Hello there! Thank you for joining me today for a card created with the Fond of Autumn Bundle featuring combining Stampin’ Blends and Watercolor Pencils. To compliment this card, I brought in Scalloped Contours Dies and gold sequins from Adhesive-Backed Seasonal Sequins.
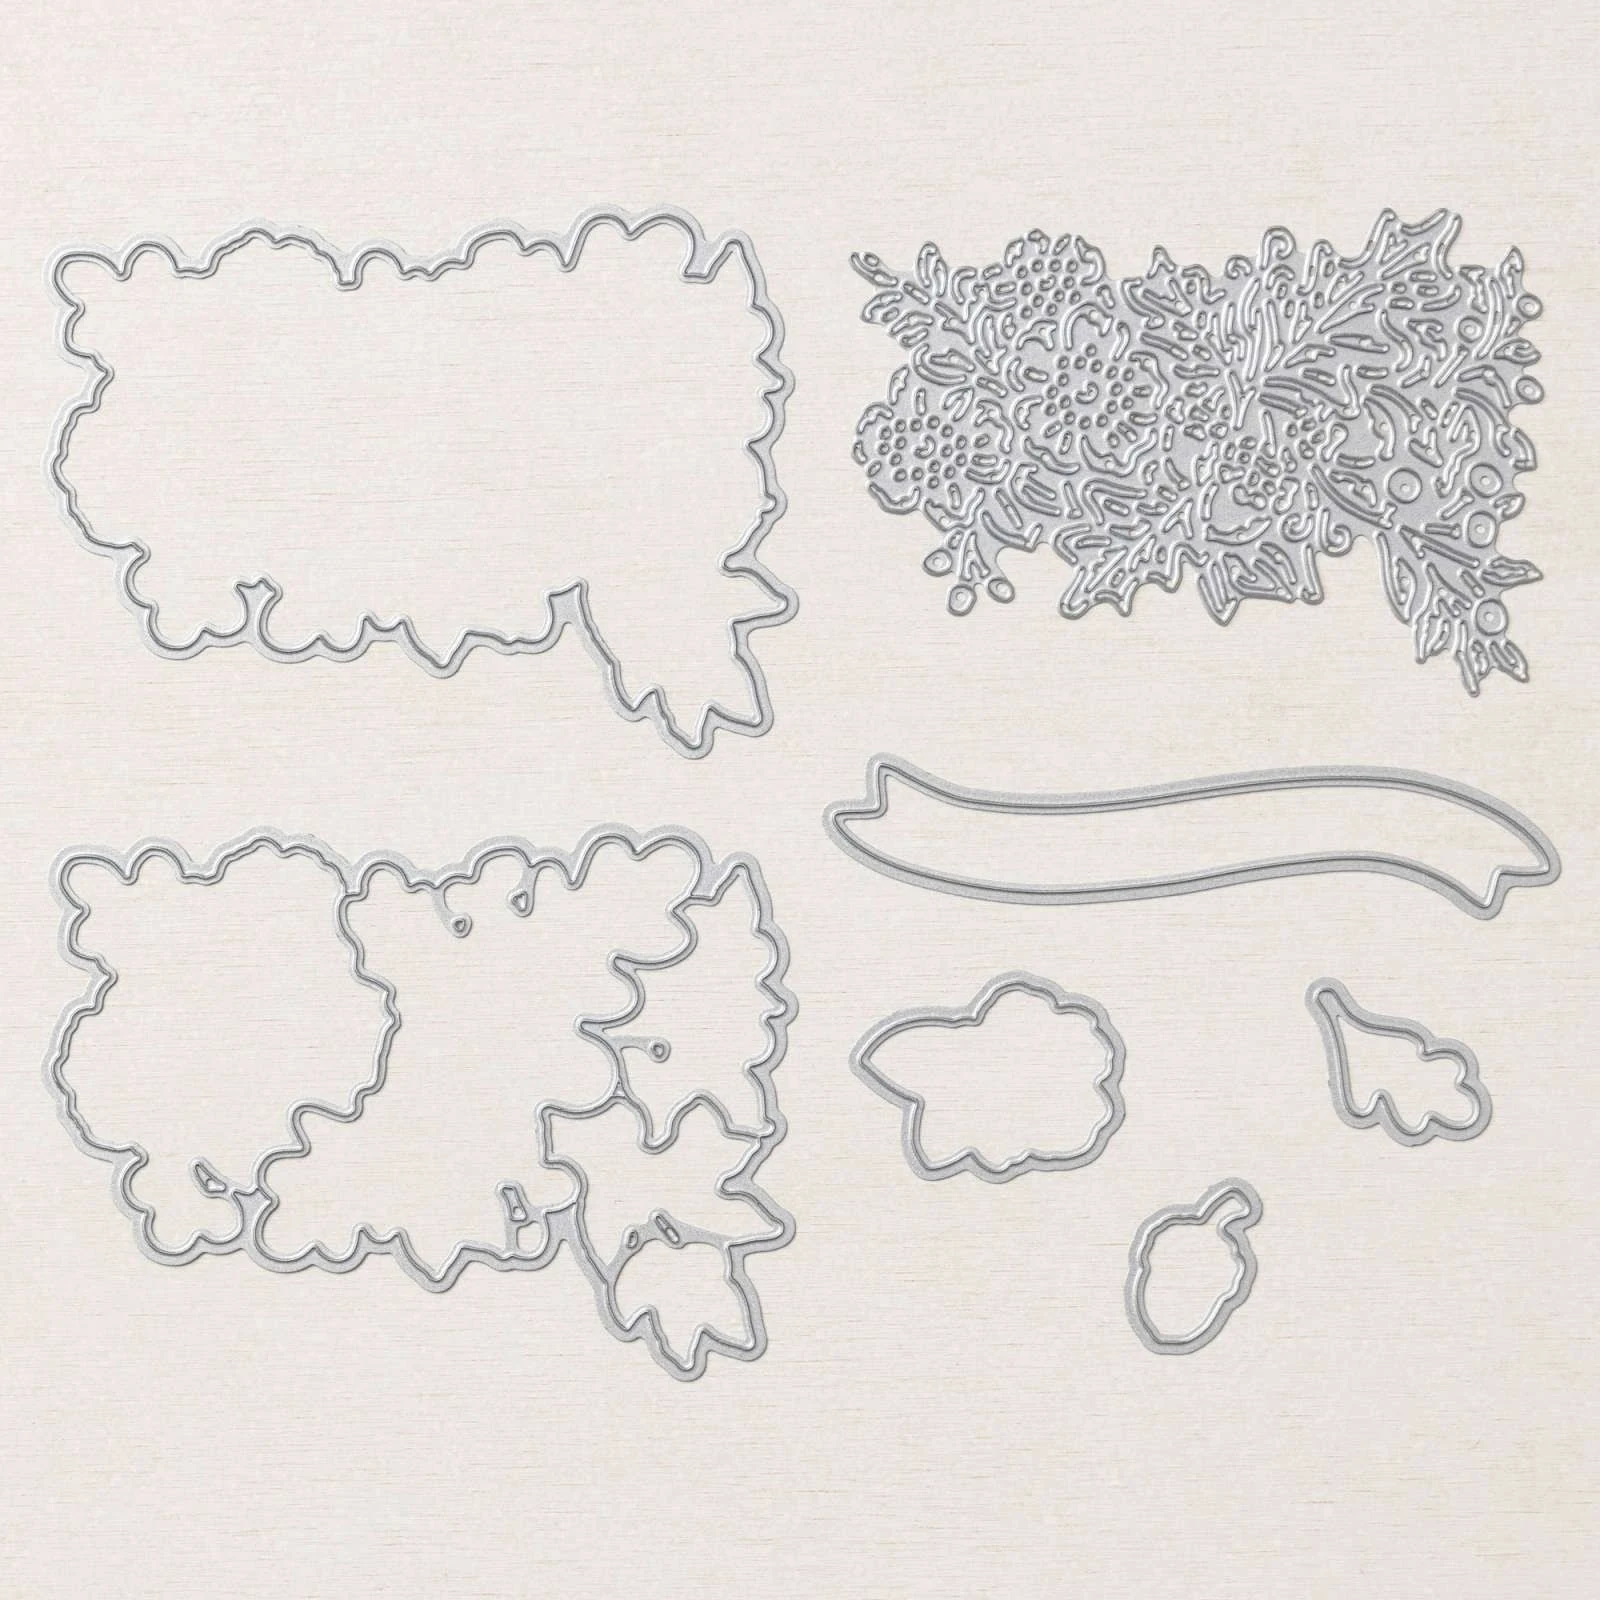
The creative options with this bundle are positively endless, especially with the fantastic standalone die-cuts that afford you various ways to cut the large autumnal image.
Even better, combining our Stampin’ Blends and using our Watercolor Pencils to accentuate and add more color, is a lot of fun to experiment with.
There are some fabulous standalone die-cuts in this bundle, one of which used for an Old Olive panel on this card.
The largest image can be die-cut several different ways to separate out the elements or cut as a whole.
The line art stamps are perfect for coloring and other techniques. 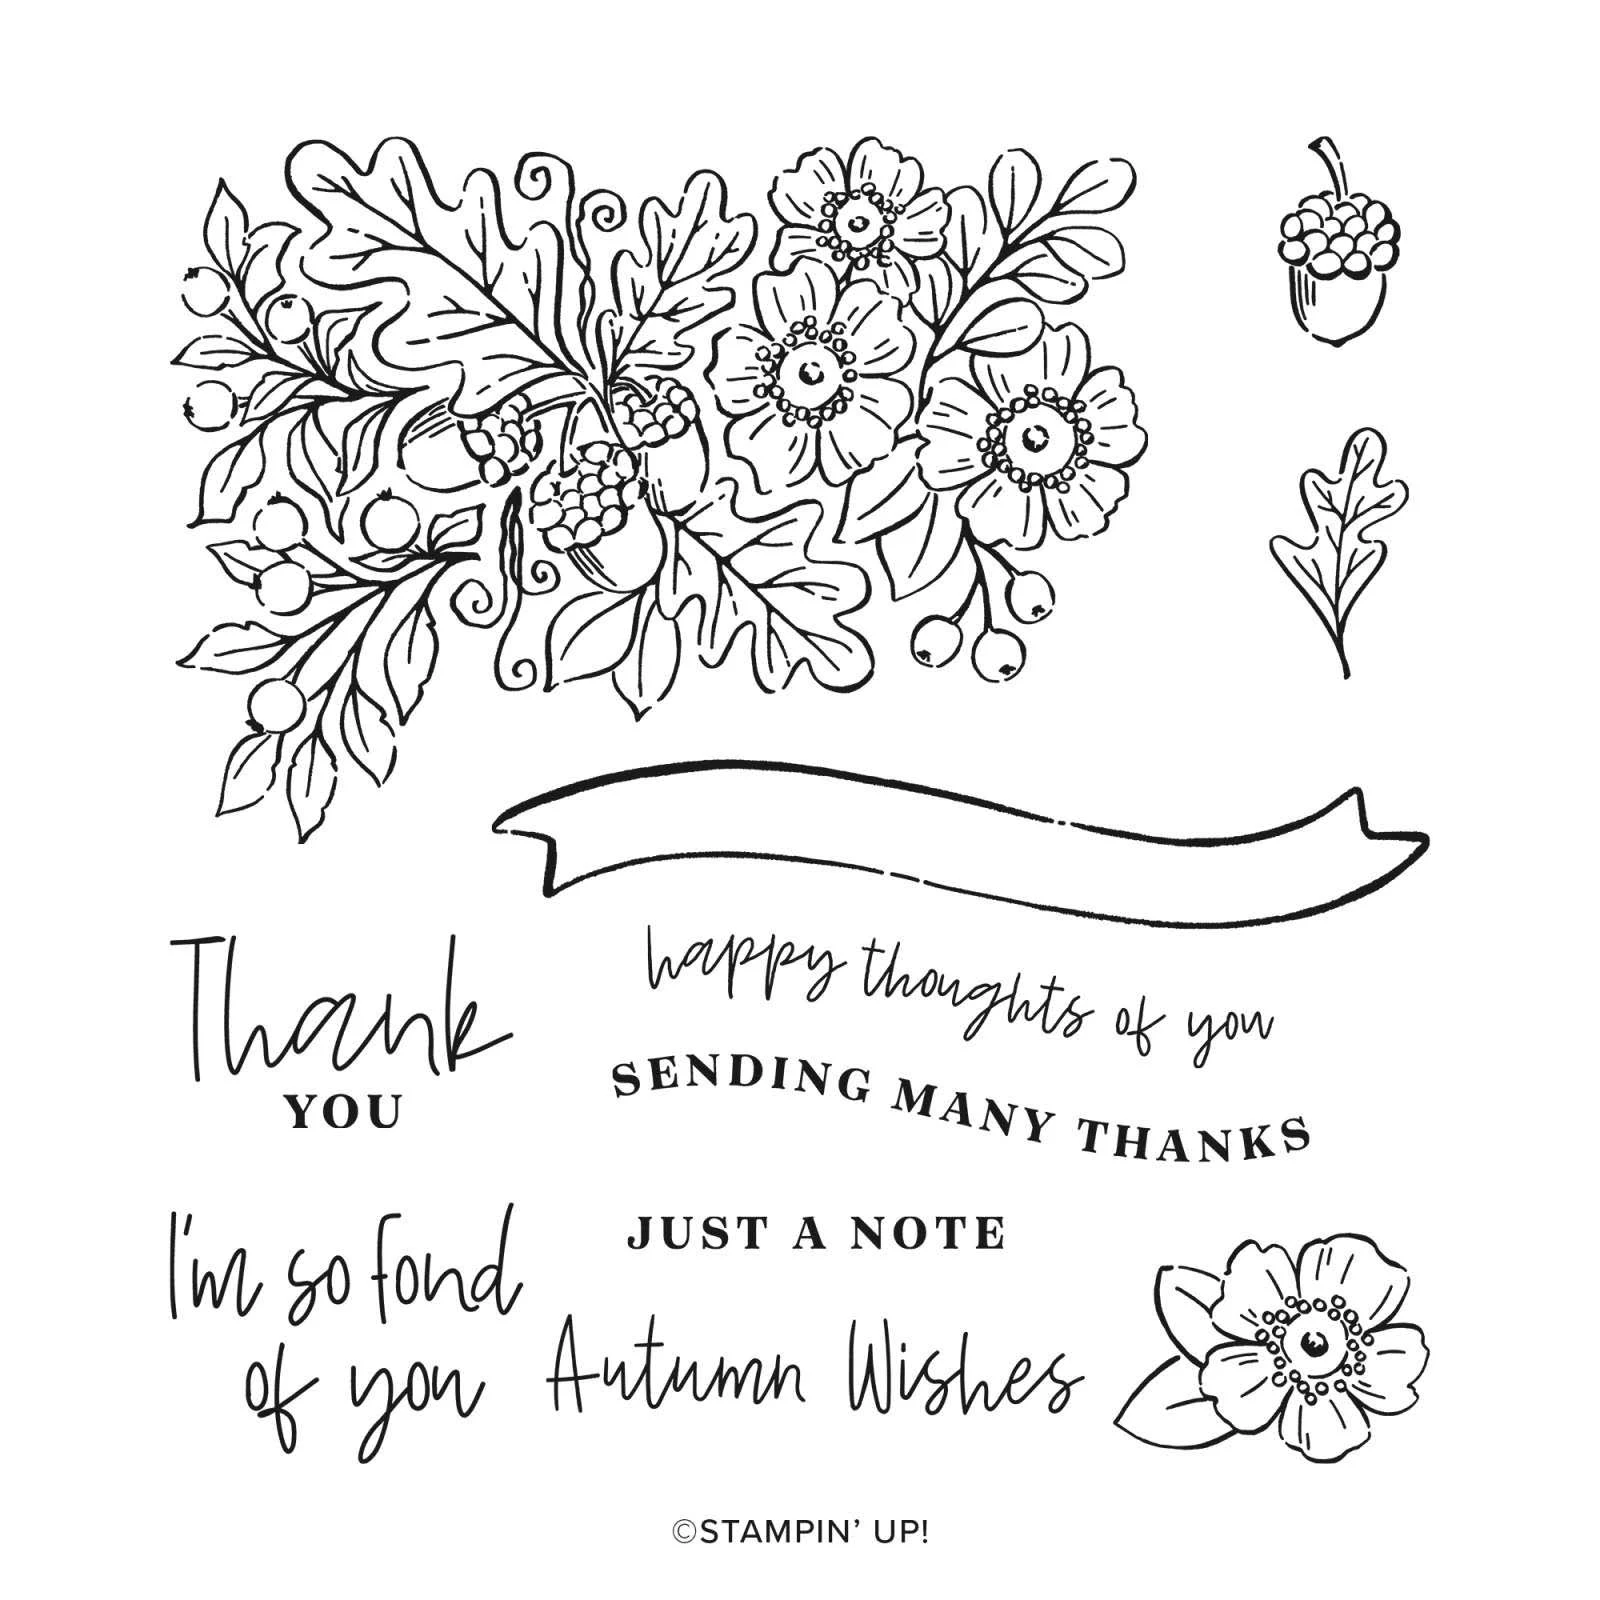

As always, your shopping Supplies and Instructions, including measurements, are below.
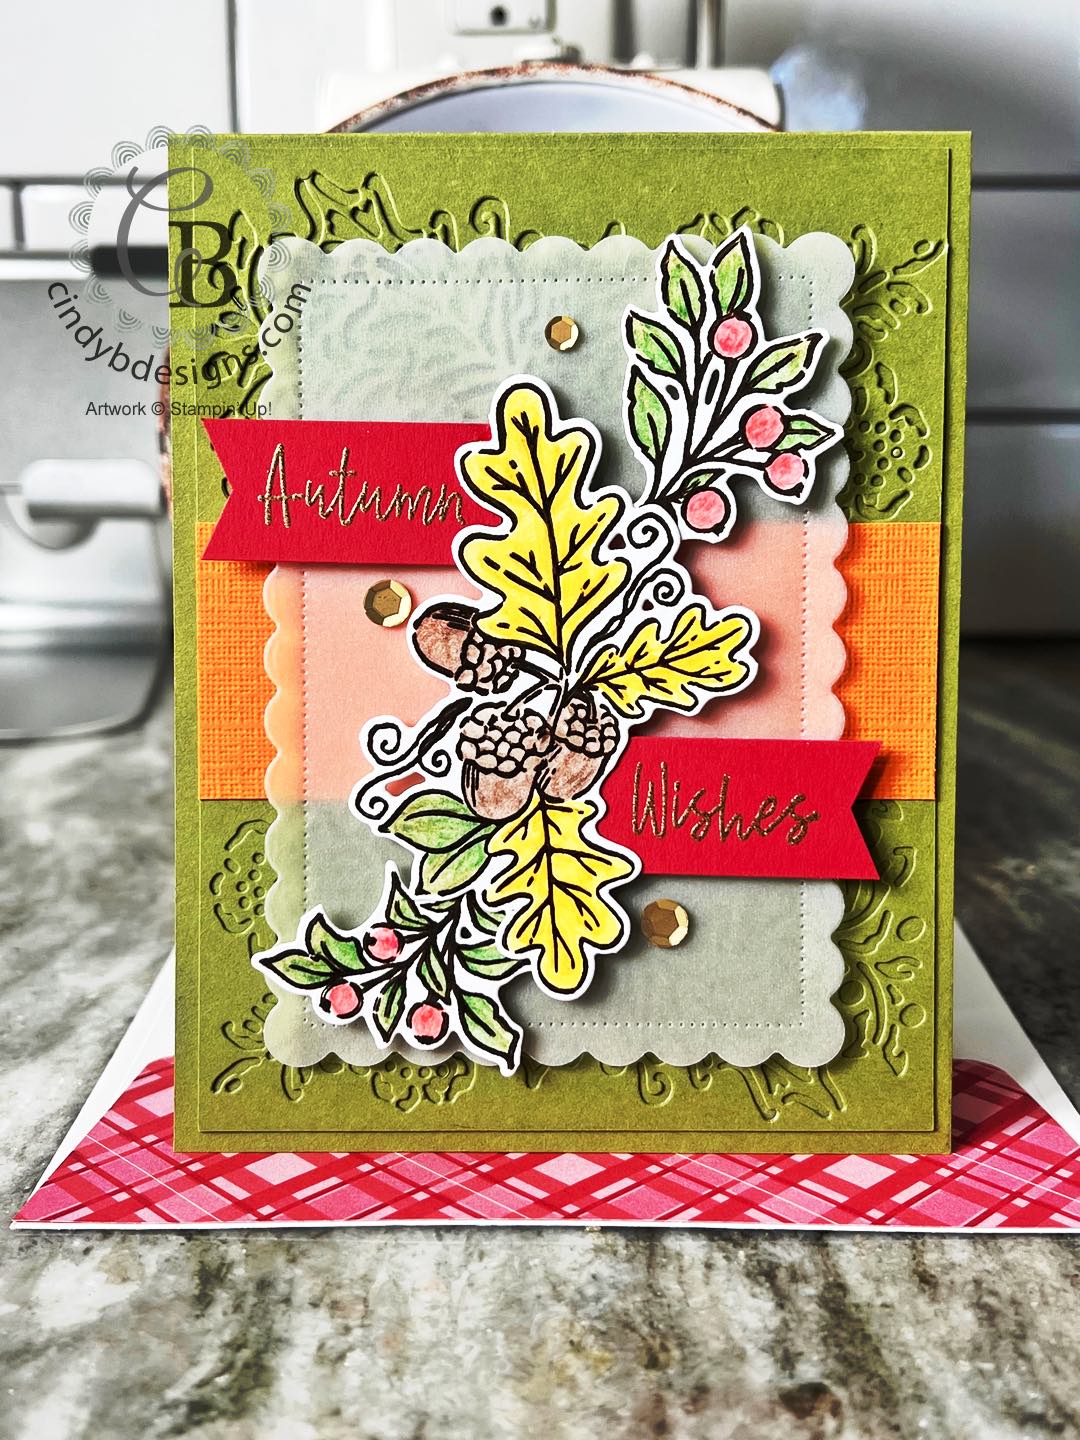
I started out with an A2 Old Olive card base and cut another piece of Old Olive for a mat that I die-cut into the CS twice; at the top and bottom turning the die 180 degrees for consistency, that was adhered with liquid adhesive.
I cut a Pumpkin Pie mat to the measurements below and adhered this with liquid adhesive at the center of the Old Olive CS mat.
I cut a Vellum frame from the 2nd largest Scalloped Contours Dies and set this aside.

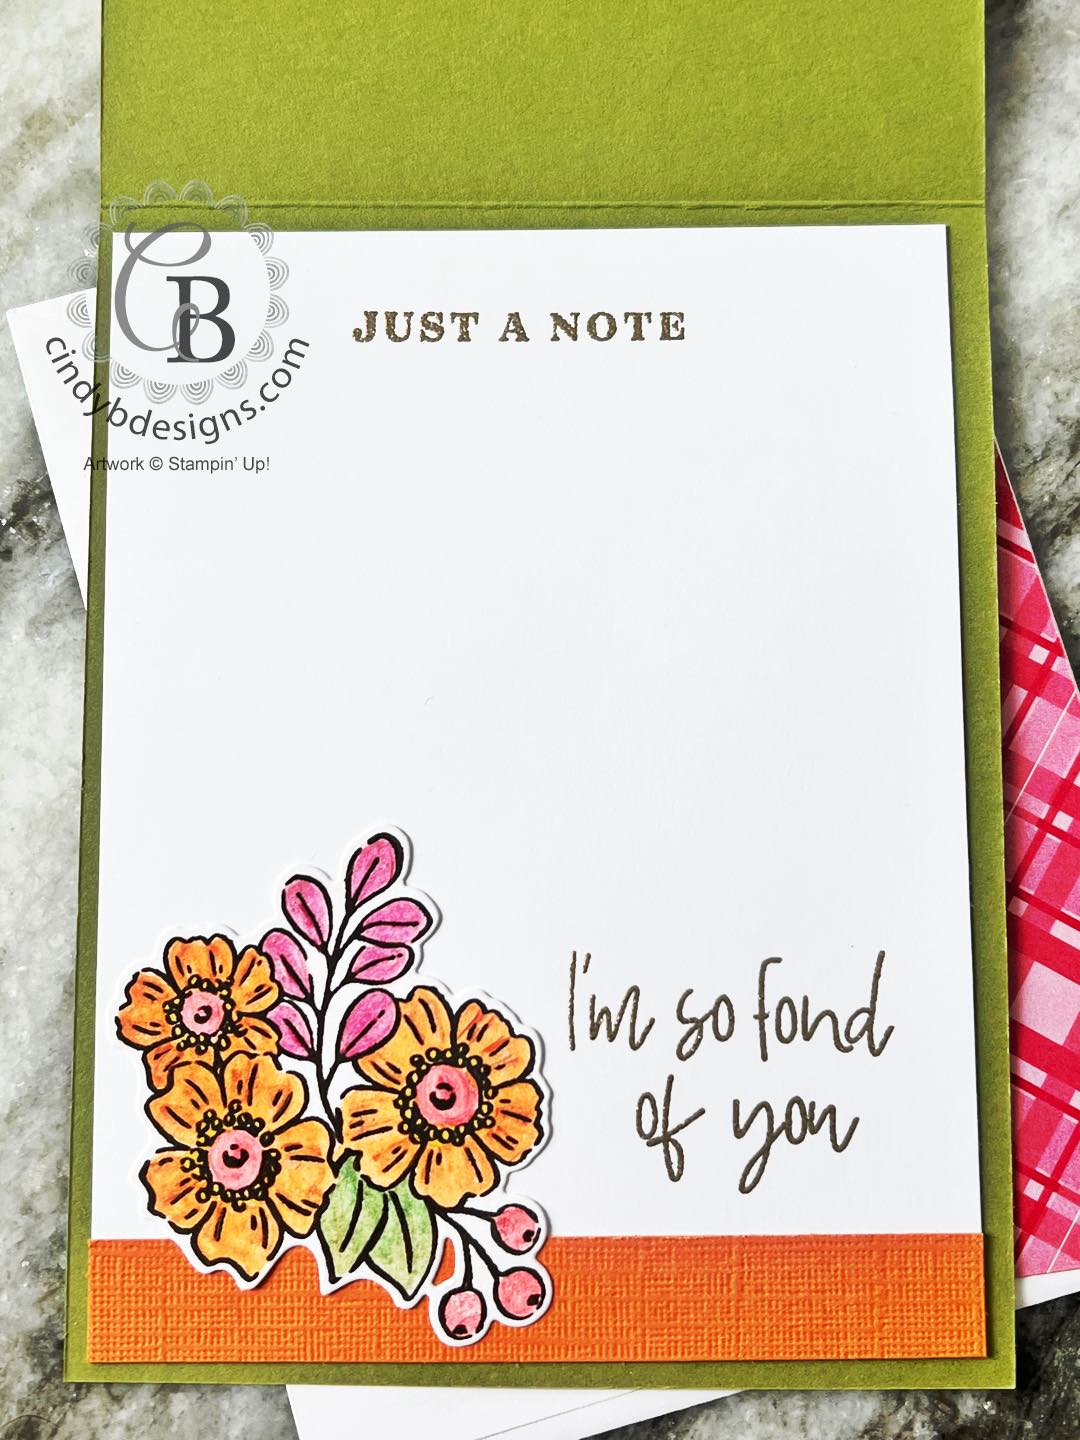
I stamped the large line art image onto Basic White Thick CS in Crumb Cake ink and then colored the image in with Stampin’ Blends and Watercolor Pencils.
All the images were blended with a Blender Pen.
- The berries were colored with Real Red and Cherry Cobbler Watercolor Pencils.
- The berry leaves were colored with Old Olive and Garden Green Watercolor Pencils.
- The acorns were colored with Rich Razzleberry and Early Espresso Watercolor Pencils. A Light Crumb Cake Stampin’ Blend was used to accent.
- The large leaves were colored with Daffodil Delight and Crushed Curry Watercolor Pencils.
- The inside flowers were colored with a Dark Daffodil Delight Stampin’ Blend on the outer stamen; Pumpkin Pie and Crushed Curry Watercolor Pencils.
After the line art was colored, I cut it from die that separates the images. Another die will cut the image as a whole. I used the images for the inside and outside of the card.
The sentiment was stamped in Versamark onto Real Red CS and heat embossed with gold. I banner cut both ends with our Banner Punch.
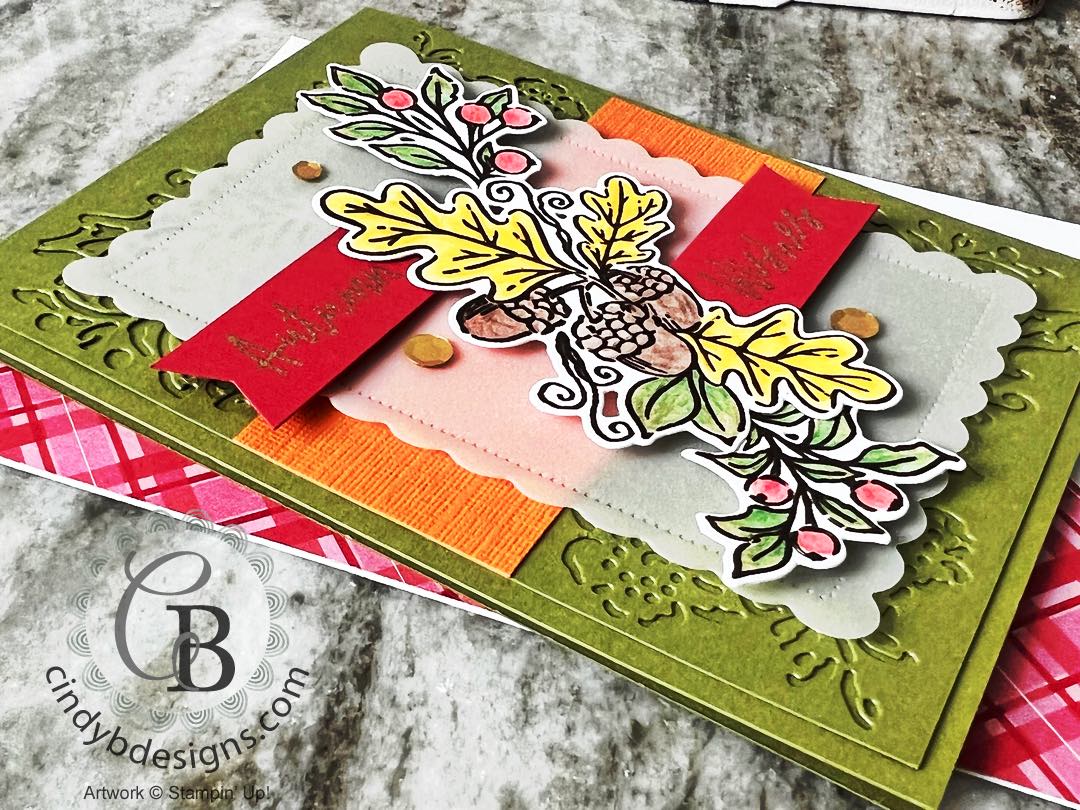
For final assembly, I adhered the images to the Vellum CS scalloped rectangle with Stampin’ Dimensionals.
The sentiments were tucked under the largest image adhered with Stampin’ Dimensionals.
I then added Stampin’ Dimensionals to the back of the Vellum CS behind the images so they would not show through the translucency of the Vellum.
Two large and 1 small gold holiday sequins were adhered to the front of the image panel.
*
I hope you enjoyed today’s project and please let me know if you have any questions.
Thank you for stopping by for a visit and have a great day!


")


")
|
|
|
|
|
|
|
|
|
|
|
|
|
|
|
|
|
|
|
|
|
|
|
|
|
|
|
|
|


- Card base: A2 top-folding 4-1/4 x 5-1/2, Old Olive CS.
- Mat 1: 4 x 5-1/4, Old Olive CS.
- Mat 2: 4 x 1-1/2, Pumpkin Pie CS.
- Image panel: Cut from the 2nd largest Scalloped Contours Die, Vellum CS.
- Sentiments: 3/4″ width, Real Red CS.
- Inside panel: 4 x 5-1/4, Basic White CS.
- Inside panel strip: 4 x 1/2″, Pumpkin Pie CS.