Hello there y’all! I’ve been home for 2 weeks and have had the same of family company. I loved every single second of with a full house of kids! One sleepover included 3 kids under 10. It was great! When I talk “kids,” they are 20 to 30-something kids. I’m at that age. It happens. I am so grateful to have the best family ever.
As you know, Stampin’ Up! has released a copy of the new catalog to demonstrators only and I’ve been having fun CASEing projects with what I currently have on hand. I received my pre-order and can’t wait to play with the great new products that are coming out! The new ink pads and updated packaging is edgy and modern. I do plan on making a separate blog post of retiring stamp sets with color chart updates; that kind of useful information, as well as sending out another newsletter. I will admit that I’m behind. My family always comes first. That’s just how it rolls in my world and I’m good with it.
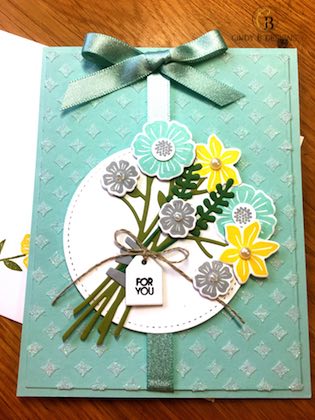
Today’s card is made using the Beautiful Bouquet Bundle. This stamp set is extremely versatile and I do reach for it a lot. One thing about the current catalog’s bundles that are carrying over is that they will be unbundled with the discount forfeited. If you want a current bundle now, grab it while you can until May 31, 2018.
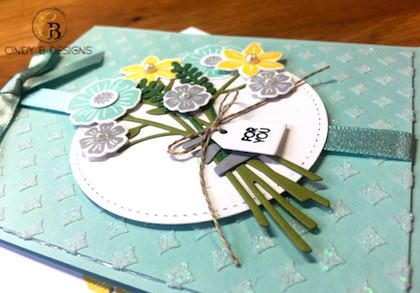
I wanted to showcase the embossing paste technique. I used Shimmery White Embossing Paste for this card and love the way it turned out. I didn’t shine up the flowers on the bouquet as there was enough in the background. When you use embossing paste, be sure to set aside the embossed panel to fully dry and use very strong adhesive on the back to adhere, as it has a tendency to warp the cardstock just a tad, even with the thinnest coat. I used every single adhesive available in the Annual Catalog on this card sans Adhesive Sheets. It’s also imperative to have a dish of hot, soapy water next to you so that you can immediately put the Palette Knives/tools and stencil in upon completion. I have a bathroom next to my office and use that to run over real fast to clean. The embossing paste sticks and can make a hot mess that will potentially render your tools useless. A lot of accessories were used on this card and it turned out lovely. Family birthdays are coming up and I am trying to get in front of the rush.
One thing that I noticed is that Stampin’ Up! Decorative Masks (stencils) are incredibly well made in that they are sturdy with a plastic coating on top to help prevent slippage as you’re applying the embossing paste. This technique is also very fun where you can add color to the embossing paste. This time around, I let the sparkle do the shine. The Holly Berry Builder Punch was used for the circles in the middle of the Pool Party flowers stamped with Smoky Slate, which afforded me the perfect finishing touch on the completed project. I have dimension all over this card.
Thank you so very much for stopping by today to visit me. A complete supply list is below with detailed instructions. God bless and have an outstanding day!


|
Pearl Basic Jewels Embellishments
[119247]
|
|||


- Cut a piece of Pool Party cardstock to 4-1/4 x 8-1/2, turn 180 degrees and score at 5-1/2.
- Cut another piece of Pool Party cardstock to 4 x 5-1/4. Tape diamond Pattern Party Decorative Mask onto cardstock. Using a Palette Knife, thinly and evenly apply Shimmery White Embossing Paste. Set aside to dry. Once completely dry, wrap a length of Pool Party 3/8″ Shimmer Ribbon centered vertically around the embossed panel. Adhere to base of card.
- Tie a bow with the above-mentioned ribbon and adhere at top.
- Die-cut a piece of Whisper White cardstock with a 3″ circle Stitched Shapes Framelit. When assembling the card, I put Stampin’ Dimensionals on the back.
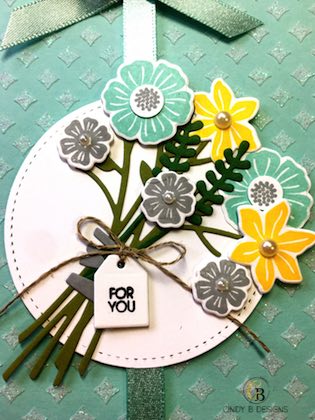
- Stamp flowers with Daffodil Delight, Pool Party, and Smoky Slate inks. Use coordinating framelits to die-cut images. Place Pearl Basic Jewel Embellishments in the center of the flowers.
- Stamp stamens to large flower onto Whisper White cardstock with Smoky Slate ink. Punch out circle with Holly Berry Builder Punch. Adhere with Glue Dots to the center of the flowers.
- Die-cut stems and leaves from Garden Green and Old Olive cardstock.
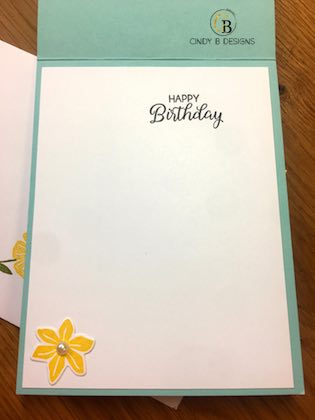
- Die-cut tag from Whisper White cardstock, stamp sentiment with Basic Black Archival Ink, and tie Linen Thread through the hole into a bow.
- Die-cut flower bunch “string” with Smoky Slate cardstock.
- Arrange all flowers and stems onto Whisper White stitched circle with various adhesives for dimension.