Hello there! Thank you for joining me today for a quick and easy tutorial to create your own cardstock with isopropyl alcohol and Stampin’ Blends. I can’t believe it’s already May.
You are going to get a different result every single time, which is the fun part about it. Know your color wheel as to where to lay down your colors so you don’t get mud as the end result.
I wish I had taken pictures along the way, but didn’t. If you want a video for this technique, let me know.
This project is a little messy and sticky but, that’s okay.
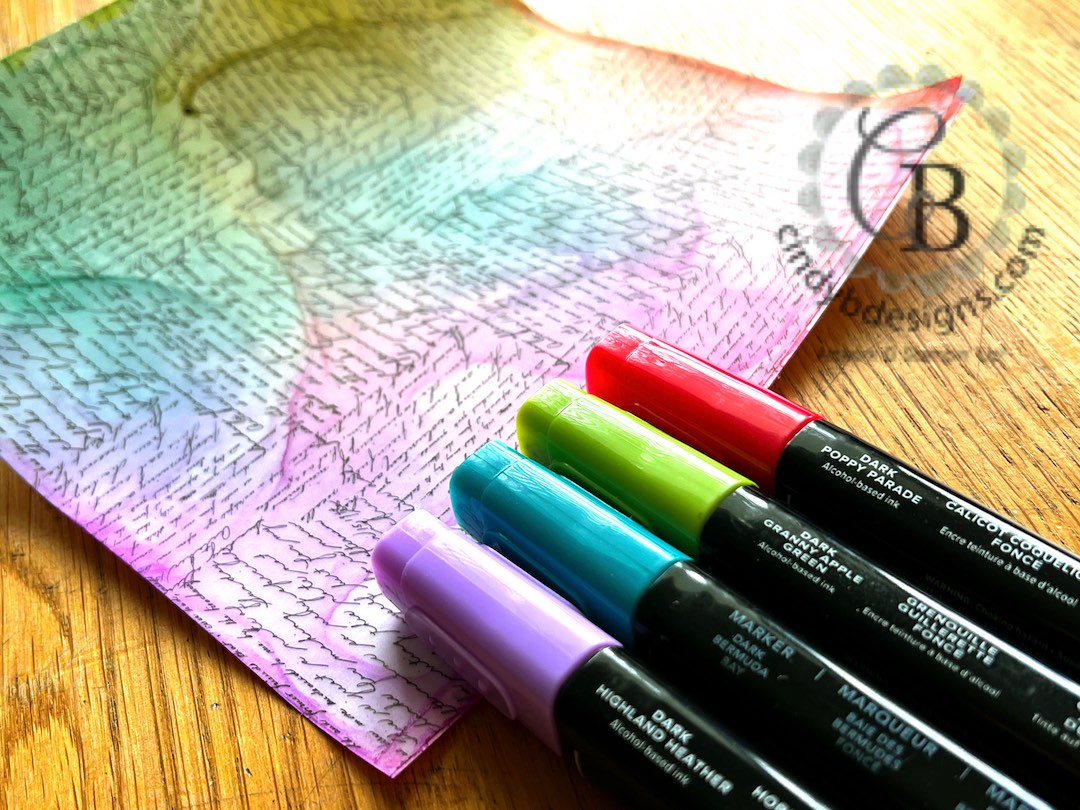
To create this panel, I used the Dark Stampin’ Blends of Poppy Parade, Granny Apple Green, Bermuda Bay, and Highland Heather, a Stampin’ Spritzer filled with isopropyl alcohol, and our Heat Tool.
I chose the dark markers because I knew the alcohol would definitely tone the colors down.
You could also do this technique with Stampin’ Write Markers but, you would have to use water as the markers have a water-base; whereas Stampin’ Blends have an alcohol base. You have to keep the same properties together to move your color.
I cut a 6 x 6 piece from Basic White Thick CS and a piece of Vellum Layering Designs. An Adhesive Sheet was cut to a tad less than 6 x 6 around the 7/8″ mark or so. You can cut the Adhesive Sheet to whatever you’re comfortable with for wiggle room.
I peeled the backing off the Adhesive Sheet and adhered it to the vellum. The backing was peeled off the vellum and adhered to the Basic White Thick CS.

This is where you have to know or look at a color wheel to avoid mud and figure out where to lay your markers down.
I took the brush end of the 4 Stampin’ Blends Markers used for this project and scribbled from the corner towards the middle about halfway-ish.
Before you do anything else, make sure your work area is protected from splatters. Alcohol color is extremely difficult/impossible to remove from any surface.
After your color is down, you’re suited up, and your work area is protected, take a Stampin’ Spritzer filled with isopropyl alcohol and spray as needed without soaking the vellum about 6″ away or so while simultaneously moving the wet color around.
Once you get the color going, warm up your Heat Tool on setting 2, and move the color around even more while drying it. There’s great control using your Heat Tool + faster drying time.
Since we did use the strongest adhesive we have, you want to watch the distance of the Heat Tool as you move the color around and dry so you don’t heat the adhesive, which would be a literal hot mess.
You want to keep the Heat Tool moving all of the time about 7-8″ away from the CS while simultaneously moving the CS until maybe almost dry. That’s really up to you and how your color looks along the way and it you’re happy with it.
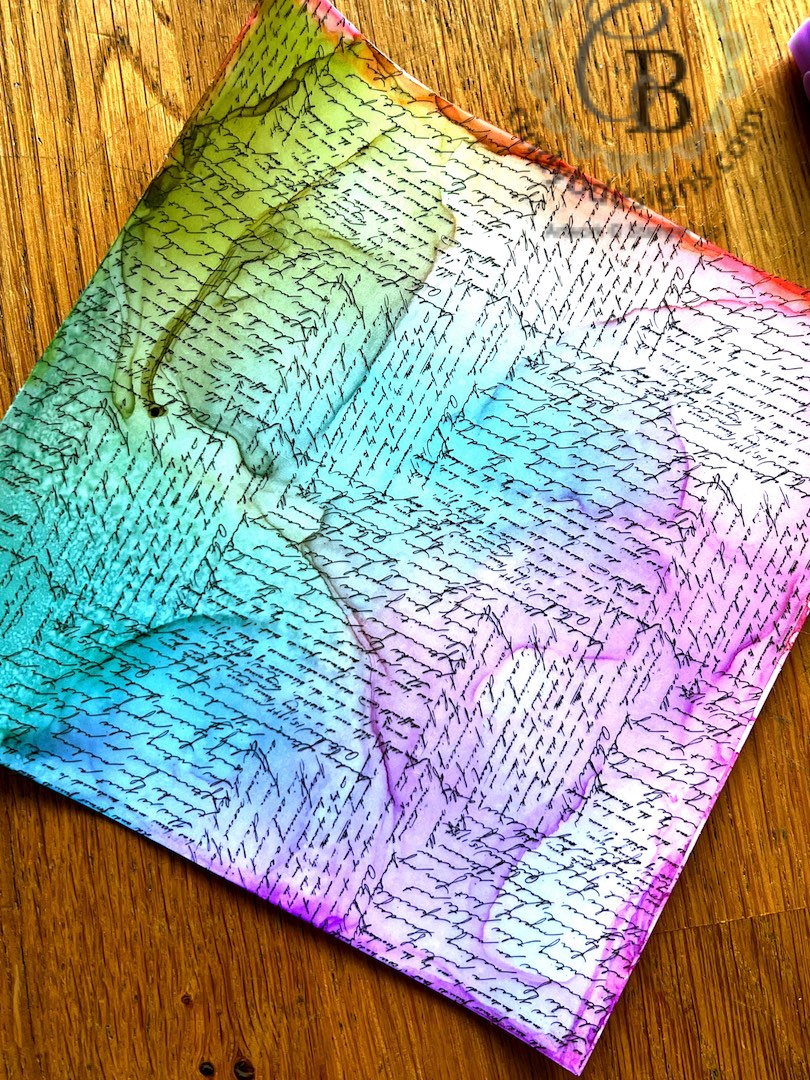
You can see the obvious areas where I let the ink dry on its own where pooled.
Because I kept the heat moving with distance, the edges were only curled up.
Once the entire panel was dry, I folded one of our Grid Sheets into quarters, placed the ink side down onto the sheet, and used Clear Blocks F and I to hold down the panel overnight to straighten it out, that worked perfectly.
I hope you enjoyed today’s tutorial and please let me know if you have any questions.
Thank you for stopping by for a visit and have a great day!


|
|
|
|
|
|
| |
|
|
|
|
| |||
|
|
|
|


 Layering Designs")


")