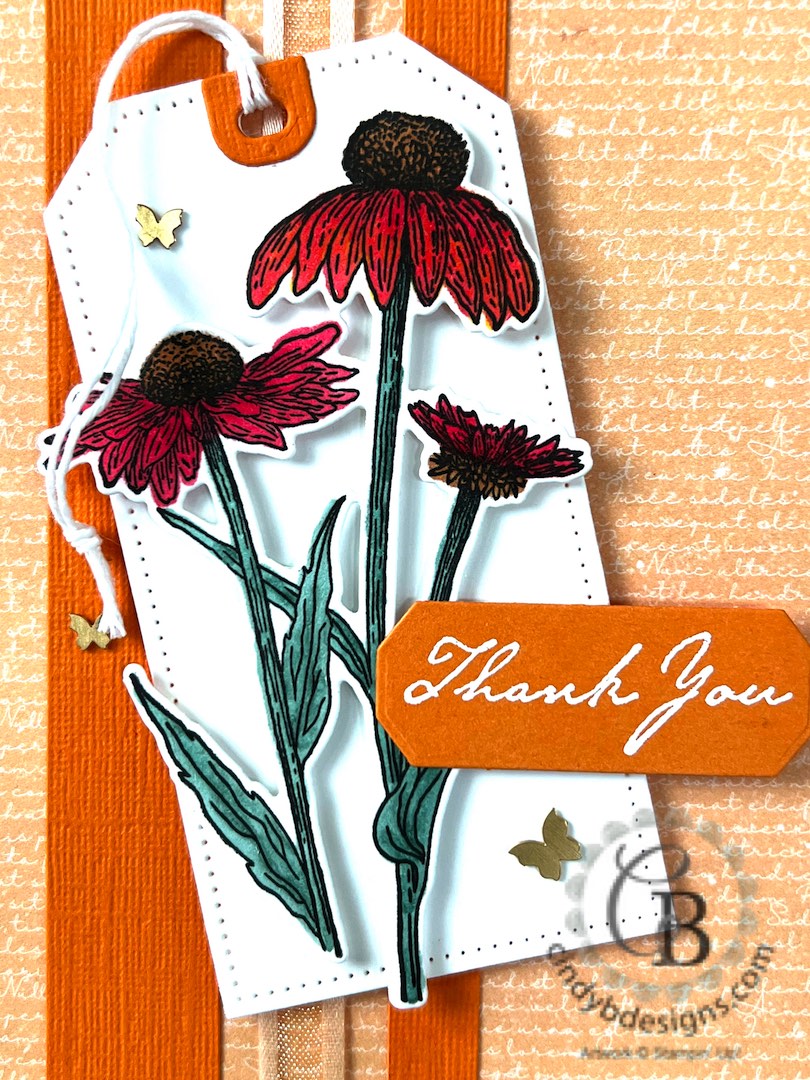
Hello there! Thank you for joining me today for a Nature’s Harvest + Harvest Dies with a video I created for another project using our Stampin’ Blends Markers with Daffodil Delight and Real Red for a flawless result.
Red is a very fussy color to work with. I achieved a fabulous orange with the above colors.
For an update, do not stamp the image in Memento Tuxedo Black. Stamp it in Smoky Slate, leave the image on the door of your Stamparatus, color, then re-stamp in Memento Tuxedo Black to crisp up the lines with zero smudging. Be sure to visit my You Tube Channel for videos using this technique.
I would like to thank Laura Milligan for her inspiration that was used to create today’s project.
Reminder, the new Annual Catalog is live on Tuesday, May 3!

I started out with an A2 top-folding Pale Papaya card base.
I cut another piece of Pale Papaya CS to 4 x 5-1/4 and die-cut the right edge with an accent.
I cut a piece of scripty DSP from Artfully Composed to 3-5/8 x 5-1/8 that was adhered to the die-cut piece of Pale Papaya with liquid adhesive. I wrapped a piece of Pale Papapa Open Weave Ribbon as shown above and secured the ends to the back. The entire panel was adhered with Seal to the card base.
I cut two scraps of Pumpkin Pie CS to the measurements below and adhered the scraps to the card with liquid adhesive.

For the image panel, I cut the largest flat top Tailor Made Tag from Basic White Regular CS. The tag hole reinforcement was cut from Pumpkin Pie and adhered with liquid adhesive. I then tied a piece of Basic White Twine through the top of the tag and knotted it at the tail.
I stamped the sentiment onto a piece of Basic White CS with Versamark, heat set with our white powder, and then cut from its coordinating Harvest Dies frame.
The coneflower image was stamped onto Basic White Thick CS in Smoky Slate and colored in exactly like the technique shown in the video tutorial above. You must leave the image on the door of your Stamparatus.
The colors are Daffodil Delight Dark with the Dark and Light Blends of Real Red. The leaves and stems were colored with Mint Macaron. When the coloring was finished, I inserted the image back into the Stamparatus and re-stamped with Memento Tuxedo Black ink to crisp and freshen up the line art, that was then cut from its coordinating die.

For final assembly, the tag was adhered as above to the card base with Stampin’ Dimensionals.
The coneflowers were adhered on top of the tag with Stampin’ Dimensionals.
The sentiment was adhered with liquid adhesive on the left with 2 Stampin’ Dimensionals on the right.
Three Brushed Brass Butterflies were scattered about to embellish.
There’s some great texture and dimension to this card. Way, way, way back, like last decade back, we used to have textured card stock. I used the few scraps that I had left over from Pumpkin Pie. You can also use regular CS and emboss for texture. Options are a good thing.
I hope you enjoyed today’s project and please let me know if you have any questions.
Thank you for stopping by for a visit and have a great day!


|
|
|
|
|
|
|
|
||
|
|
|
||
|
|
|||
|
|
|
|
|
|
|
|
|
|
|
|
|
|
|
|
|
|
|
|
|
|
|
|

- Card base: A2 top-folding 4-1/4 x 5-1/2, Pale Papaya CS.
- DSP mat: 4 x 5-1/4, Pale Papaya CS cut with … I have no idea, but was current on April 11, 2022.
- DSP panel: 3-5/8 x 5-1/8, Artfully Composed DSP.
- CS layers: 3/4 x 5-1/2 and 3/8 x 5-1/2, Pumpkin Pie CS.
- Tag: Cut with the largest flat top Tailor Made Tag from Basic White CS.


