Hello there! Welcome to today’s very beautiful and fun card using this week’s Paper Craft Crew Sketch Challenge 244 (PCC244). We would love to have you play along with us this week for a new sketch that features the new Daisy Delight Bundle from Stampin’ Up! that is available to you on June 1 to purchase. This is an awesome bundle and I’ve said this 1000x of the new catalog being the best that I’ve seen in a decade. I can’t wait to use everything!
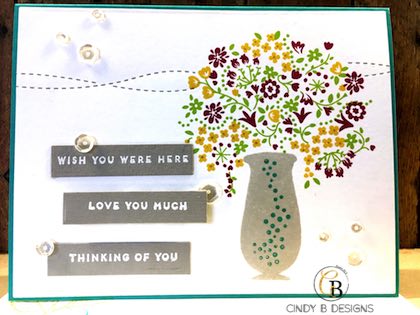
Since I know I have another year minimum to play with this new bundle, I decided to break out a few current Hostess stamp sets, 1 retired alphabet and Birthday Blossoms, that is so beautiful and I wish I had inked up more. I keep retired alphabet sets for a year or 2 and then depending upon the new ones, I might get them.I like to have at least 3-4 on hand to give me the variety of characters and fonts that I need just in case I do not find a sentiment or symbol that I want to use. The ampersand from the Back to Basics Alphabet stamp set has an ampersand in it that fit perfectly with the font the Iconic Occasions stamp set uses. When you weed out products after a new annual catalog, pay attention to that sort of stuff as to how you can mix retired products and dies with the new products. I’ve been doing this for years and I get so much more mileage out of everything. Maximum value for less $. That’s how you keep your financial house in order when it comes to your crafting budget. I can still make a beautiful card with a stamp set that’s over a decade old, and so can you.

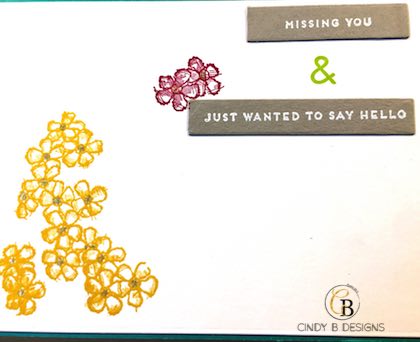
I love mixing and matching stamp sets with old and new ink and card stock colors, which is exactly what I did here. I used 2 new In Colors with 2 current colors and they played very well together in the sandbox. Use those little tools, such as a gel pen to add centers to your flowers or use up retiring product and be liberal with what you’ve hoarded over the past few years. We all know the hoard stories and guilty!
I would have used Smoky Slate for an SUO card, but I had just inked up my pad and it was not easy to work with, so I switched over to MFT Stamps Cement Gray Premium Dye Ink and Prestige Card Stock that I stamped the vase with and stamped my sentiments on to white heat emboss. When you have sentiments that tiny, always use fine detail embossing powder, always. It’s the only way to keep your sentiment intact so the words can be seen and even with sentiments this small, which is a bit rare in reality, I still feel like I lost the detail(s), even though I did use fine white embossing powder. Using an anti-static tool, such as your Embossing Buddy, is a must too. Heat embossing is messy enough and can be frustrating. Don’t make it harder on yourself by not using the right tools. They are always a solid investment that will last you for decades and beyond.

I made a process video for you to show you how I made this card since I used so many products, but the end result is worth it. As I was making this card, I didn’t pay attention to how Pam had designed the left sentiments and I wish I had staggered mine better with a bit of wonky whimsy.
See how great the picture is above that seamlessly sits on the white background with no visible lines? I’m going after that look for all of my pictures. My friend Gloria Stengel has a totally unconventional way of taking her pictures that include a white sheet, swivel chair and a few lights; her work and pictures are amazing!

I’m not sure what it is with me lately and these mushy love cards, but I’m just rolling with it. This card is really pretty and unfortunately, I am not camera savvy, video editing savvy, and nothing technology savvy whatsoever. I’m working on it, but remember, it only took me 8 years to learn how to do voiceovers and not very good ones at that since I usually do them a week after I’ve completed my card and have forgotten about it already. I’m aiming for 48 hours right now. It really is a lot of hard work and I commend those who can do 7+ videos a week with voiceovers and making 10 cards at one time. I don’t know how these ladies do it. Pure expertise and knowing how to use their equipment in my best guess.
In my other home art studios, I’ve had a camera mount from the ceiling or a custom-built setup where my videos were so much better with knowing the software, transitioning, frames, intros/outros, zooming in and out with you being able to see everything up close. Not anymore. I think I’m going to have to call a friend to have him ceiling mount something for me. I don’t feel confident enough in my power tool skills to do this alone, even though I did pretty good at rebuilding my back fence safety mechanisms yesterday.
I really hope that you’ve enjoyed this card and the video.
Thank you so very much for stopping by to visit today and God bless!

Product List
|
Back To Basics Alphabet Photopolymer Stamp Set
[133742]
|
|||