Hello there! Thank you for joining me today for a fun fold Mother’s Day card created from the Marigold Moments Bundle on page 36 of the Spring Mini Catalog and Dandy Designs Designer Series Paper on page 14 of the Sale-A-Bration Brochure.
I also brought in the Country Bouquet stamp set for the sentiment, Stylish Shapes Dies, Vellum Basics DSP, Thanks & Hello Embossing Folder, Petal Pink Ribbon, In Color Opal Rounds, and Dragonfly Trinkets.
There’s a really cool border die-cut in Marigold Moments that cut the scallop on the image panel and a cute heart border used on the back of the card that is shown in the pictures.
This was super easy and fun to make and guarantees your card is standing up at all times. A fold like this is fantastic for those who have dexterity issues.
As always, your shopping Supplies and Instructions, including measurements, are below.

I found it easier to make the fun fold part of the card first and put that all together. I cut the card base, the fun fold mechanism, image panels, and designer series paper.
You want to apply Tear & Tape to the outside of the ‘valley’. I used the L-corner of my Stamparatus to evenly adhere the mechanism to the inside of the card as shown in the pictures.

I ran the image panel through the Stampin’ Cut & Emboss Machine in the Hello Embossing Folder at the top and adhered the designer series paper with Seal. I tied Petal Pink Ribbon around the image panel with a bow to the left where the DSP meets to cover the transition.
I then adhered the image panel to the card base with Stampin’ Dimensionals.

I stamped the images from Marigold Moments onto Basic White Regular CS using the following colors:
- Flower base: Petal Pink
- Flower detail: Calypso Coral
- Stems: Granny Apple Green
- Stem detail: Garden Green
I added Stampin’ Dimensionals to the back of the flowers and stems then cut the vellum circle from the 2nd largest Stylish Shapes Circle Die. I adhered the flowers to the vellum circle then applied Stampin’ Dimensionals to the back of the vellum circle under the flowers to hide the dimensionals from visibility.
I stamped the sentiment from Country Bouquet onto a piece of Basic White Regular CS and cut to size. This was tucked under the circle and was adhered with Stampin’ Dimensionals.
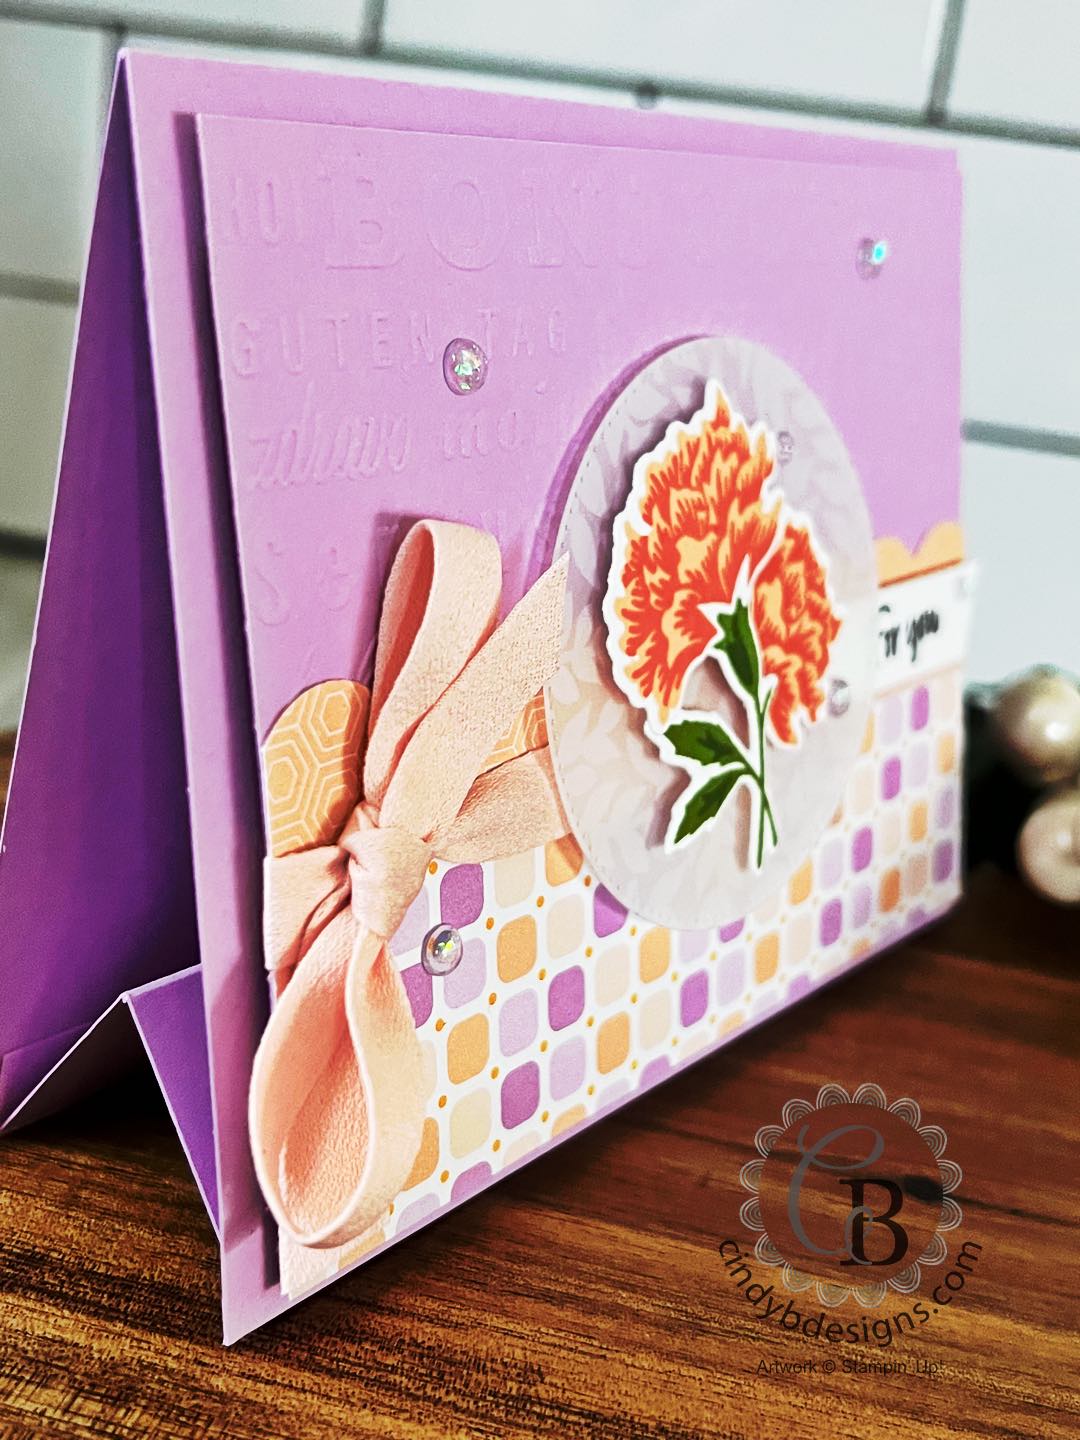
Lastly, I applied 5 self-adhering Fresh Freesia In Color Opal Rounds as shown.
I added 2 Mini Glue Dots to the back of a Dragonfly Trinket and adhered as shown.

For the inside, I cut the CS to size. The sentiment from Marigold Moments was stamped at the top center in Memento Tuxedo Black. The leftover piece of DSP from cutting the card front scallop border was adhered to the bottom of the image panel with liquid adhesive. If you were to flip this upside down, you would see the heart pattern that I just noticed after I put it all together.
The sentiment panel was adhered to the Petal Pink CS mat with Seal. Stampin’ Dimensionals were added to the back of the Petal Pink CS and adhered to the card base.
Another Dragonfly Trinket was adhered to the right of the sentiment.
I hope you enjoyed today’s project and please let me know if you have any questions.
Thank you for stopping by for a visit and have a great day!


|
|
|
||
|
|
|
||
|
|
")
")


 Designer Series Paper")
 Specialty Designer Series Paper")


 Soft Polyester Ribbon")


|
|
|
|
|
|
|
|
|
|
|
|
|
|
|
|
|
|
|
|
|
|
|
|
|
|
|
|
|


- Card base: A2 landscape top-folding 5-1/2 x 4-1/4, Fresh Freesia CS.
- Image panel: 5-1/4 x 5, Fresh Freesia CS.
- DSP: 5-1/4 x 1-3/4, Dandy Designs DSP.
- DSP 5-1/4 x 1, Dandy Designs DSP.
- Fun fold: 5-1/4 x 3-1/4. Score at 3/8″, 1-5/8″, 2-7/8″ on the 3-1/4″ side, Fresh Freesia CS. Fold the 3/8″ and 2-7/8″ score lines as ‘valleys’ and the 1-5/8″ line as a ‘mountain.’
- Inside image panel mat: 5-1/4 x 4, Petal Pink CS.
- Inside Image panel: 5 x 3-3/4, Basic White Regular CS.