Hello there! Thank you for joining me today for a layered project created from the Fancy Floral Suite Collection on pages 14-17 of the Spring Mini Catalog and Framed Florets Bundle on page 65 + our new Vellum Basics Specialty Designer Series Paper on page 46.
This Fancy Floral Suite Collection is a double package with 2 stamp sets, 2 sets of die-cuts, 2 paper packs, and 2 embellishments.
These two collections work beautifully together with the Fancy Flora DSP perfectly coordinating with the Framed Florets Bundle.
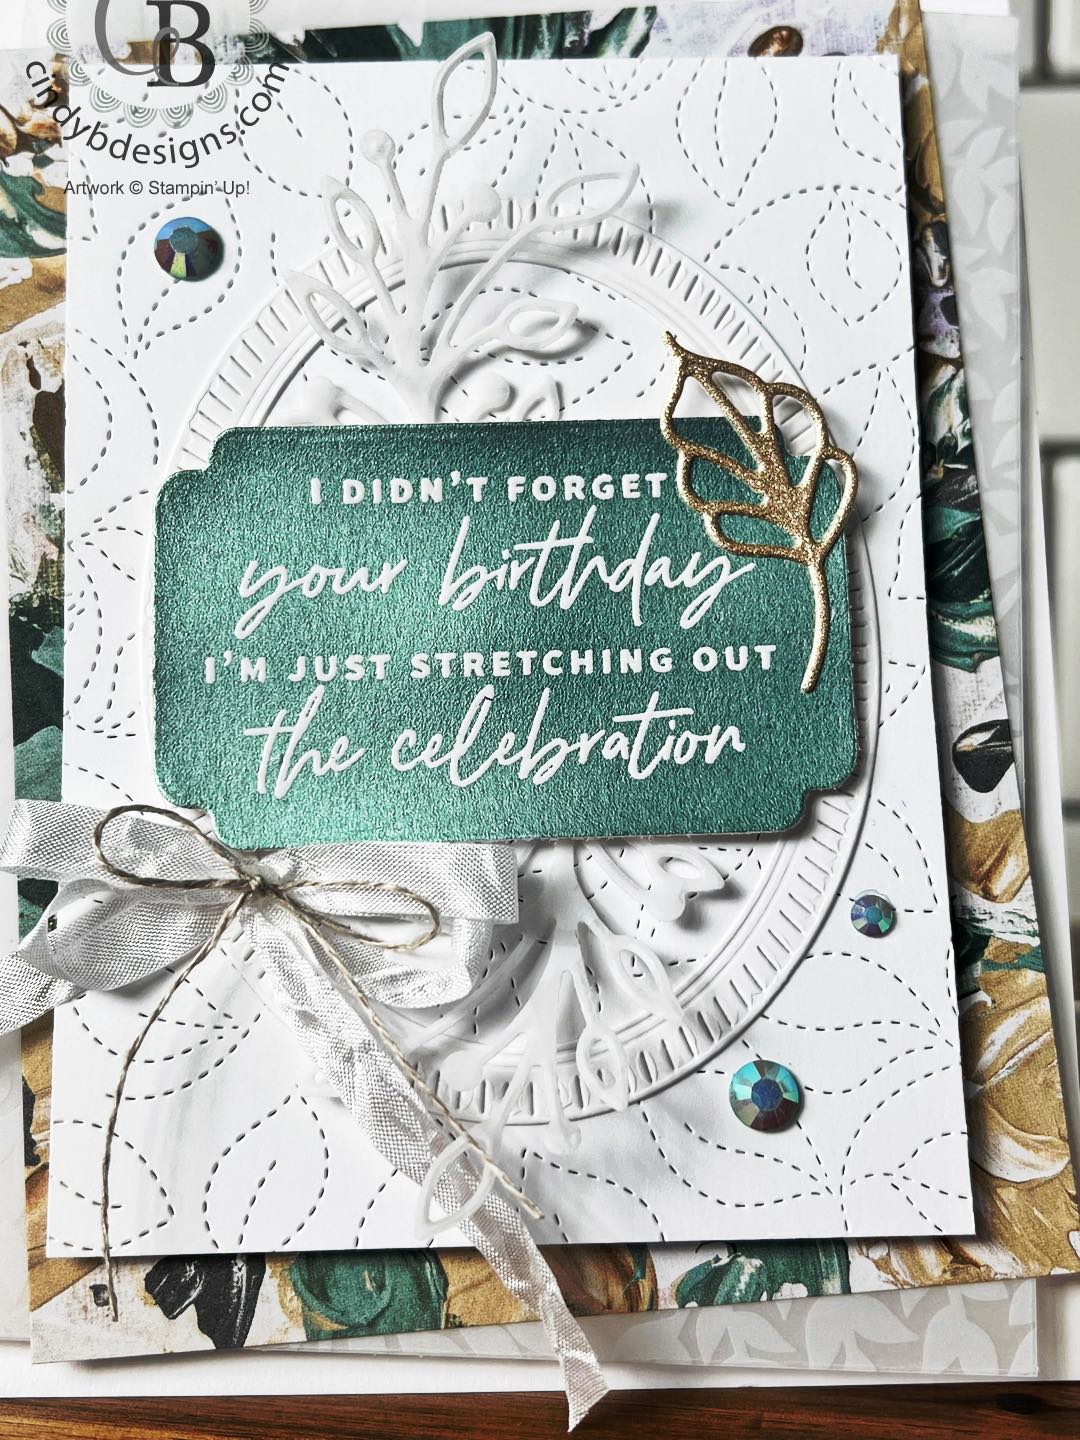
I used the fabulous Stitched Greenery Die on my image panel and I need to leave this one out on my desk to use more often. These ‘cover plate’ dies are perfect for adding some spice to any panel.
I love the combination of the various textures showcased and the great dimension. These are my favorite cards to make and are really easy. It’s just a matter of putting all of your elements together with the perfect sketch.
As always, your shopping Supplies and Instructions, including measurements, are below.

I started out with my card base and cut all of the layers to size of the vellum, DSP, and image panel + the Framed Florets die.
The image panel was embossed with the Stitched Greenery Die.

To build up the layers to the image panel, and it is important where you place your adhesive; I went in the following order:
- The vellum was adhered to the card base with Stampin’ Dimensionals towards the middle of the panel not to show through due to its translucency.
- The DSP panel was adhered to the vellum with Seal Adhesive leaving a margin around the edges to adhere to the vellum.
- The image panel embossed with the Stitched Greenery Die was adhered to the DSP with Stampin’ Dimensionals.
- The Framed Floret frame was adhered to the image panel with liquid adhesive.
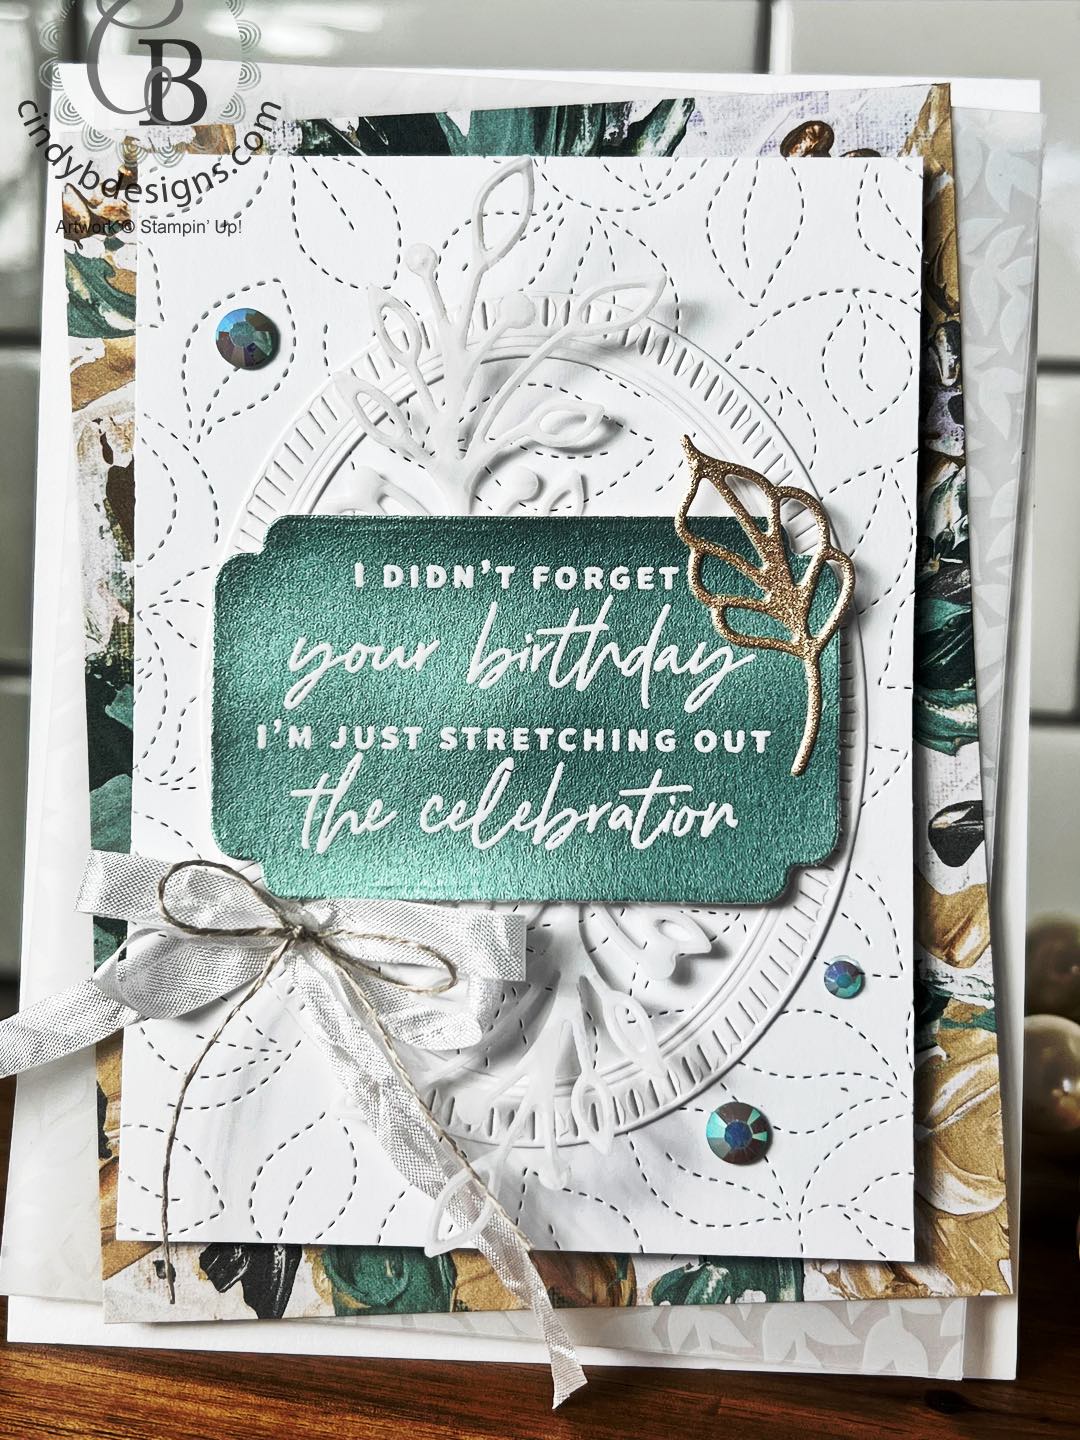
After treating my paper with the Embossing Buddy, I stamped the sentiment from Something Fancy onto a piece of Soft Succulent Fine Shimmer with Versamark and heat set with white embossing powder. The sentiment was cut from the 2nd largest Something Fancy die-cut. You will want to wipe down the sentiment with a Swiffer Cloth to remove the Embossing Buddy residue.
Two large sprigs were cut from Framed Florets out of the leafy pattern of the vellum, as shown above.
One small gold leaf facing left was cut from Framed Florets out of the Fine Shimmer Paper Pack included in the Fancy Flora Suite Collection.

For final assembly, I laid the two floral sprigs with the ends in the center of the Framed Florets frame and adhered them to the card base with Scotch Tape.
To prevent curling of the shimmer paper after heat embossing, you will want to place Foam Adhesive Strips around the edges and center of the sentiment panel, as this paper has a tendency to curl after heat embossing. I then adhered the sentiment panel to the center of the frame.
The gold leaf cut earlier was adhered atop the sentiment panel on the right.
I tied a double bow with our Crinkled White Seam Binding and adhered this to the bottom left of the frame with a Mini Glue Dot.
I used Linen Thead to tie a single bow that was adhered to the center of the white bow with a Mini Glue Dot.
Two large and 1 small Balmy Blue Iridescent Pastel Gems were used to embellish.

For the inside, I cut a gold frame from Framed Florets Dies and adhered it to the center with liquid adhesive.
The sentiment from Framed Florets stamp set was stamped in the center of the oval frame with Soft Succulent ink.
Small flowers from Two-Tone Flora were stamped in Balmy Blue ink with the accent stamp in Soft Suede.
Balmy Blue and gold Iridescent Pastel Gems were used to embellish the flowers.
A small leaf cluster was stamped around the edges of the inside in Crumb Cake.
I hope you enjoyed today’s project and please let me know if you have any questions.
Thank you for stopping by for a visit and have a great day!


|
|
|
|
|
|
|
|||
|
|
|
||
|
|
")
")

 Specialty Designer Series Paper")

 Crinkled Seam Binding Ribbon")


")

|
|
|
|
|
|
|
|
|
|
|
|
|
|
|
|
|
|
|
|
|
|
|
|
|
|
|
|
|


- Card base: A2 top-folding 4-1/4 x 5-1/2, Basic White Thick CS.
- Vellum: 4 x 5-1/4, Layering Basics Specialty Designer Series Paper, leafy pattern.
- DSP: 3-3/4 x 5, Fancy Flora DSP.
- Image panel: 3-1/4 x 4-1/2, Basic White Regular CS.
- Sentiment panel: 2nd largest square Something Fancy Dies, Fine Shimmer Paper Pack, Soft Succulent.