Hello there! I hope you had a wonderful weekend. Today’s card would be great for my Clean & Simple Tuesday Series, so we will pretend that it’s Tuesday too.
I made this card for the Facebook CardMaker Magazine Card Challenge Corner to make a sweet card to send to a friend. I don’t know if that meant sweet, as in chocolate, but I think this card is sweet by telling my girlfriend how amazing she is.
As you know, I’m hooked on everything metallic right now and rose gold. I used this fabulous stamp set of Geometric Greenery by My Favorite Things Stamps and just started to have fun. I stamped all of the leaf images using Delicata Celestial Copper Pigment Ink onto Gina K Designs Ivory Pure Luxury Heavyweight Base card stock and covered it with WOW Metallic Copper Super Fine Embossing Powder. I so much prefer using super fine embossing powder as the granules are teeny tiny and you get a much cleaner embossed impression. I was pleasantly surprised how well the pigment ink heat embossed. Even better, I had another happy accident that I will show you later this week on a card with a tremendous amount of heat embossing on it – like several times on the same image layer – yet the card stock did not warp at all by using pigment ink. It was the weirdest thing, but hey, works for me! I used my Milwaukee heat tool to melt the embossing powder.
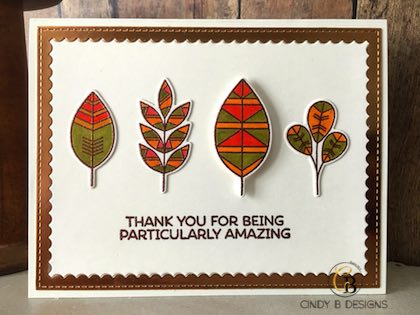
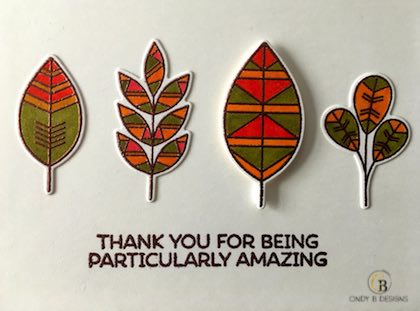
Before I die-cut out my images, I colored them in using autumnal Copic marker colors of: E07, R14, YG95, YR09, YR15 and YR24. I also stamped my sentiment from the aforementioned stamp set with the same embossing technique. Now remember that I’m working from the center of a die-cut that’s a little wonky as you can tell by the above picture. It was easy enough to place the sentiment in the middle using my MISTI.
I then decided to do an inlay technique of die-cutting out the largest square from the Stitched Rectangle Scallop Frame by MFT Stamps twice; one using the Ivory card stock and the other with a Stampin’ Up! 12 x 12 Copper Foil Sheet. My card is your basic A2 top-folding landscape card using the above-mentioned card stock as the base of my card. I adhered the Copper Foil piece from the die-cut to the center of the card using my Modge Podge Adhesive, which I had done a video on earlier. The leftover Copper Foil went into my folder. I used the Ivory CS to adhere to the inside to frame that up for a great tone-on-tone look.
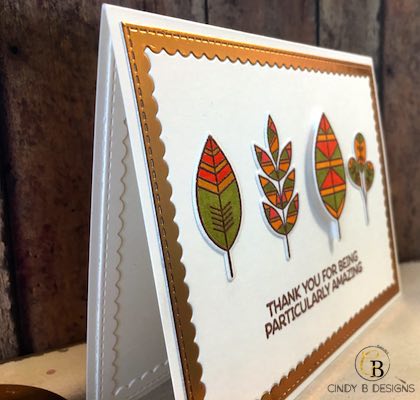
The leaf images that I did not use on the front, I will use for the inside of the card and stamp and heat emboss another sentiment. After the sentiment was stamped, I inlaid the image panel to the inside of the Copper Foil with strong adhesive. I chose 4 leaves that I felt went very well together and spaced them out on my image panel. I just eyeballed this. As you can see from the picture above, the third leave in is on foam tape for dimension. I adhered the other 3 leaves using adhesive.
I didn’t think the card needed any additional embellishing as I already had some great color and shine going on. This would also be a great masculine card too!
Thank you so very much for stopping by to visit me and God bless! I will generate a supply list later this evening.
Also, I still have the Verve Box up for sale. I do plan on doing a price reduction on that down to $260 from $320. I will also update the PayPal Button for that later this evening too.