Hello there! Thank you for joining me today for a birthday theme card created with the new Sending Smiles Bundle for Stampin’ Up! Only Challenge #301 and hope that you join us today!
I am going to apologize right now about the quality of the picture projects. I’m learning a new software program, which has been a little bit of a nightmare with the learning curve.
The flowers in this project are cut from this TUTORIAL and I used up the rest that I had left.
I had planned to put a video up on Saturday, but … Cinco de Mayo and Mother’s Day should absolutely not be within 72 hours of each other.
I am hoping to have the video up on Thursday using different Stampin’ Blends colors with vellum. I gotta wing this one. I would really prefer to do a FB live and get it over with, not spending time to edit and voiceover. I’m great with public speaking in front of crowds, not so good otherwise.
Once again, the sequins are from the same Pumpkin Paper Kit that I’ve been using for the past several weeks on projects.
I strongly encourage you to SUBSCRIBE. The deadline for the fabulous new kit featuring the all new In Colors is TODAY to subscribe. You can choose a 1-month to 12-month subscription.
As always, your shopping Supplies and Instructions, including measurements, are below.
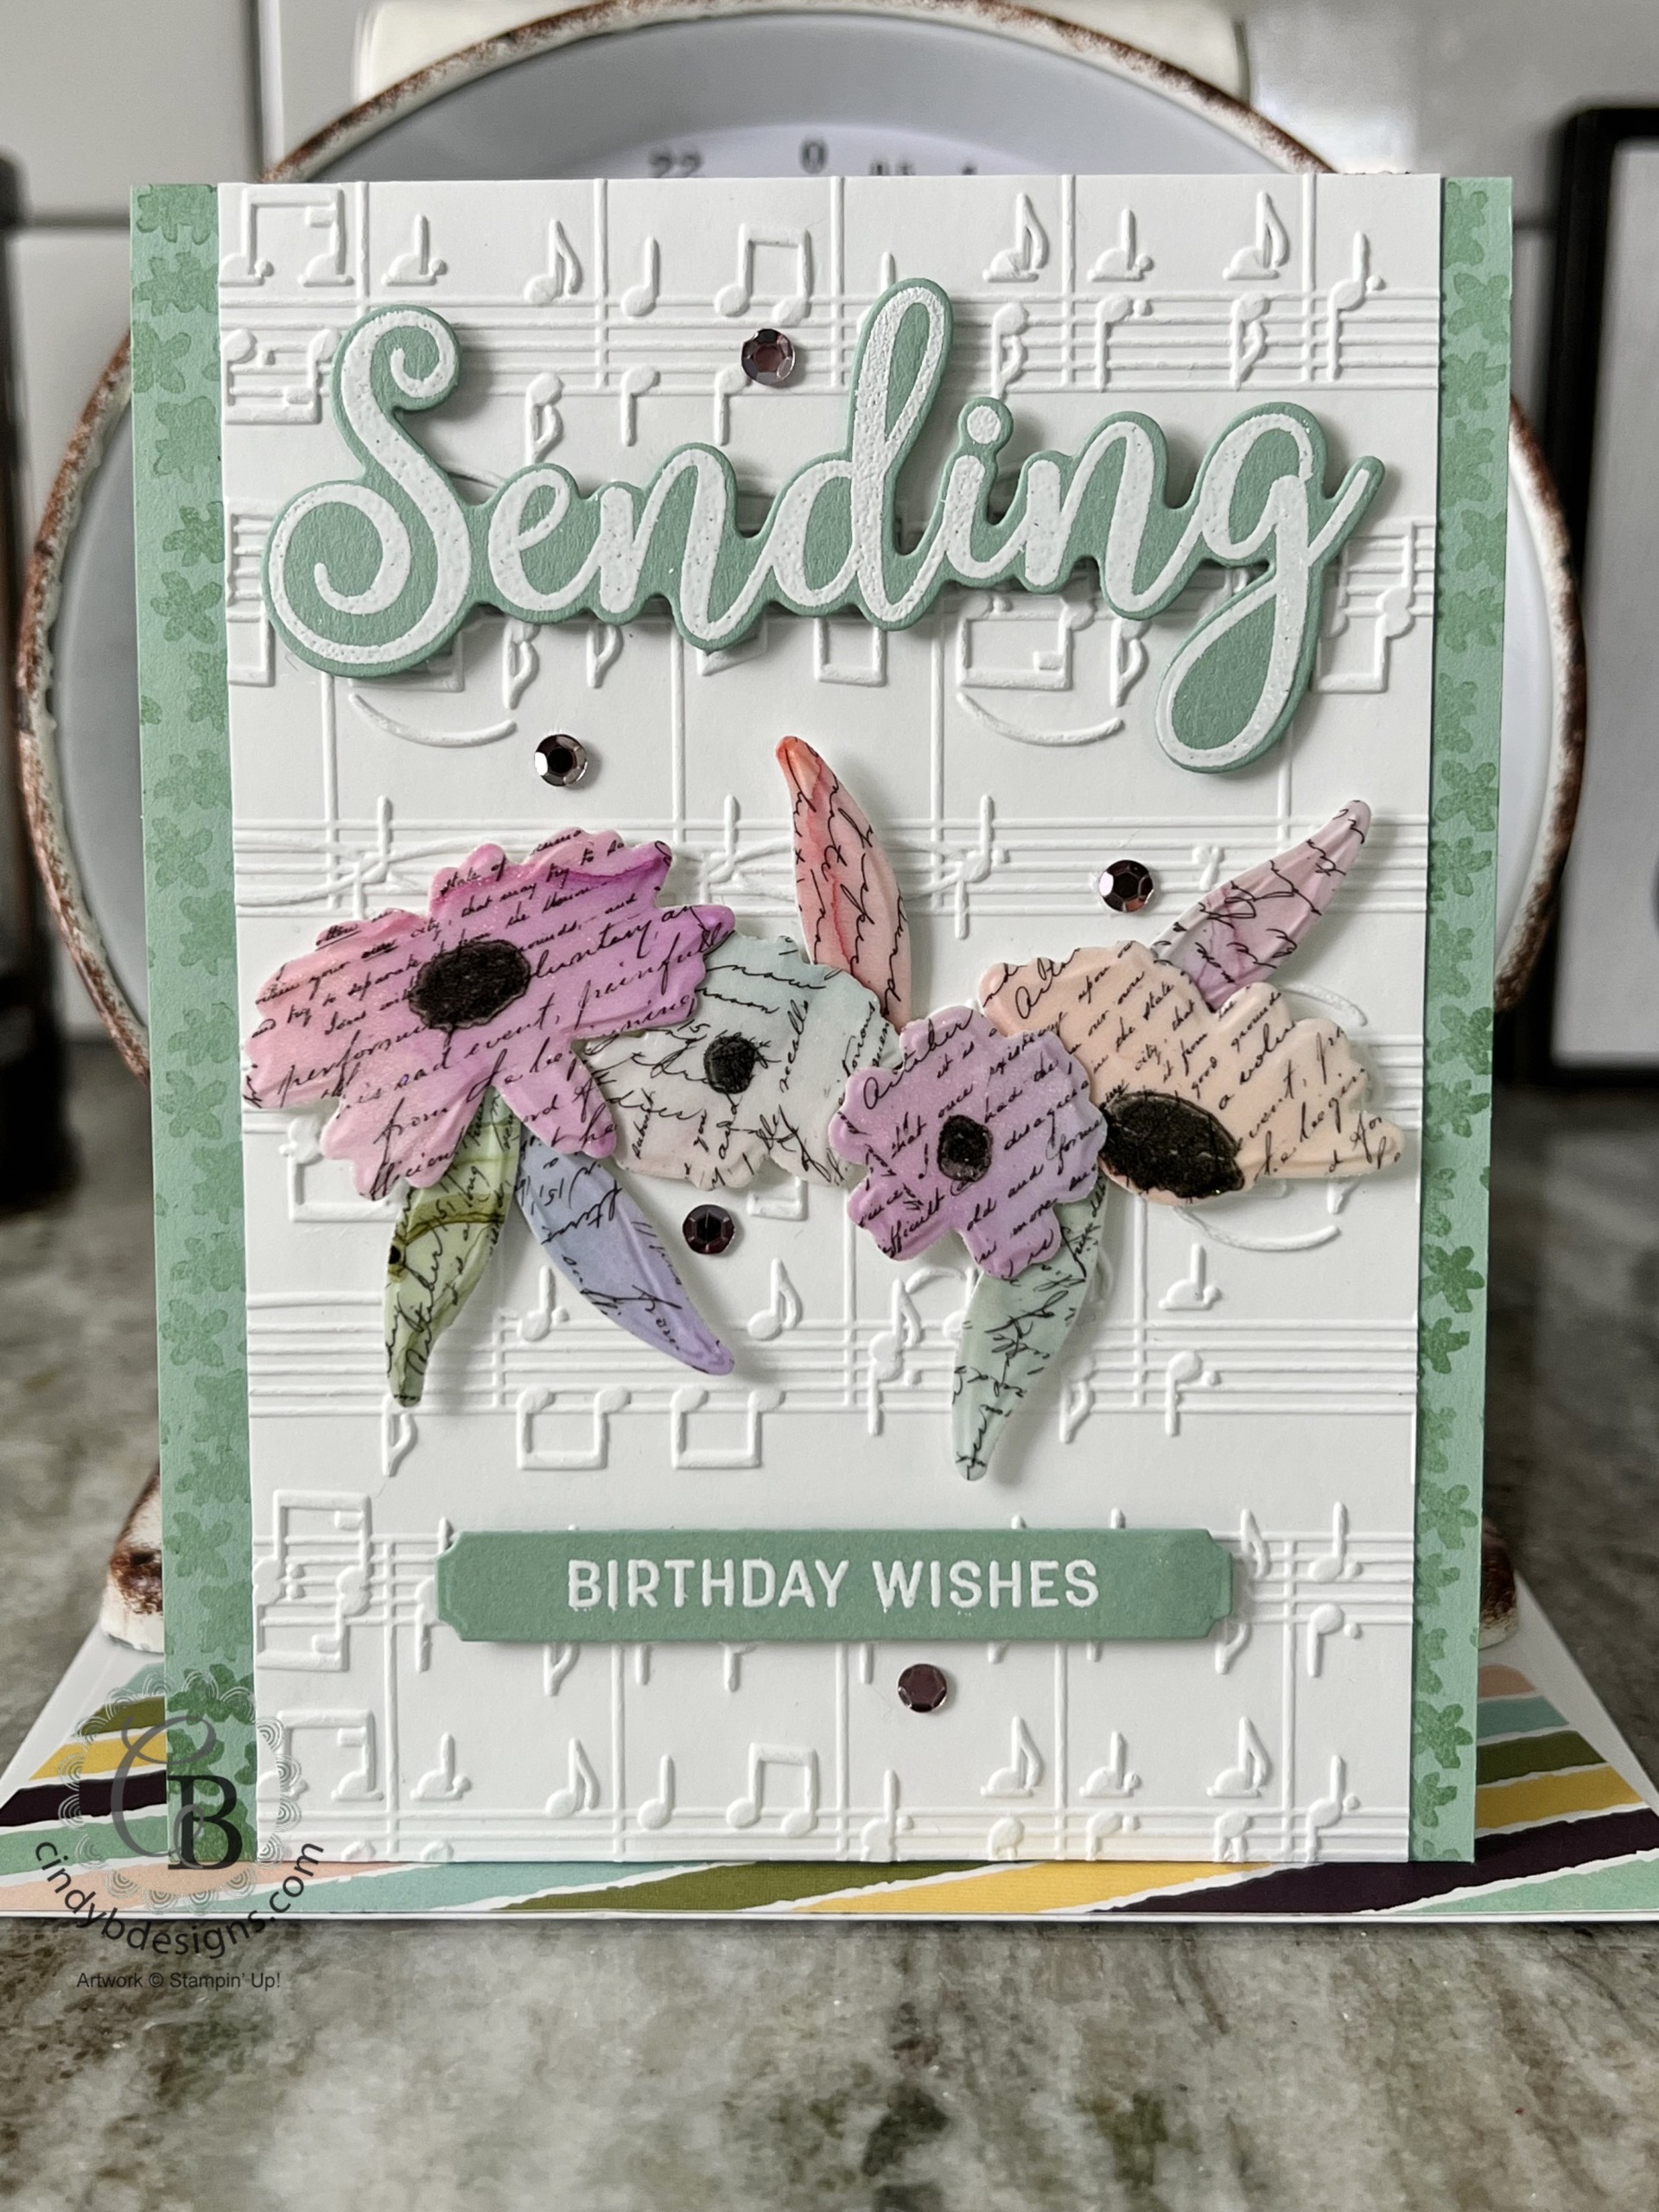
I started out with an A2 top-folding Mint Macaron card base and stamped off the small floral image from Sending Smiles x3 in Mint Macaron and stamped around the edges and bottom of the card base.
I cut a piece of Basic White CS to 3-3/4 x 5-1/2 and ran it through the Merry Melody 3D EF. This EF is not just for Christmas. I’m using it to compliment the birthday theme. This panel was adhered to the card base with liquid adhesive as shown.

I cut the flowers as leaves from the custom vellum DSP I created from the above tutorial. I stamped the coordinating stamens with Memento Tuxedo Black ink that was heat embossed with clear powder. Due to the vellum coating, the ink is going to smear and there is no way around that. The clear embossing powder covers the ink so it doesn’t smear.
There is a steady heat embossing element on every feature of this project. The sentiments were stamped onto Mint Macaron CS in Versamark ink, heat embossed with white powder, and cut from their coordinating Sending Dies. Here is an INLAY TECHNIQUE that I shared with you earlier using the large Sending die for perfect placement.

The images and sentiments were all adhered with Stampin’ Dimensionals with sequins scattered about to embellish.
BEST RESULTS FOR HEAT EMBOSSING
- Always use an Embossing Buddy or tool that coats the surface. This repels the powder where it shouldn’t be, i.e., outside of the Versamark ink. You might get stray flecks, which is usual. I use an angled paint brush to whisk away the strays.
- Make sure your image is clean.
- I impress the image several times with Versamark. I want to visibly see the impression and make sure it’s a solid one where the powder will evenly spread and stick. This makes your end results crisp.
- Use a Swiffer Cloth or like material to wipe away the Embossing Buddy powder after you heat emboss.
I hope you enjoyed today’s project and please let me know if you have any questions.
Thank you for stopping by for a visit and have a great day!


|
|
|
|
|
|
|
|
||
|
|
|
|
|
|
|
|
|
|
|
|
|
|
|
|
|
|
|
|
|
|
|
|
|
|
|
|
|
|
")


 Layering Designs")


")


- Card base: A2 top-folding 4-1/4 x 5-1/2, Mint Macaron CS.
- Image panel: 3-3/4 x 5-1/2, Basic White CS embossed with Merry Melodies EF.
Beautiful, Cindy! I love the blossoms done this way, and what fantastic colors! So nice to see the music EF, too – such a great design!