Hello there! Thank you for joining me today for a multifaceted card created with the new Charming Sentiments Bundle + Designer Tags, that I will introduce to you below.
I brought in the Hues of Happiness Suite Collection’s Designer Series Paper and Glossy Dots Assortment.
I let the designer series paper, die-cuts, and sentiment do the work on this project. All I did was die-cut, heat emboss, and adhere.
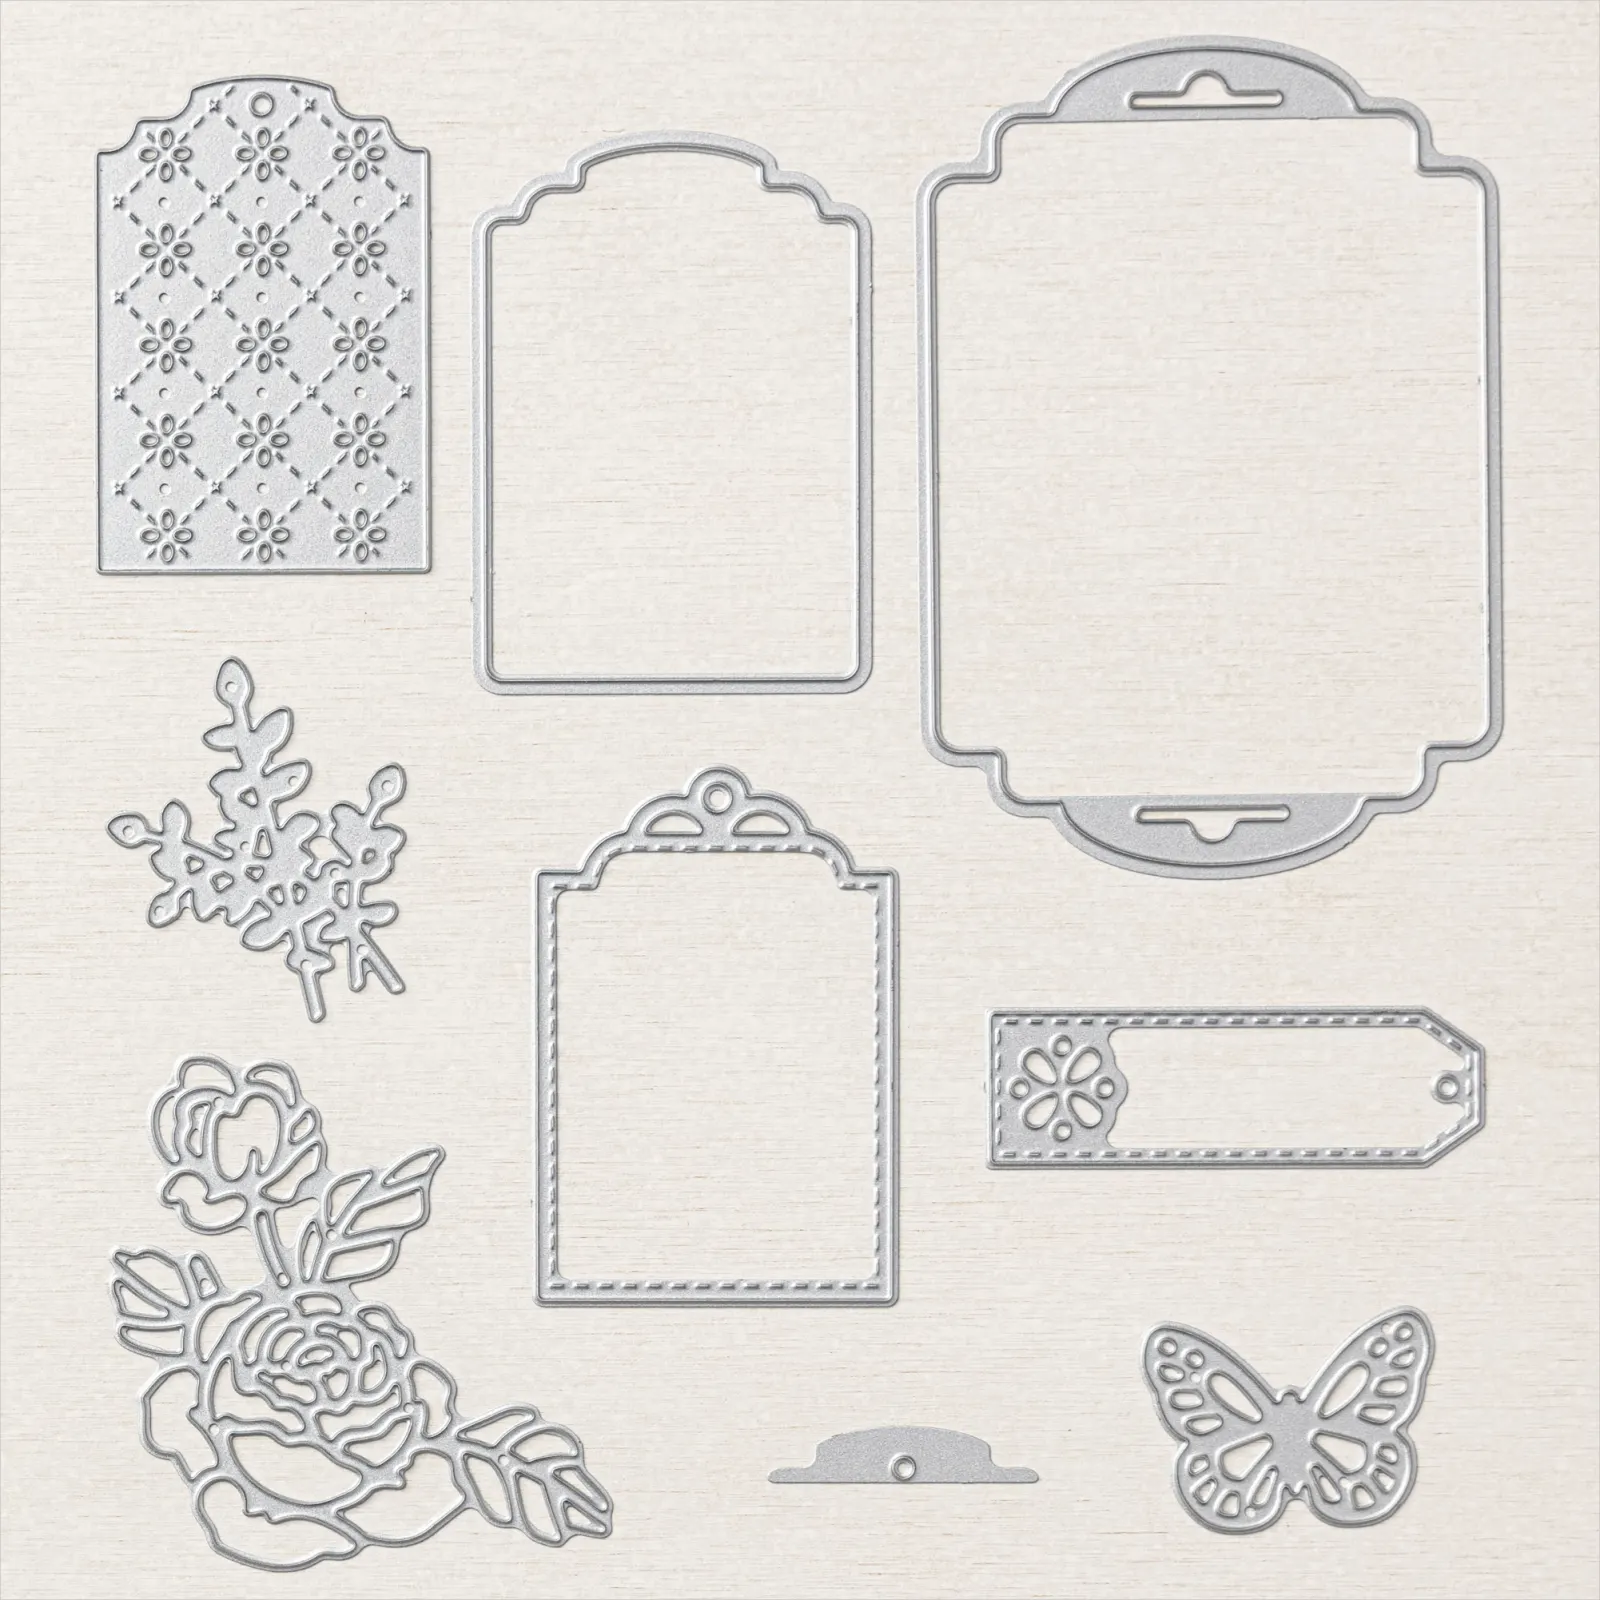
The tag I used in this project is from Designer Tags, but I altered the tag to fit my vision.
I absolutely LOVE the Charming Sentiments Bundle with the fonts and coordinating die-cuts. We really needed a bundle like this!
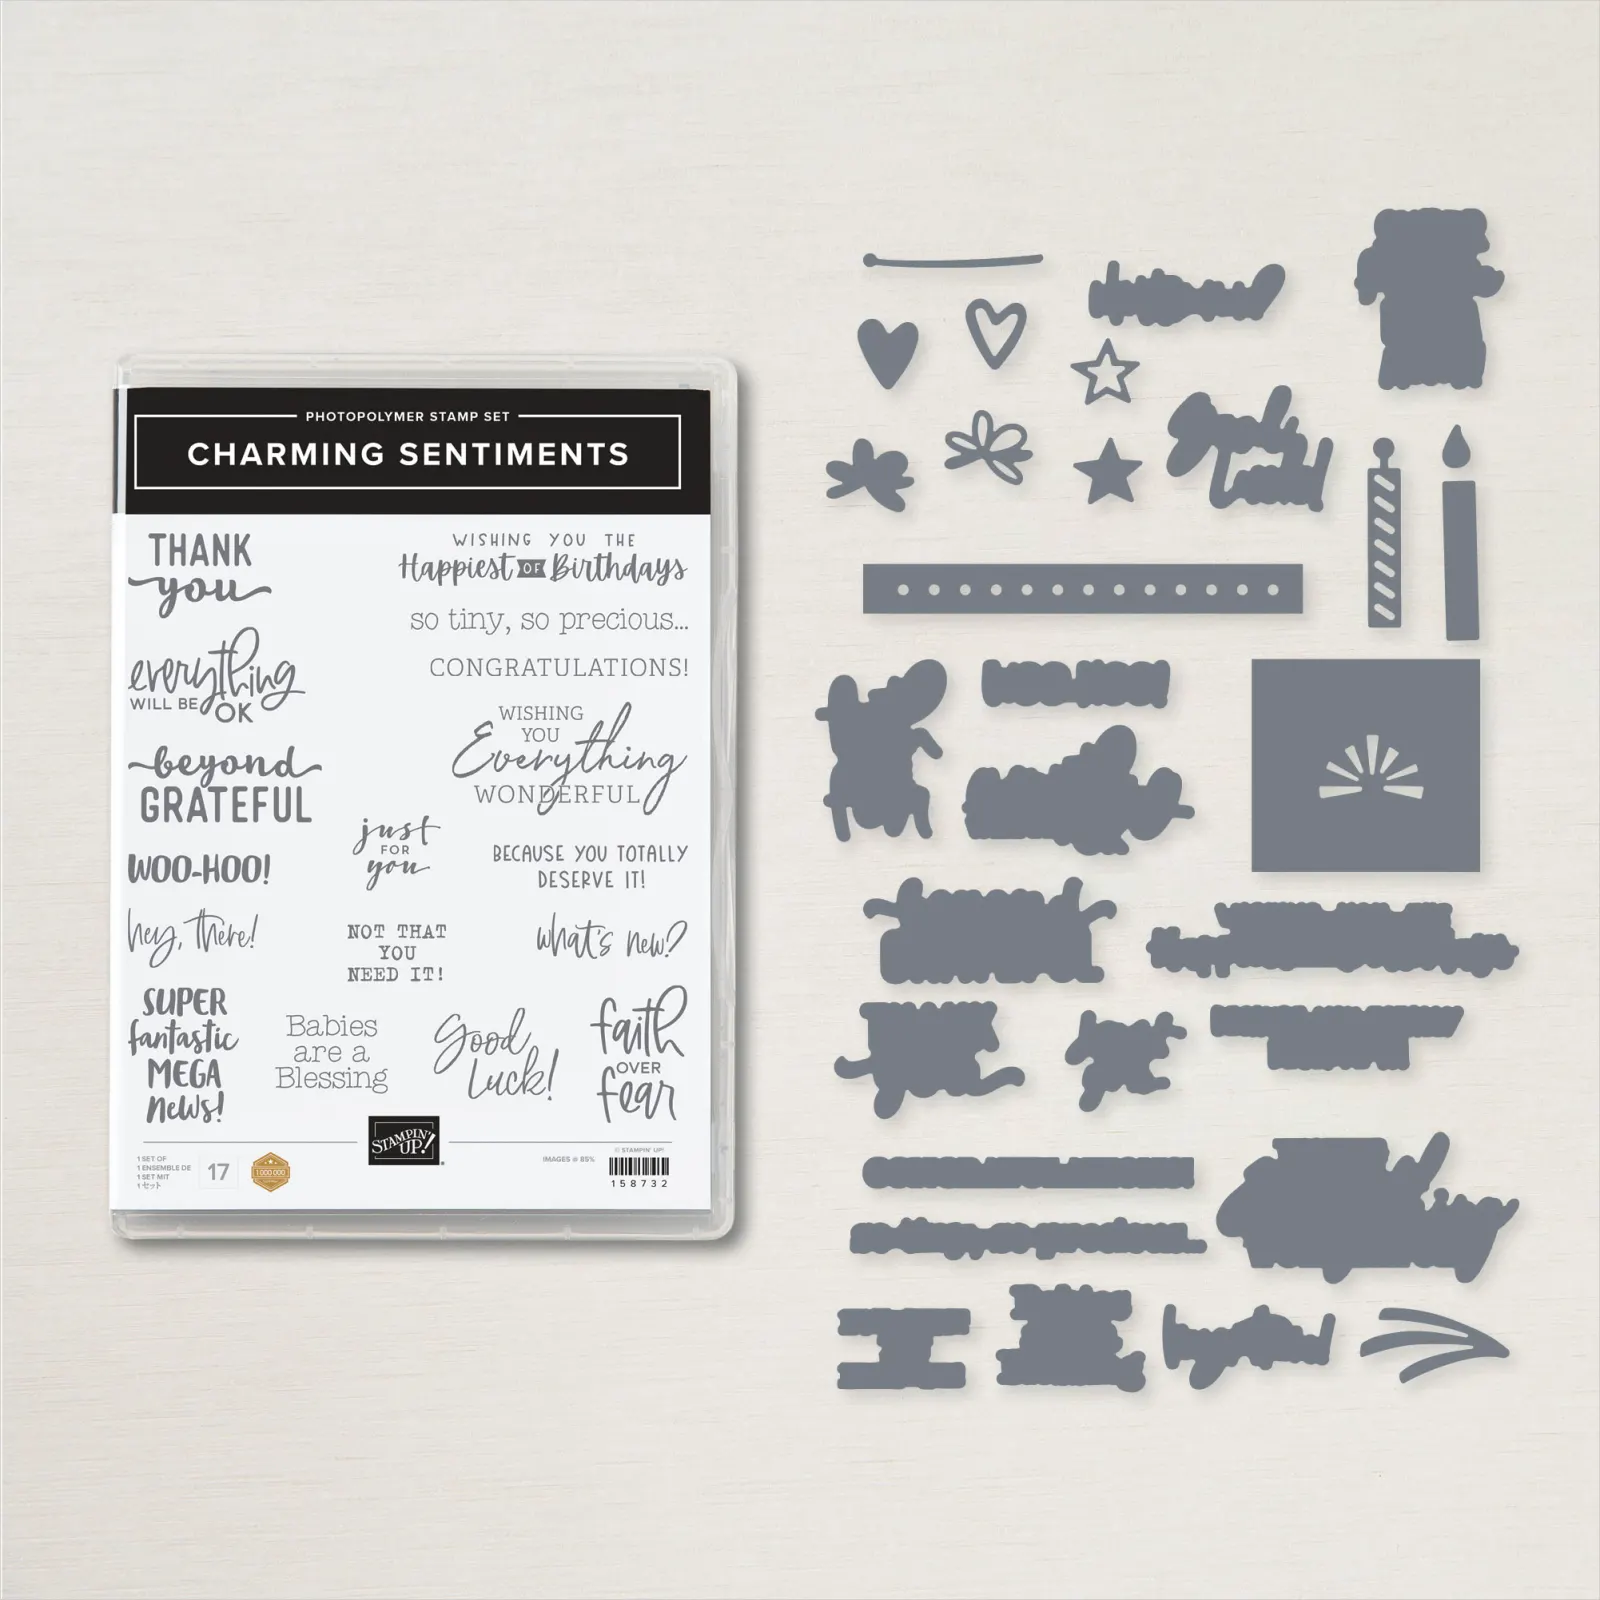

Looking for a sentiment-only stamp set? Meet the Charming Sentiments Stamp Set, which includes various sentiments in different stylistic fonts designed to be used for all occasions. With this set, say thank you and congratulations, wish happy birthday and good luck, and show people you care. Grab some ink, pair with the images of your choice, and create your personalized handmade cards! This set was designed with the help of our Million Sales Achiever Lisa Curcio.
* 17 photopolymer stamps
* Suggested clear blocks (sold separately): b, c, d, h
Create die cuts with the Sentiment Silhouettes Dies. This set of dies includes decorative shapes like stars and hearts and open dies that coordinate directly with the sentiments included in the Charming Sentiments Stamp Set. Pair the dies as you wish with the stamp set and create lovely papercrafting projects for all occasions all year long!
* 30 dies
* Largest die: 2-1/2″ x 1″
* Use with a Stampin’ Cut & Emboss Machine
* Compatible with the Mini Stampin’ Cut & Emboss Machine
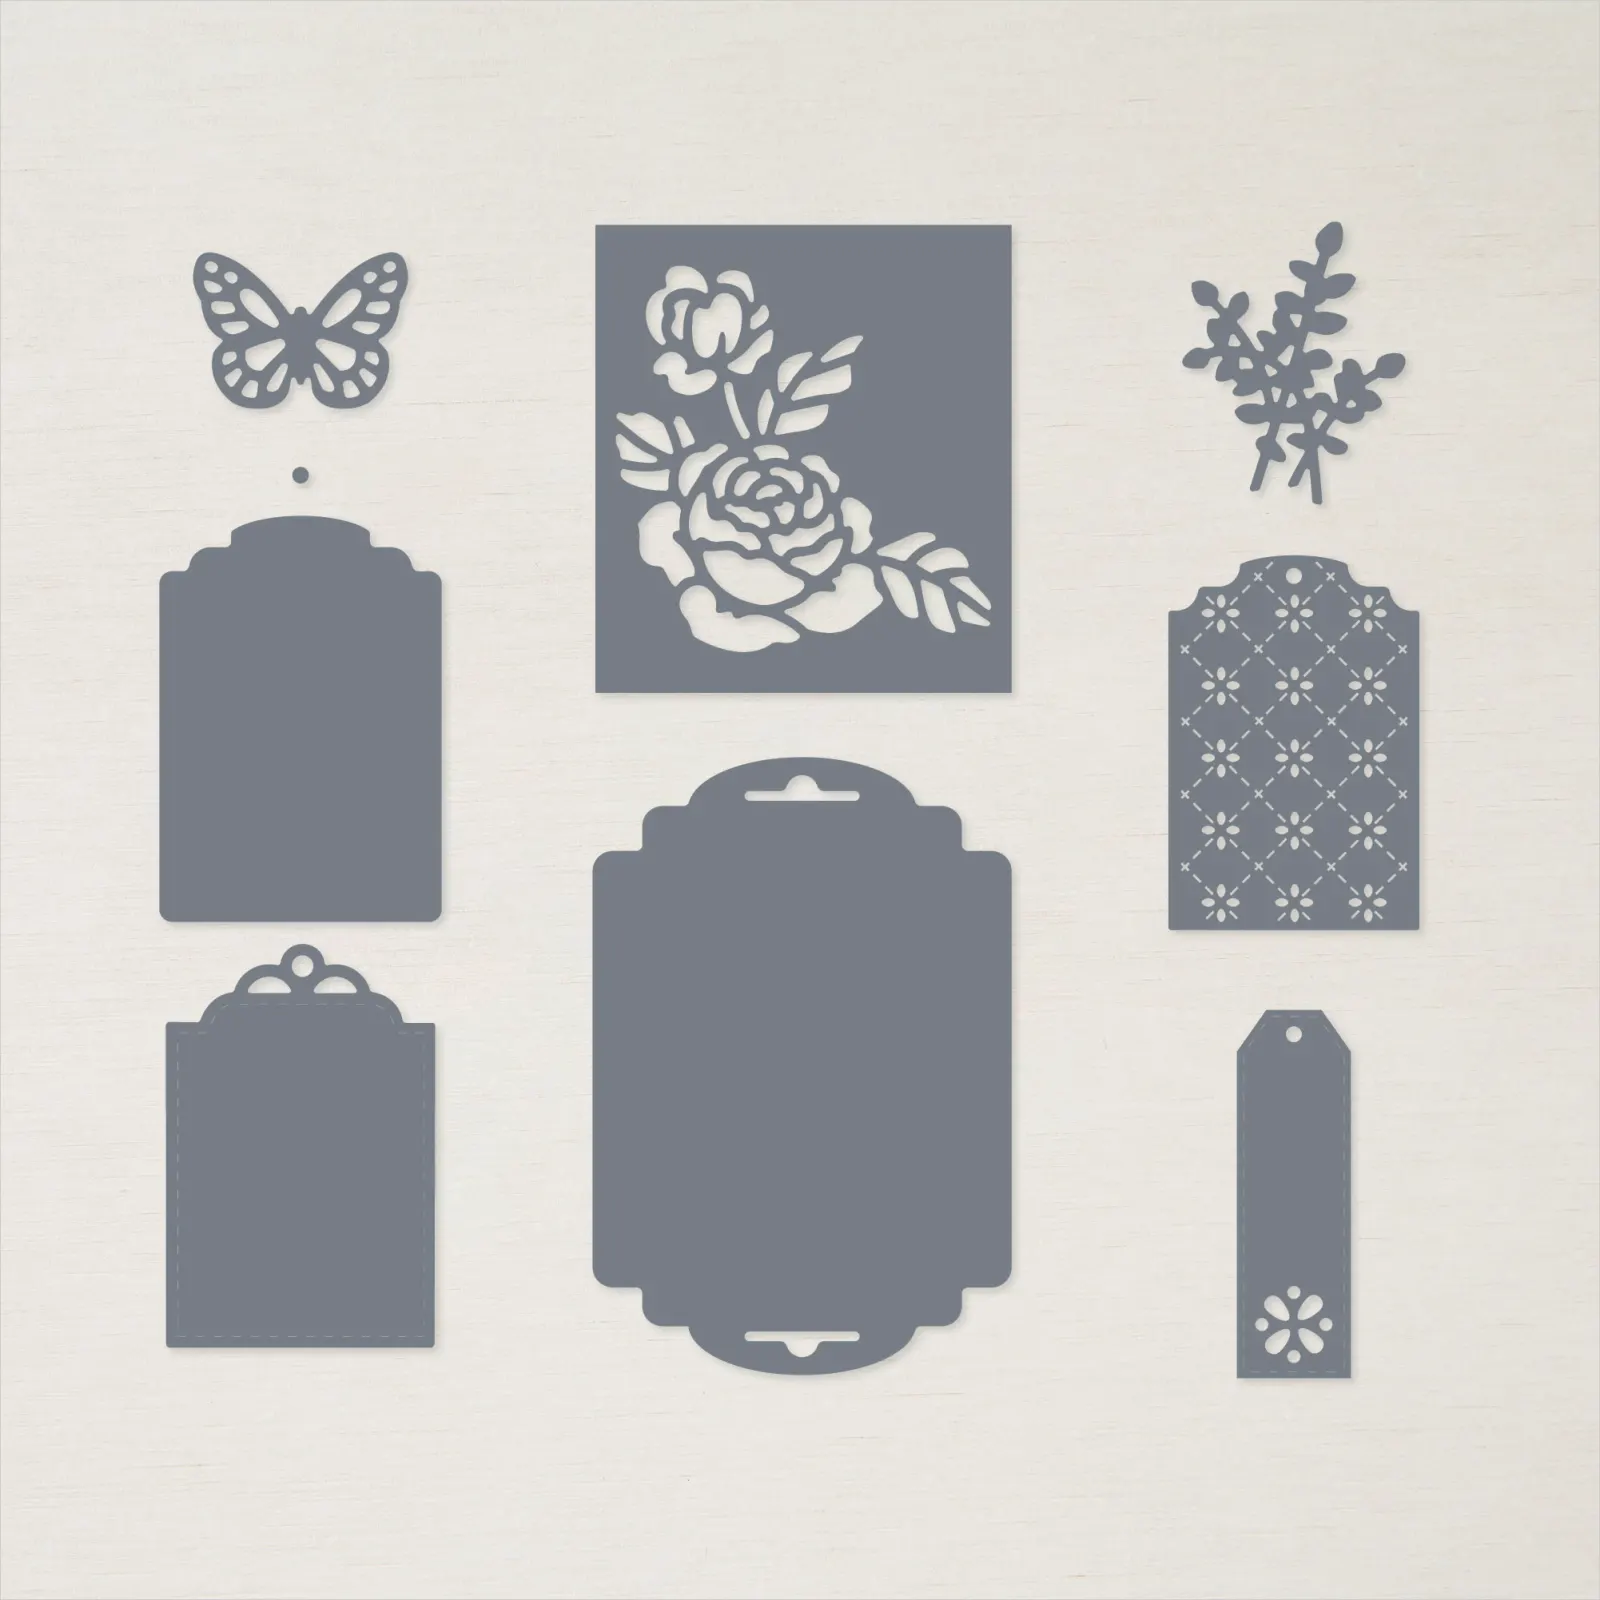
* Largest die: 2-5/8″ x 3-7/8″
* Use with a Stampin’ Cut & Emboss Machine
* Compatible with the Mini Stampin’ Cut & Emboss Machine

I’ve been experimenting around with the flip side of our designer series paper lately and a lot of them are great backgrounds with the least amount of work. I’ve been in a creative drought lately and this helps.
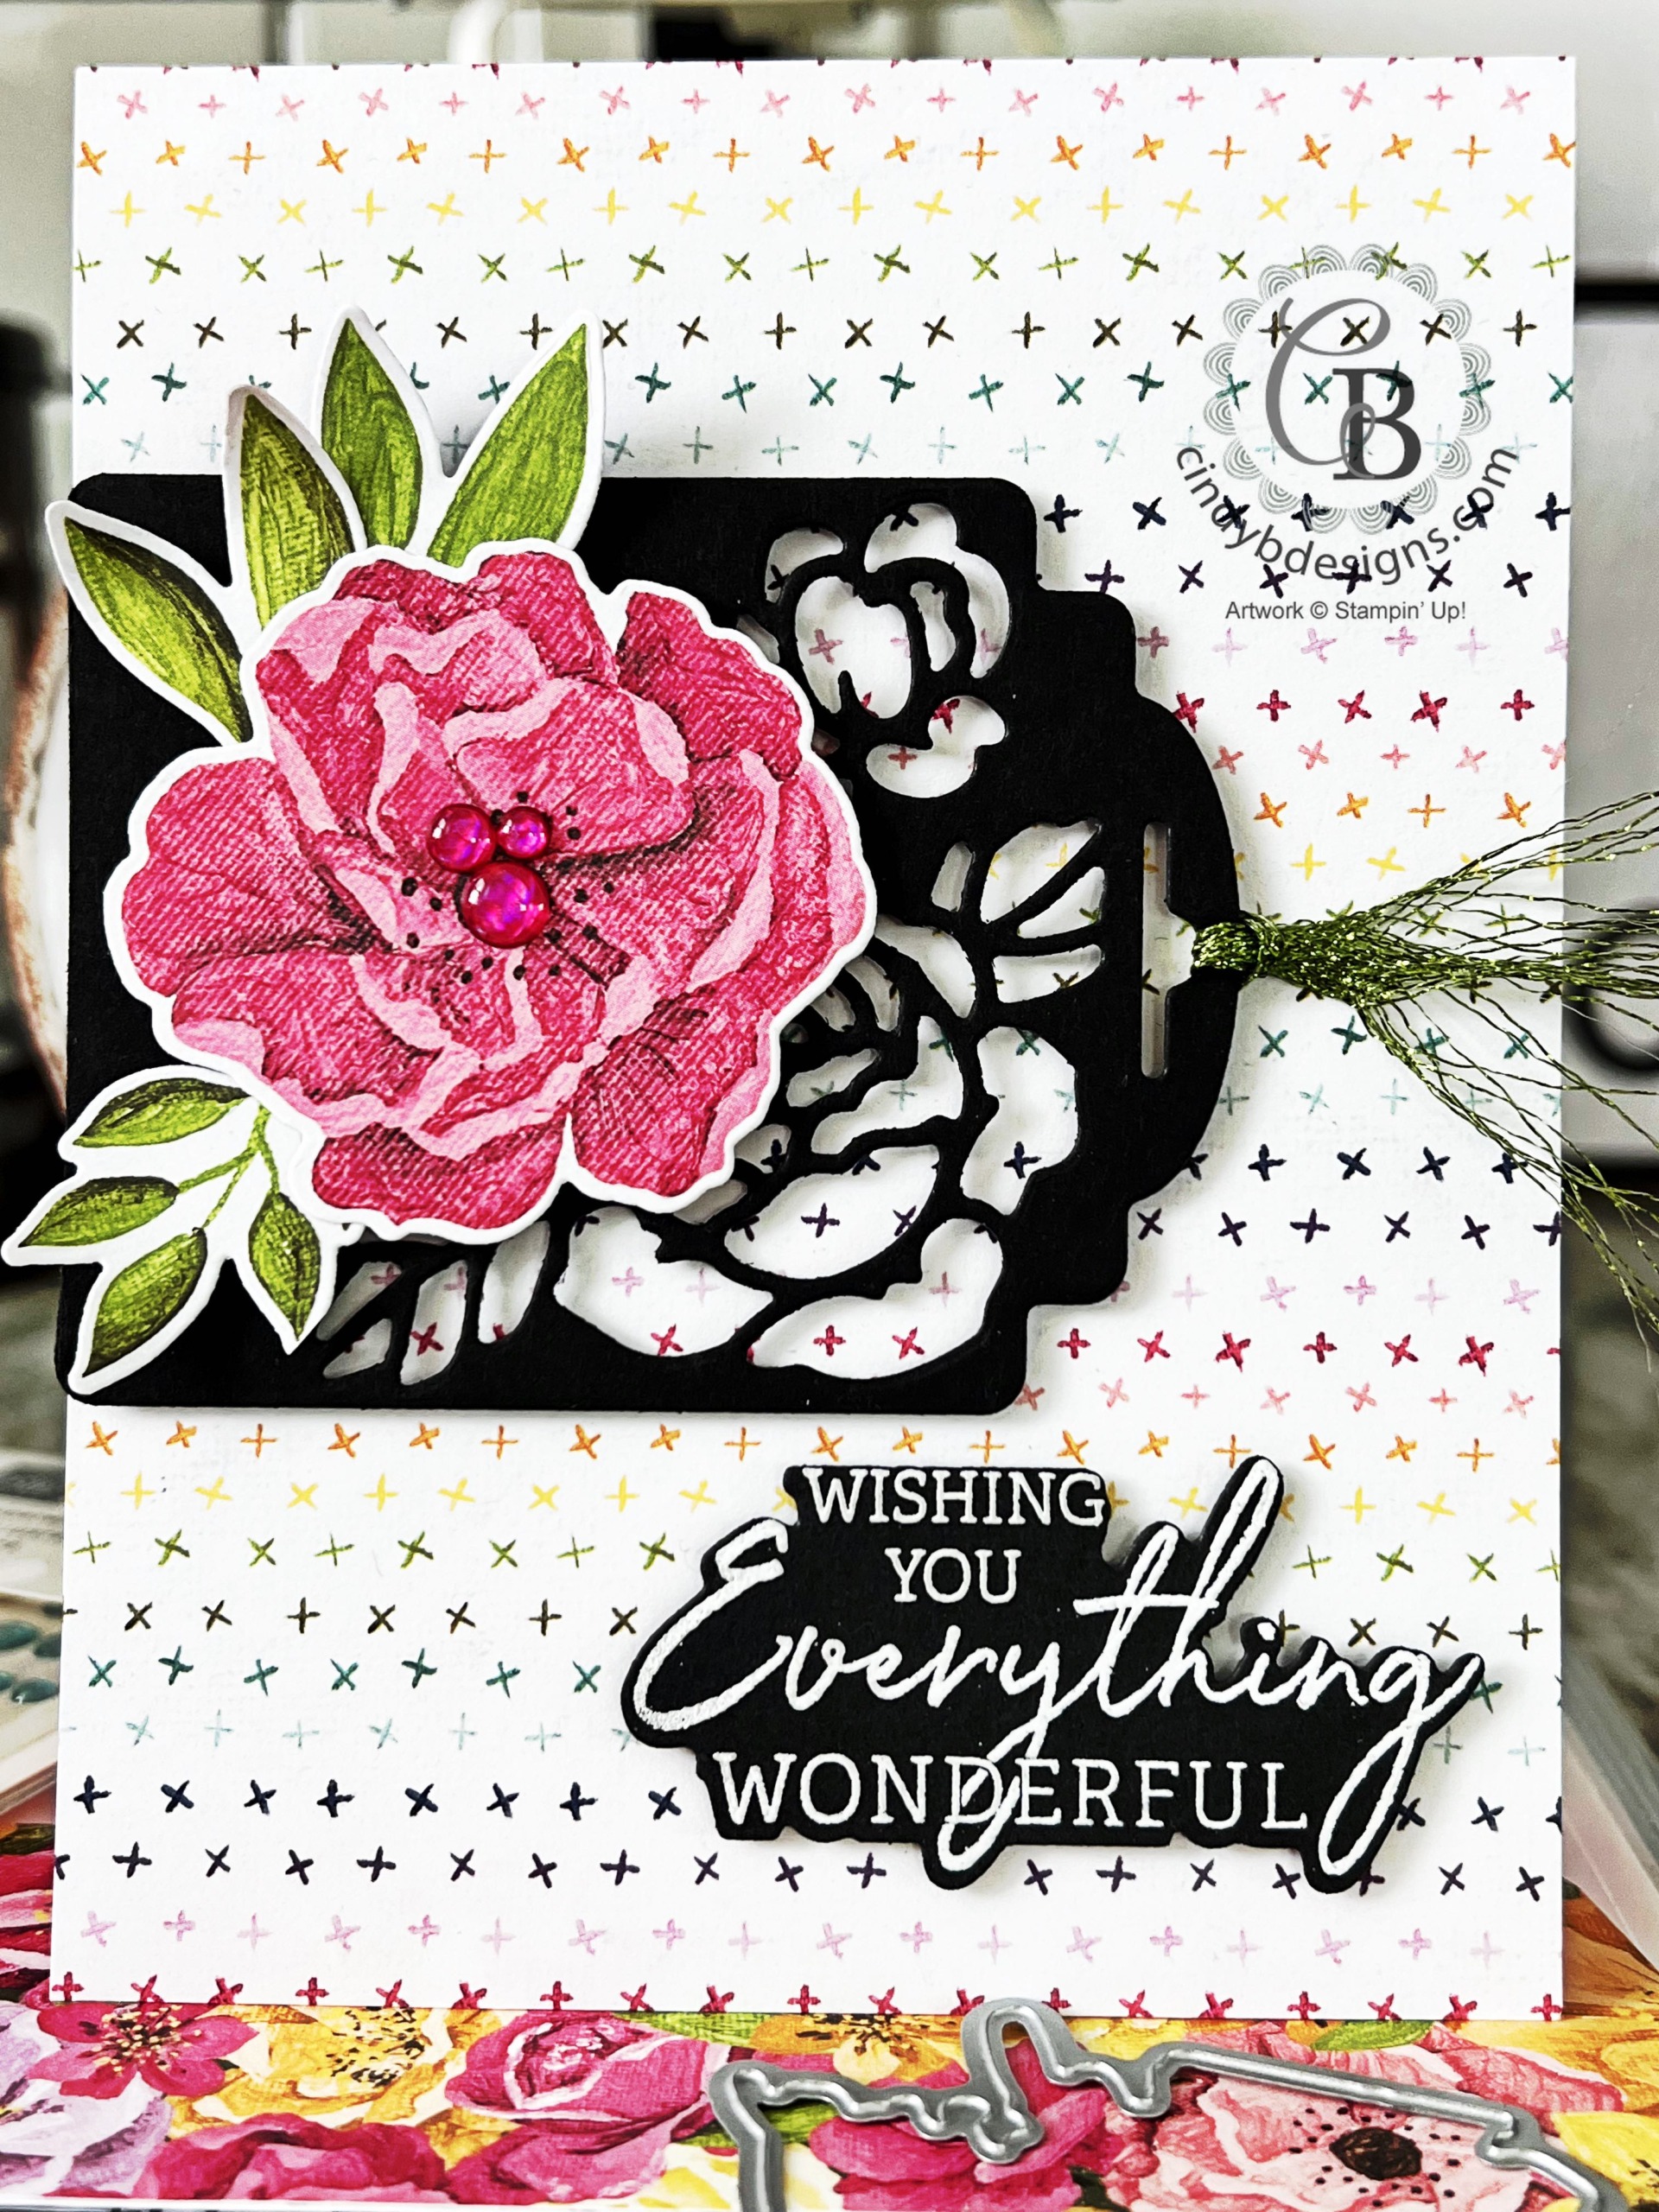
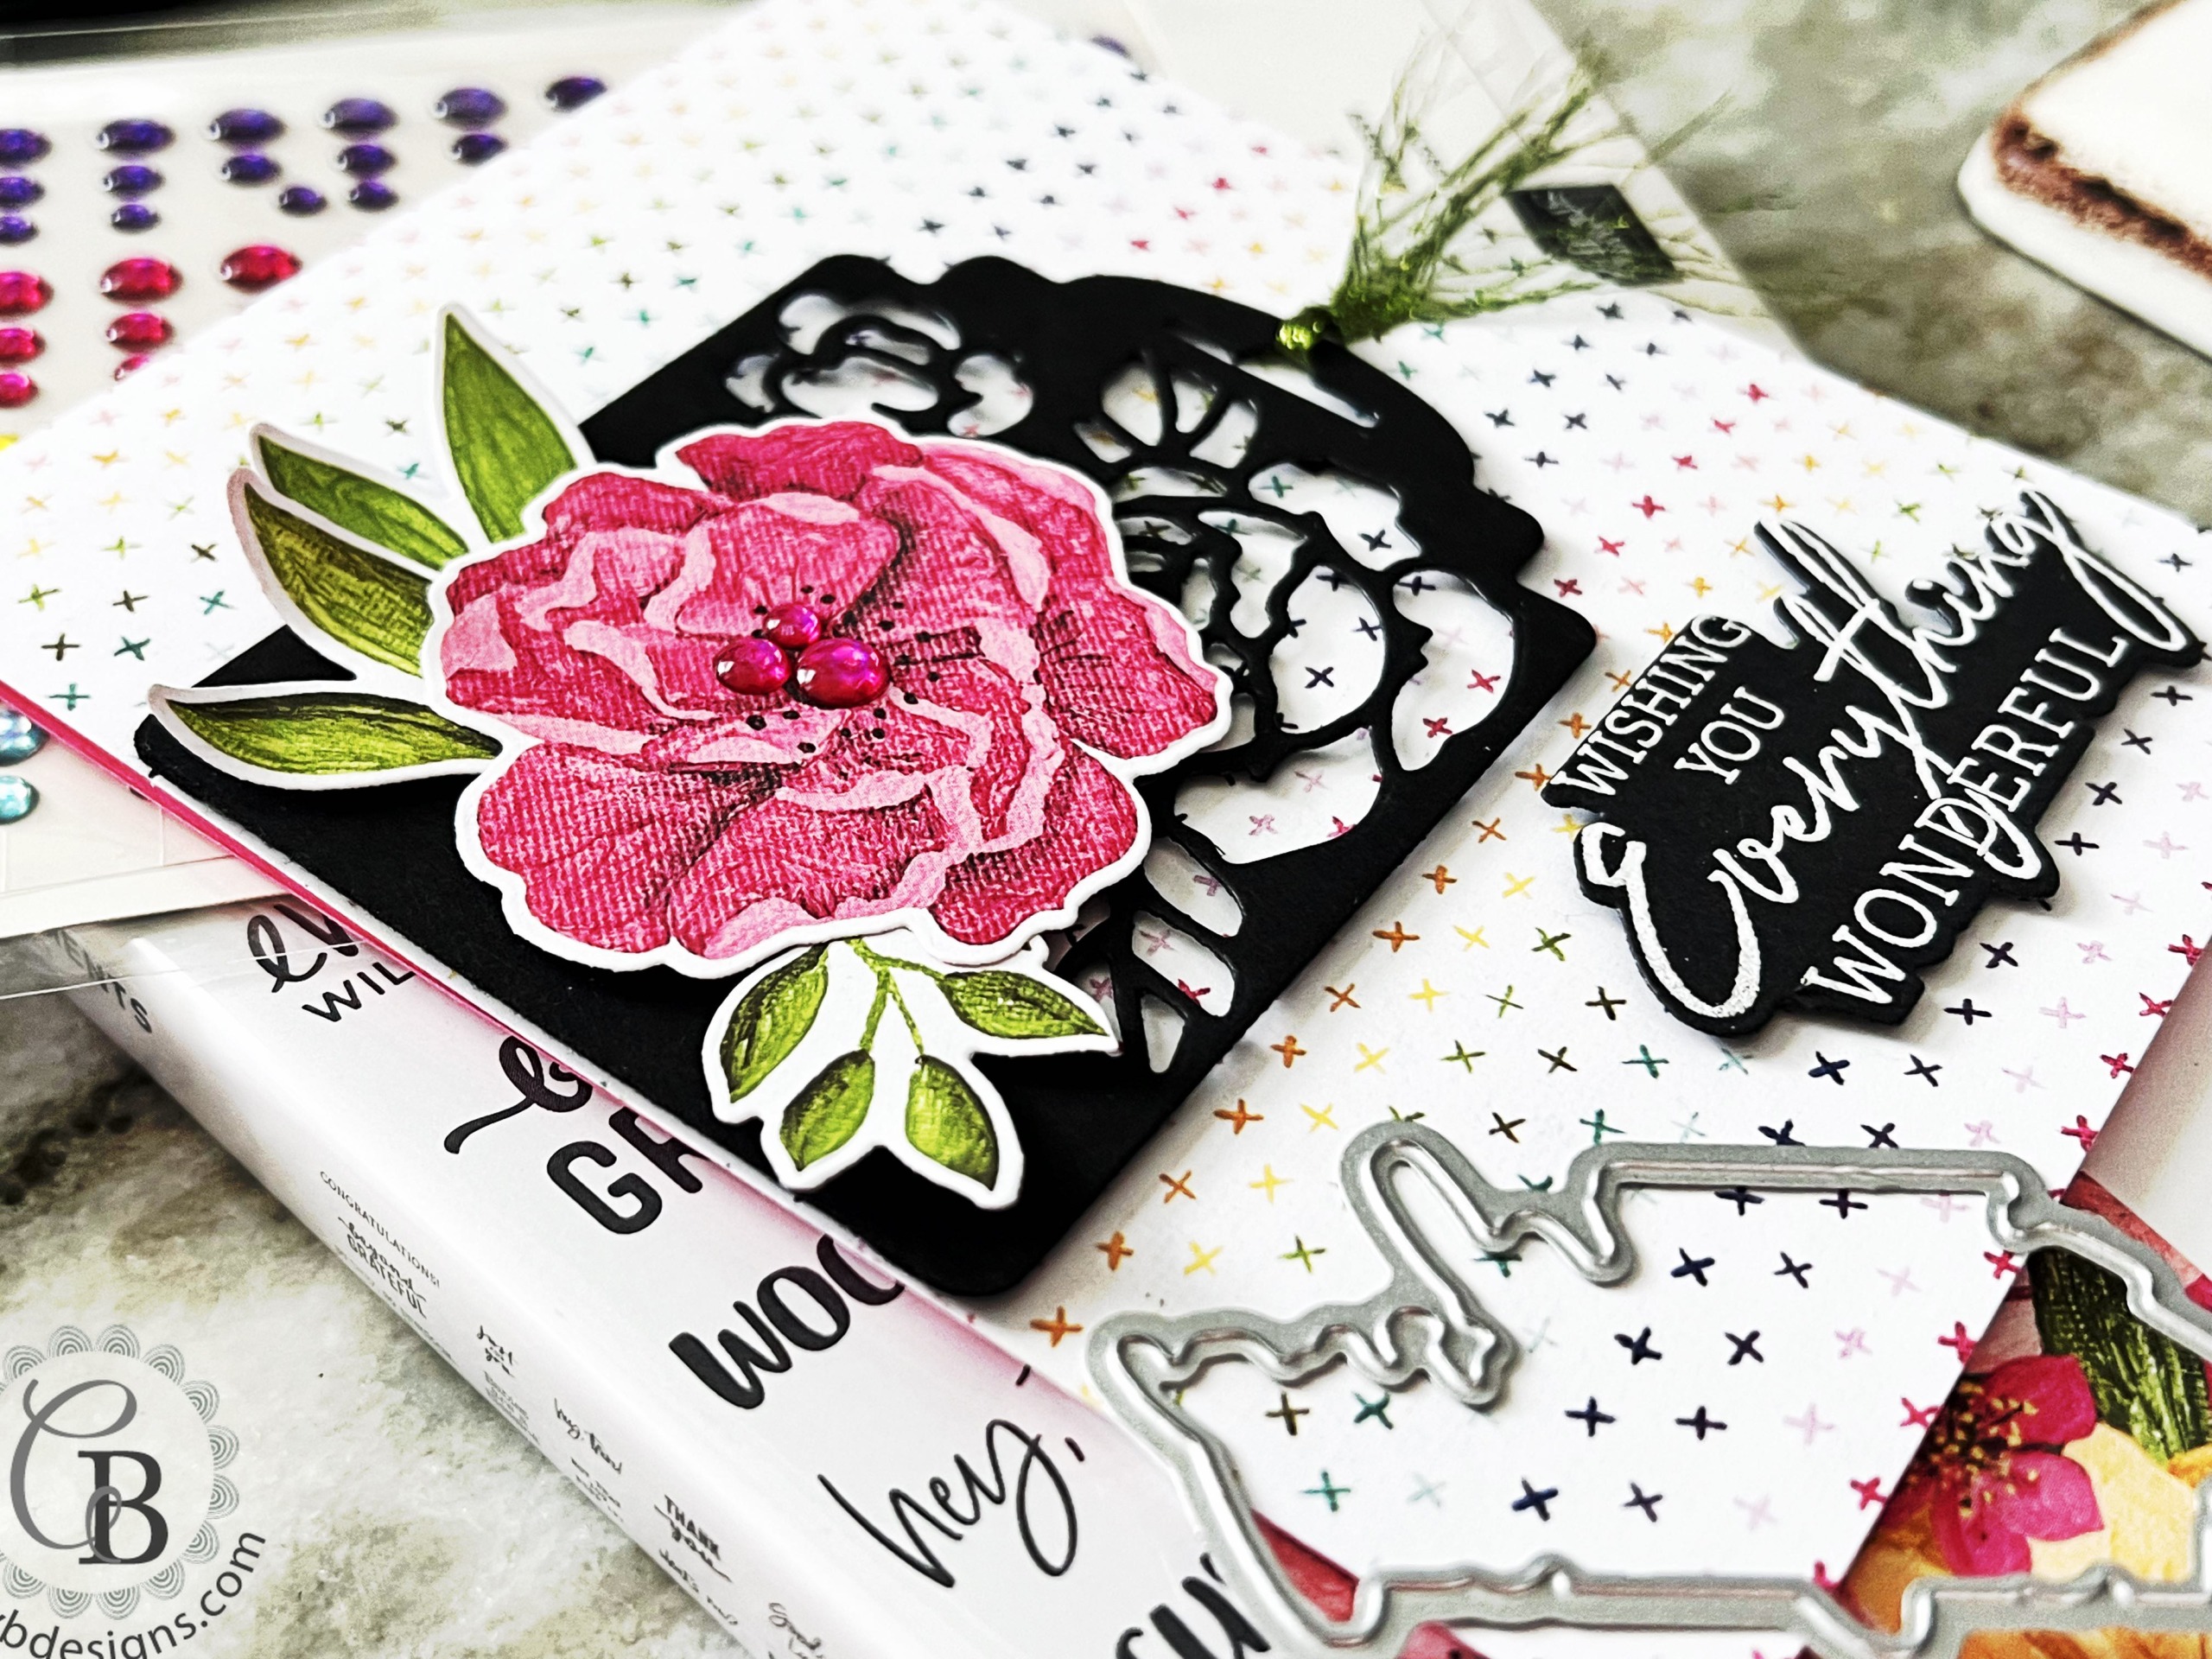
The Color Theory part boils down to the unspoken Rule of 3. My DSP is white with subtle pops of bright and regal colors with no focus, because this is an accent designer series paper. The rose and leaves focal point is cut from the side of designer series paper that we focus on the most. I needed a bold color to ground everything and that was Basic Black.
The Basic Black CS tag separates the busy designer series paper from the die-cut rose and leafy greenery designer series paper.
The same was done for the sentiment that was heat embossed with white powder.
My bling is the Parakeet Party Glimmer Ribbon and Glossy Dots Assortment for the stamen.
I started out with an A2 top-folding 4-1/4 x 5-1/2 card base of Polished Pink. I layered on the DSP with liquid adhesive over the card base and placed our large F Block on top to let the adhesive set up.
Using the this flip side of the Hues of Happiness Designer Series Paper can be used with our entire color palette. You have your color burst pops in the background and a solid dark grounding color in the tag and sentiment. You could cut or stamp any image and it would work with this. I’ve already die-cut my Hues of Happiness DSP and trust me, I went through the possibilities and ended up settling on the Melon Mambo DistINKtive floral and leaves. Regular Black Stampin’ Dimensionals were added to the back of the rose and leaves cuts.
For the tag, I used a frame from Designer Tags, inlaid the floral die-cut, then ran it all through the Stampin’ Cut & Emboss Machine. Right where the curves on were going to taper, I cut the rest off to make the frame more of a tag and to preserve the rounded corners. I added Mini Black Stampin’ Dimensionals to the back of the newly created tag from the frame, that were also cut in halves and quarters.
I tied the gorgeous Parakeet Party Metallic Woven Ribbon through the top of the tag and heavily frayed the ends.
The sentiment was stamped onto Basic Black CS with Versamark ink, heat embossed with white powder, then cut from the coordinating die. I added Black Stampin’ Dimensionals to the back of the sentiment.
For final assembly, I adhered the sentiment first at the bottom, the tag second, and the DSP die-cut floral/greenery images last to make sure it was all balanced.
I hope you enjoyed today’s project and please let me know if you have any questions.
Thank you for stopping by for a visit and have a great day!


|
|
|
||
|
|
|||
|
|
|
|
|
|
|
|
|
|
|
|
|
|
|
|
|
|
|
|
|
|
|
|
|
|
|
|
|
")

")

 Metallic Woven Ribbon")


