Hello there! Thank you for joining me today for Stampin’ Up! Only Challenge #322, SUOC #322, where we are using up our scraps today and hope that you join us.
May 1 will be here before you know it with our new 2023-2034 Annual Catalog release featuring new designer series paper and cardstock colors, so it’s really important to use up those scraps. I’m pretty good about not having too many scraps or paper overload and definitely do not keep the little pieces that I know I will never use.
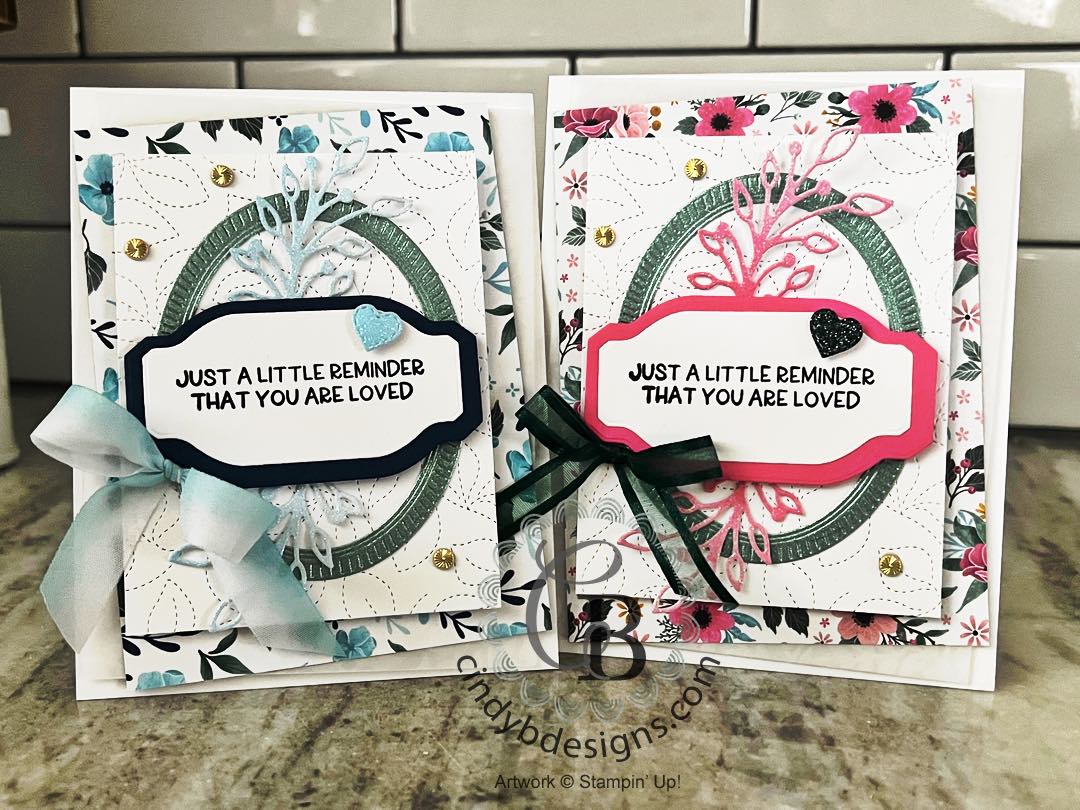
I created two cards today of a layered project from the Framed Florets Bundle on page 65 of the Spring Mini Catalog and + our new Vellum Basics Specialty Designer Series Paper on page 46, that I’m sure will carry over to the Annual Catalog as part of our basic staples that I’m seeing a trend in.
The Framed Florets Bundle was an early release suite collection with Fitting Florets Designer Series Paper and Gold Adhesive-Backed Swirls, which have since retired. As of this year, I have decided to keep on board in my craft room products that have retired that were part of a suite collection or promotion, such as Day on the Farm Designer Series Paper from Sale-A-Bration that coordinates with the current On The Farm Bundle on page 34 of the Spring Catalog. When the core products retire, then I will let go of the coordinating items. I’m a current product purist but, why NOT keep the coordinating on board? I also keep any type of glimmer, glitter or foil paper, retired or not. It always makes it way back around again; however, I do pay attention to the colors, i.e., not keeping an In Color after it retires.
I used the fabulous Stitched Greenery Die on my image panel and I need to leave this one out on my desk to use more often. These ‘cover plate’ dies are perfect for adding some spice to any panel.
I love the combination of the various textures showcased and the great dimension. These are my favorite cards to make and are really easy. It’s just a matter of putting all of your elements together with the perfect sketch.
Since the layers are large, it’s just as easy to make two cards as one. These two are obviously exact with different colors used.
As always, your shopping Supplies and Instructions, including measurements, are below.
I started out with my card bases and cut all of the layers to size of the vellum, DSP, and image panel + the Framed Florets die from the Fine Shimmer Paper Pack.
The image panel was embossed with the Stitched Greenery Die.
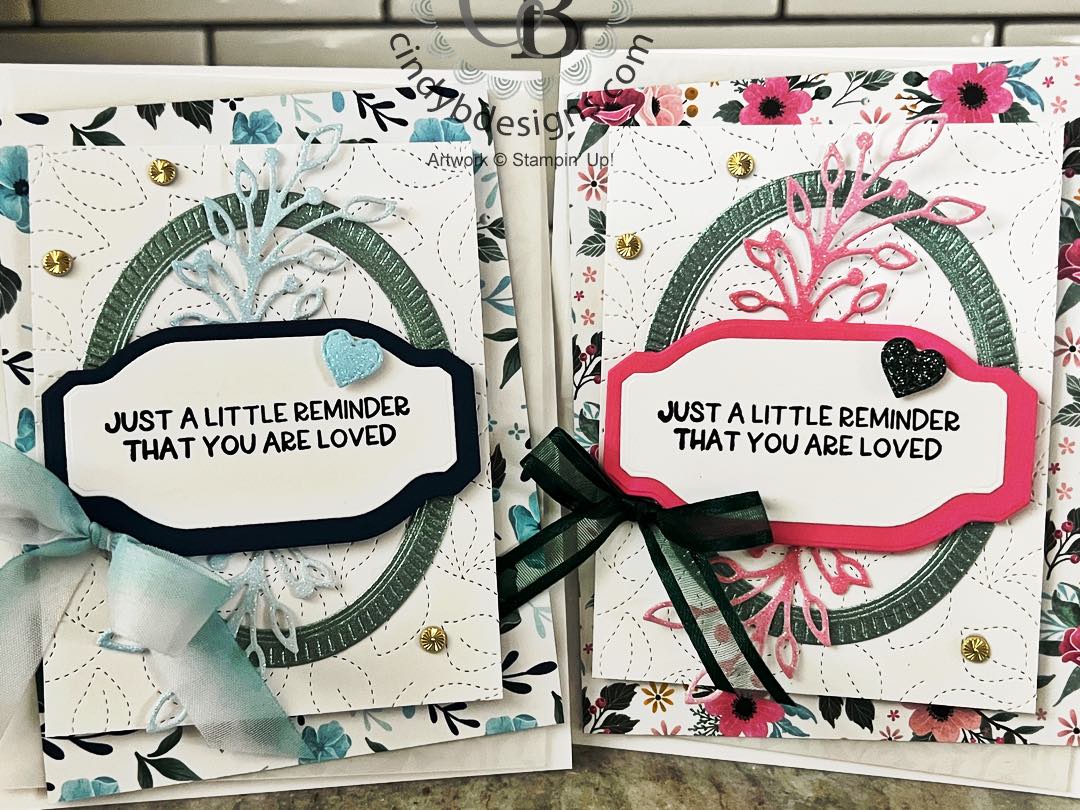
I stamped the sentiment from Framed Florets onto a piece of Basic White Regular CS with Memento Tuxedo Black ink and cut from the 2nd largest Something Fancy die-cut. The sentiment mats were cut from Polished Pink and Night of Navy CS from the largest Something Fancy die-cut.
The large sprigs were cut from Framed Florets using the lightest part of the ombre in the 2022-2024 In Color Glimmer Paper of Sweet Sorbet and Tahitian Tide.
There is a small stitched heart die in Give It a Whirl that I used to cut the Tahitian Tide Glimmer Paper and Textured Shimmer Paper.

For final assembly and to build up the layers to the image panel, it is important where you place your adhesive; I went in the following order:
- The vellum was adhered to the card base with Stampin’ Dimensionals towards the middle of the panel not to show through due to its translucency.
- The DSP panel was adhered to the vellum with Seal Adhesive leaving a margin around the edges to adhere to the vellum.
- The image panel embossed with the Stitched Greenery Die was adhered to the DSP with Stampin’ Dimensionals.
- The Framed Floret frame was adhered to the image panel with liquid adhesive.
- I laid the two floral sprigs with the ends in the center of the Framed Florets frame and adhered them to the card base with Scotch Tape.
- The sentiment panel was adhered to the mat with liquid adhesive and then adhered to the center of the frame with Stampin’ Dimensionals.
- The hearts were adhered with Mini Stampin’ Dimensionals.
- The bows were tied and adhered at the bottom left of the sentiment panel with a Mini Glue Dot.
- Gold Adhesived-Backed Swirls were scattered about the card.
I hope you enjoyed today’s projects and please let me know if you have any questions.
Thank you for stopping by for a visit and have a great day!


|
|
|
|
|
|
|
|||
|
|
")


 Glimmer Paper")
 Paper Pack")
 Shimmer Paper")
 Specialty Designer Series Paper")
 Variegated Ribbon")
 Open Weave Ribbon")
 Designer Series Paper")


|
|
|
|
|
|
|
|
|
|
|
|
|
|
|
|
|
|
|
|
|
|
|
|
|
|
|
|
|


-
- Card base: A2 top-folding 4-1/4 x 5-1/2, Basic White Thick CS.
- Vellum: 4 x 5-1/4, Layering Basics Specialty Designer Series Paper, leafy pattern.
- DSP: 3-3/4 x 5, Fitting Florets DSP.
- Image panel: 3-1/4 x 4-1/2, Basic White Regular CS.
- Sentiment mat: Largest square Something Fancy Dies, Polished Pink and Night of Navy.
- Sentiment panel: 2nd largest square Something Fancy Dies, Basic White Regular CS.