Hello there! Thank you for joining me today for Make the Cards Challenge #63 where our theme is autumn/fall and hope that you join us!
These cards are also a part of Global Design Project #359 with an autumn/fall theme.
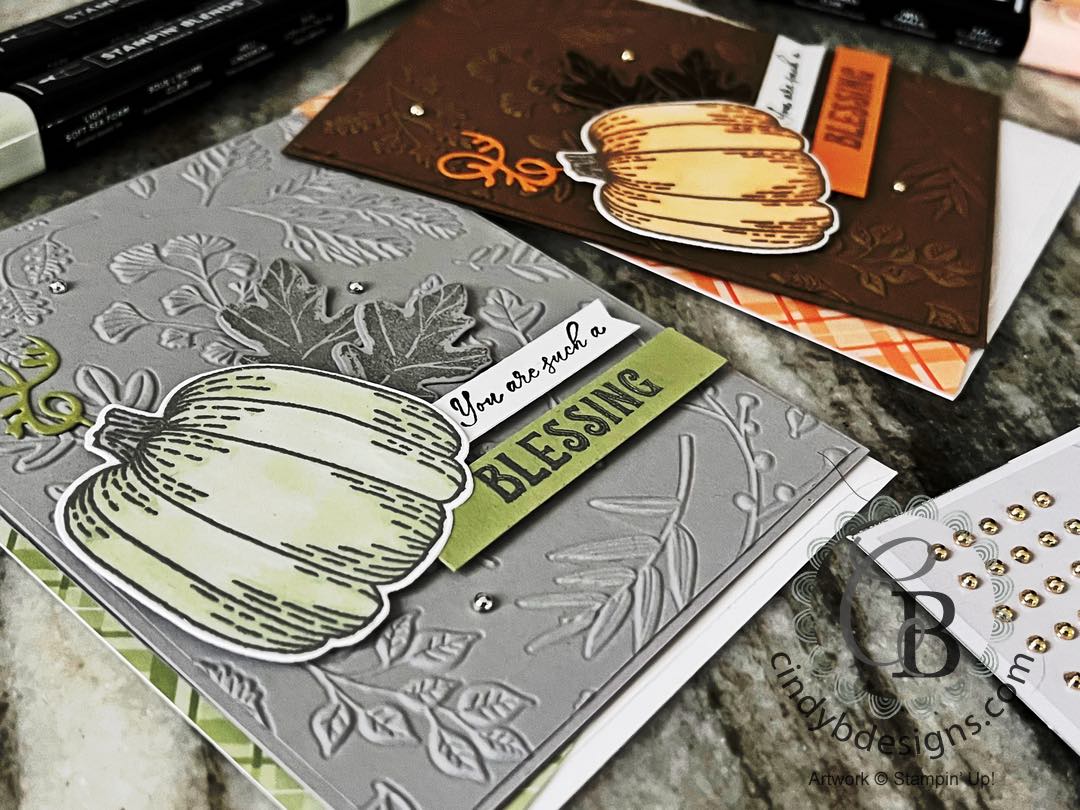
I created 2 cards using products from the Rustic Harvest Suite Collection and brought in Twigs & Springs EF + Festive Pearls with Soft Sea Foam/Smoky Slate and Pumpkin Pie/Soft Suede, which were easy to make despite the detail, with coloring and die-cutting. There is also a lot of heat embossing with silver on the Smoky Slate card and gold on the Soft Suede card.
The sentiment stamp is one stamp. I masked the sentiment to achieve the desired effect. Masking is covering part of the image with our Masking Paper as you ink up to omit other part(s) of the image. You remove the Masking Paper before you stamp.
TIP: Whenever there is black ink or heat embossing on any given image that is colored, I stamp the image FIRST with Smoky Slate or Sahara Sand ink, leave the image on the lid of the Stamparatus, complete my coloring, then re-stamp the image with black ink or Versamark with heat embossing to crisp up the line art AND it’s a foul-proof way to avoid color bleeding/smearing. This works like a charm and is my process, every single time.
All steps of this project were done at the same time using different colors with the accent leaves tone-on-tone.
As always, your shopping Supplies and Instructions, including measurements, are below.
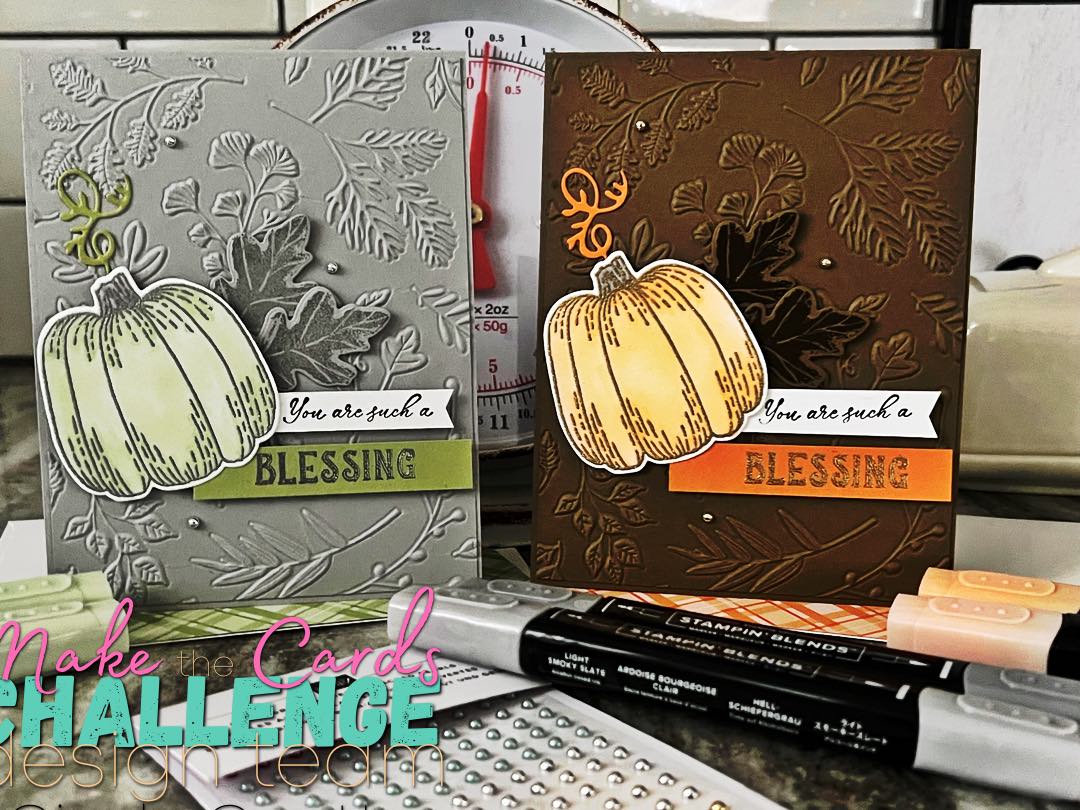
I started out with my A2 card bases in Soft Suede and Smoky Slate.
I cut the image panels to size and ran them both through the deeply etched Twigs & Springs Embossing Folder that was adhered to the card bases with liquid adhesive.
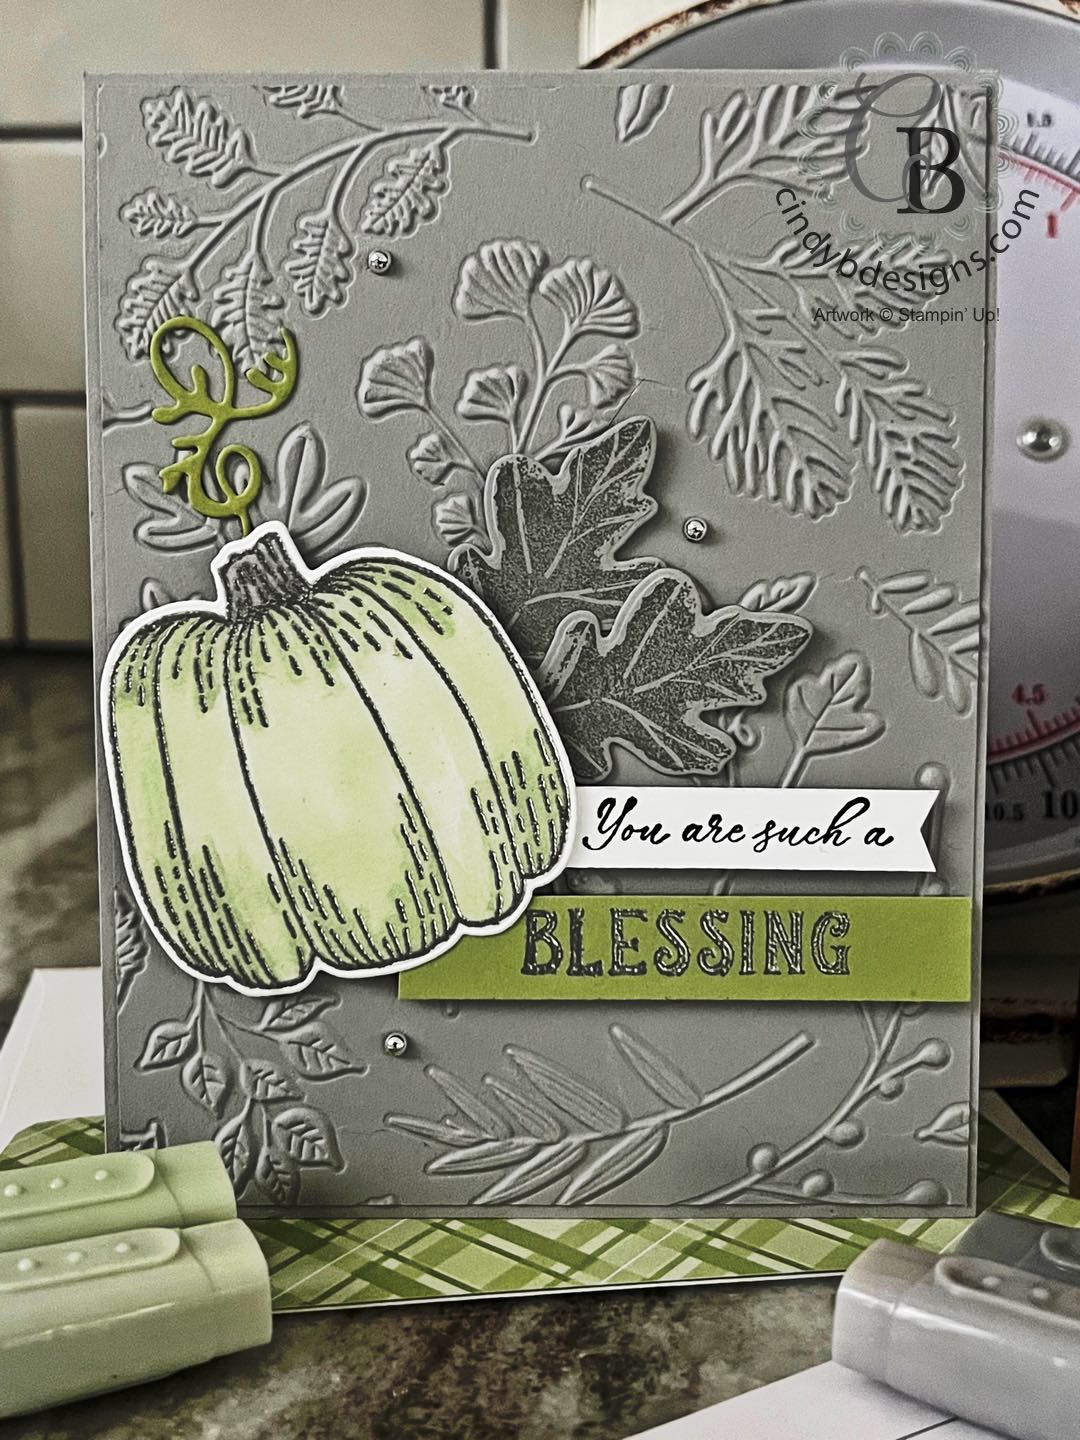
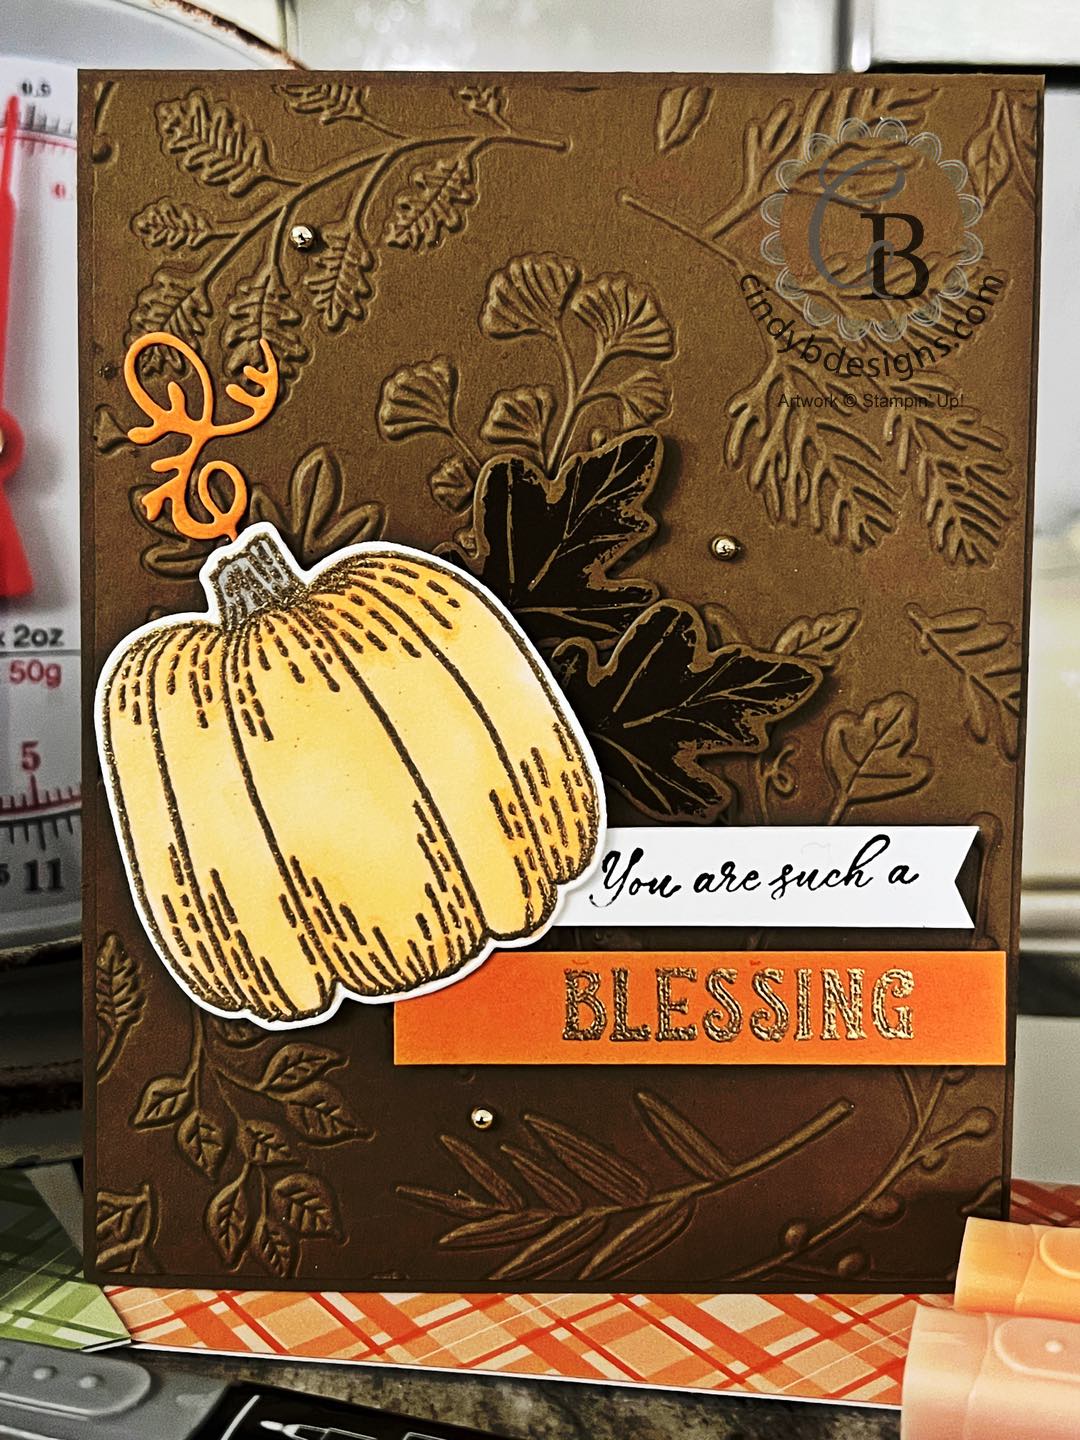
Both pumpkins were stamped onto Basic White Thick CS with Smoky Slate ink. I colored the pumpkins with our Stampin’ Blends in Pale Papaya and Soft Sea Foam. The stems were colored in with Smoky Slate Stampin’ Blends.
I used my Embossing Buddy to coat the cardstock and re-stamped the images with Versamark ink. The Pale Papaya pumpkin was heat embossed with gold powder and the Soft Sea Foam pumpkin with silver powder, heat set, then cut from their coordinating die.
Two accent pumpkin stems were cut from Pumpkin Pie and Old Olive CS.
TIP: With the intricate and smaller die-cuts, I put a piece of Wax Paper between the die-cut and the cardstock then run it through the Stampin’ Cut & Emboss Machine. The cuts are released from the die so much easier with less chance of tearing during removal.
The leaves on the right of the pumpkin were stamped tone-on-tone with Soft Suede and Smoky Slate then cut from their coordinating die.
The masking technique was used on the sentiment with the top half stamped onto Basic White Regular CS in Memento Tuxedo Black ink, cut down to size, and banner punched on the right.
The lower half of the sentiment was stamped onto Pumpkin Pie and Old Olive CS with Versamark ink and heat embossed in gold for the Soft Suede card and Old Olive for the Smoky Slate card and cut to size.
For final assembly, I actually laid down the sentiments first with Stampin’ Dimensionals. I then adhered the pumpkins with liquid adhesive at the bottom right and Stampin’ Dimensionals around the rest of the pumpkin.
The leaves were adhered with a Mini Stampin’ Dimensional at the tip and liquid adhesive at the bottom then tucked under the pumpkin.
The accent stems were adhered with liquid adhesive.
Three gold and silver Festive Pearls were added to embellish as shown.
I hope you enjoyed today’s project and please let me know if you have any questions.
Thank you for stopping by for a visit and have a great day!


|
| ||
| |||
| |||
|
|
|
|
|
|
| |
|
|
|
|
| |||
|
|
|
")


 Designer Series Paper")
 Designer Series Paper")


")


- Card base: A2 top-folding 4-1/4 x 5-1/2.
- Image mat: 4-1/8 x 5-3/8.
- Sentiment 1: 3/8″ wide.
- Sentiment 2: 2-3/4 x 1/2″.