Hello there! Thank you for joining me today for a simple stamping tag card project created from Layering Leaves and the coordinating Bough Punch. I brought in the Something Fancy Dies for my tag sentiment with partial die-cutting to customize the size. This particular sentiment really covers all occasion.
I decided to do rainbow colors with Gray Granite CS, which is a color that I need to start using more. I over look this color by defaulting to Smoky Slate.
My new go-to blue is Azure Afternoon. I love this color and it was one that we badly needed to add to our core colors.
We are offering more flat embellishments to keep the postage to one stamp that will pass through USPS machinery without getting stuck.
As always, your shopping Supplies and Instructions, including measurements, are below.
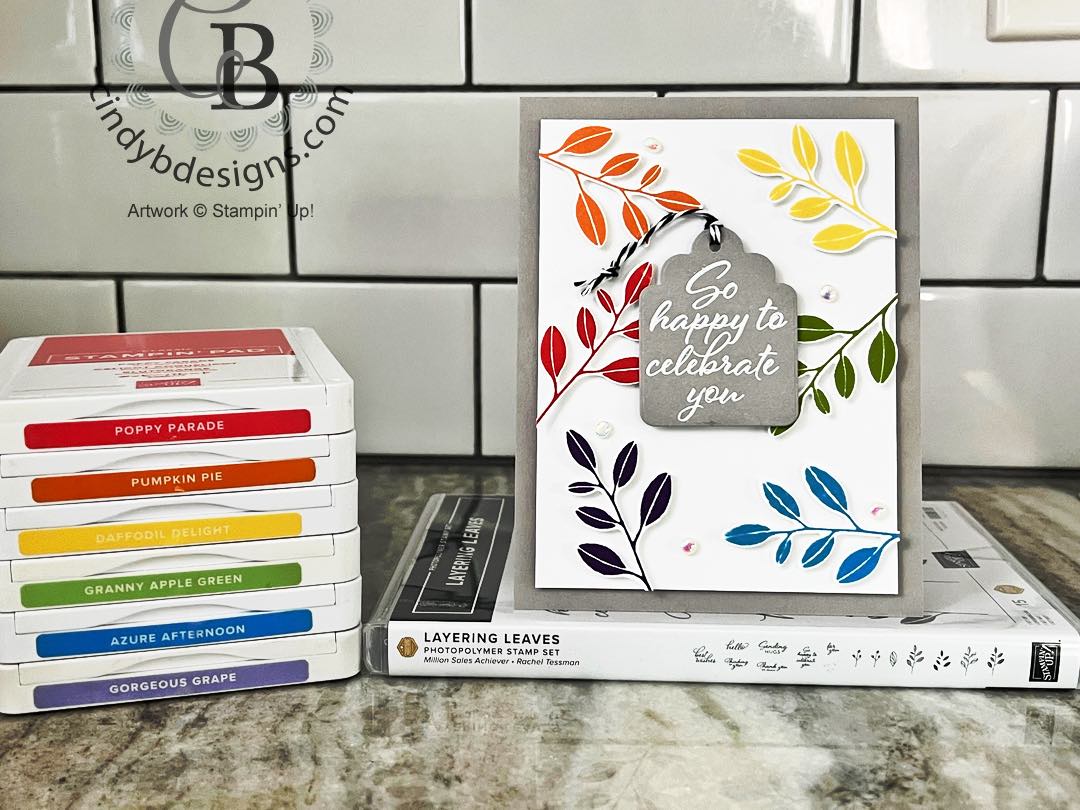
I started out with my Gray Granite card base and then cut my image panel to size.
I then went about stamping my leaf images in the colors shown above. After punching the leaves out with the coordinating Bough Punch, I cut Mini Stampin’ Dimensionals in half and painstakingly adhered them to the back of every single leaf because it had to be done for consistent dimension.
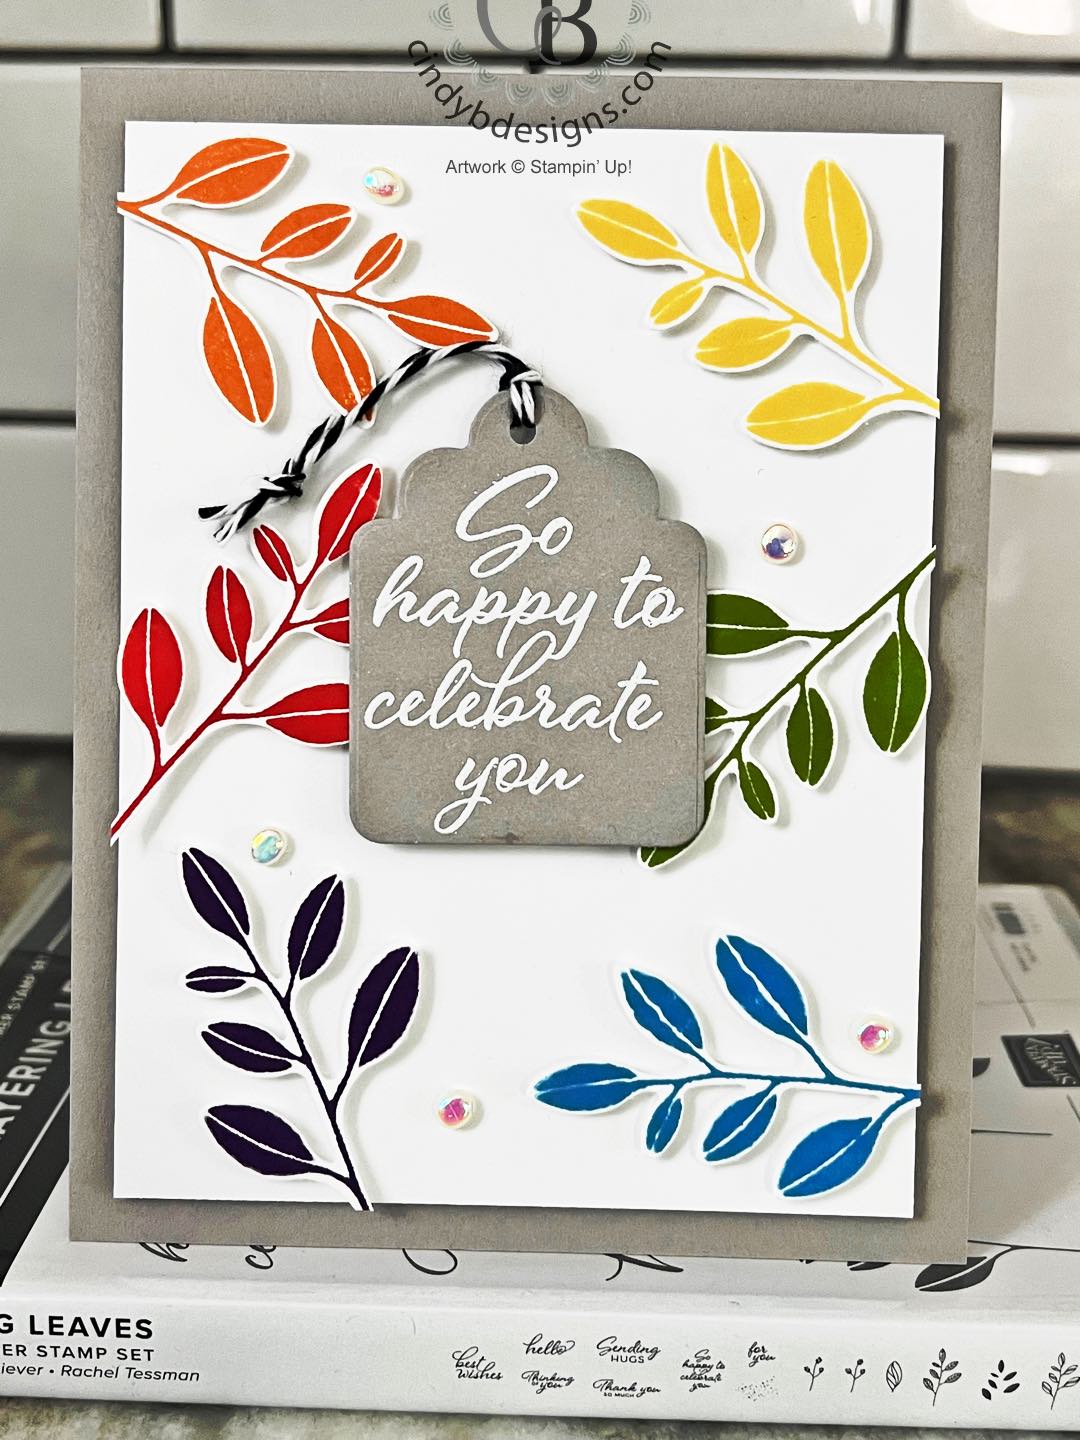
I adhered the leaves to the image panel as shown above and cut the stem ends with my Paper Snips.
For the partial die-cutting technique, I stamped the sentiment from Layering Leaves onto Gray Granite CS with Versamark ink and white heat embossed. I used the smallest scallop top tag from Something Fancy die-cuts to cut the sentiment. I then moved the die-cut up to under the ‘you’ and cut the sentiment again running it through the Stampin’ Cut & Emboss Machine. Partial die-cutting is a great way to get more out of your die-cuts.
I punched a hole at the top of the tag and tied some black and white twine through.
Since this card has so much height to it, I cut 2 pieces of our Foam Adhesive Strips and adhered them right down the middle of the tag. Our Foam Adhesive Strips are a tad bit higher than Stampin’ Dimensionals helping the tag to rest more even atop of the leaves.
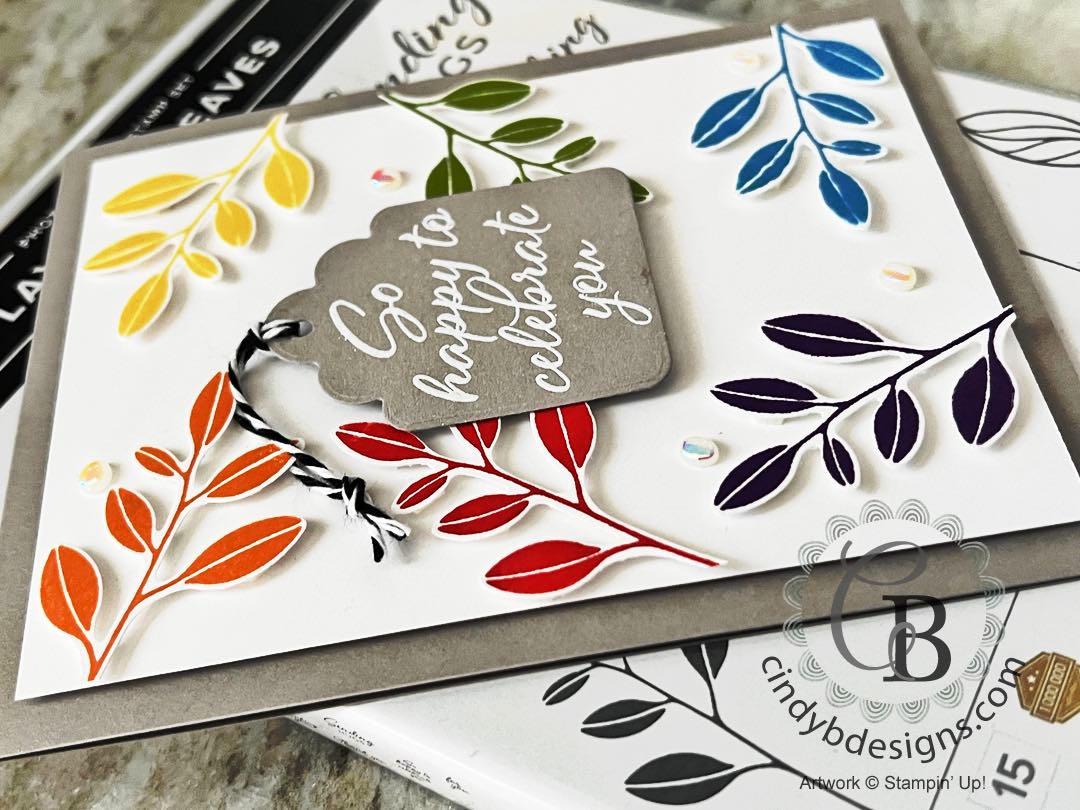
To embellish, I scattered 5 Flat Adhesive-Backed Pearls on the image panel.
I think I’m going to turn this one into a FB live or video as a beginner, seasoned, and avid card.
I hope you enjoyed today’s project and please let me know if you have any questions.
Thank you for stopping by for a visit and have a great day!


|
|
|
|
|
|
|
|||
|
|
|||
|
|
")


|
|
|
|
|
|
|
|
|
|
|
|
|
|
|
|
|
|
|
|
|
|
|
|
|
|
|
|
|


- Card base: A2 top-folding 4-1/4 x 5-1/2, Gray Granite.
- Image panel: 3-3/4 x 5, Basic White Regular CS.