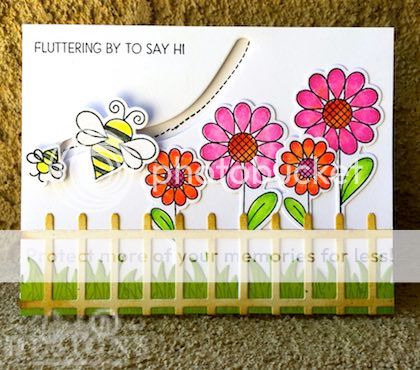
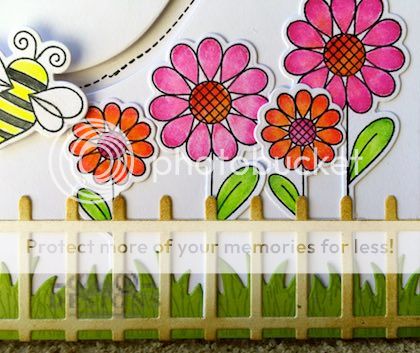
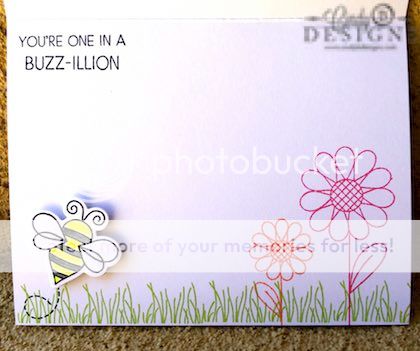
Hello there my friends. Today I have made you a very fun interactive card with slider die-cuts. This was a lot of fun and the first time I've made this type of card. I also had to break out my Prismacolor Colored Pencils, that fabulous 150-pack, and use them coloring my images using Gamsol and paper blending stumps. It's a great scene card and as you know, I've been trying to work at creating them more. They are a bit time-consuming, but always well worth it in the end.
I'm also using this card for My Favorite Things Camp Create, Day 2, slider cards.
I talk in part of this video, sped up the actual coloring process, and then we put the card together. I did have to fix a few mistakes along the way, but showed you how I fixed them. It was a result of not necessarily poor planning, but just adhered a fence down before I should of. In the long run, I think this worked in my favor for better flower placement in my scene.
I hope you enjoy this video and the card that I made. I had a lot of fun with it adding additional details along the way that really define the card.
Here are the Prismacolor Colored Pencils name and number that I used for my project:
BUMBLEBEE: Cool Grey PC1065, Cool Grey PC1067, Lemon Yellow PC915, Neon Yellow PC1035
FLOWER LEAVES: Apple Green PC912, Spring Green PC913
PINK FLOWER: Hot Pink PC993, Process Red PC 994
ORANGE FLOWER: Cadmium Orange PC118, Permanent Red PC122
Thank you so much for stopping by today to visit me and God bless!
In the spirit of full disclosure to FTC Declarations, affiliate links are used when applicable to My Favorite Things Stamps, Stampin' Up! and Amazon.