Hello there! Thank you for joining me today for a card created from the Saint Nicholas Bundle with it’s coordinating Online Exclusive Traditions of St. Nick Designer Series Paper + so many other products from the Annual and Holiday Catalogs to make my vision come to life for this project and to play along with the Global Design Project #419 challenge theme of Tis The Season. I would also like to thank the GDP Design Team for choosing my #418 card as a Winner.

I used various Saint Nicholas Dies to create a double fireplace (surround), mantel, hearth, and firebox insert|opening, which were designed as a chimney. The standalone die-cuts are fabulous in Saint Nicholas that can be used to accent Santa and the chimney. You can find this bundle on pages 10-11 in the Holiday Catalog.
As always, project specific supplies with basic supplies are below.
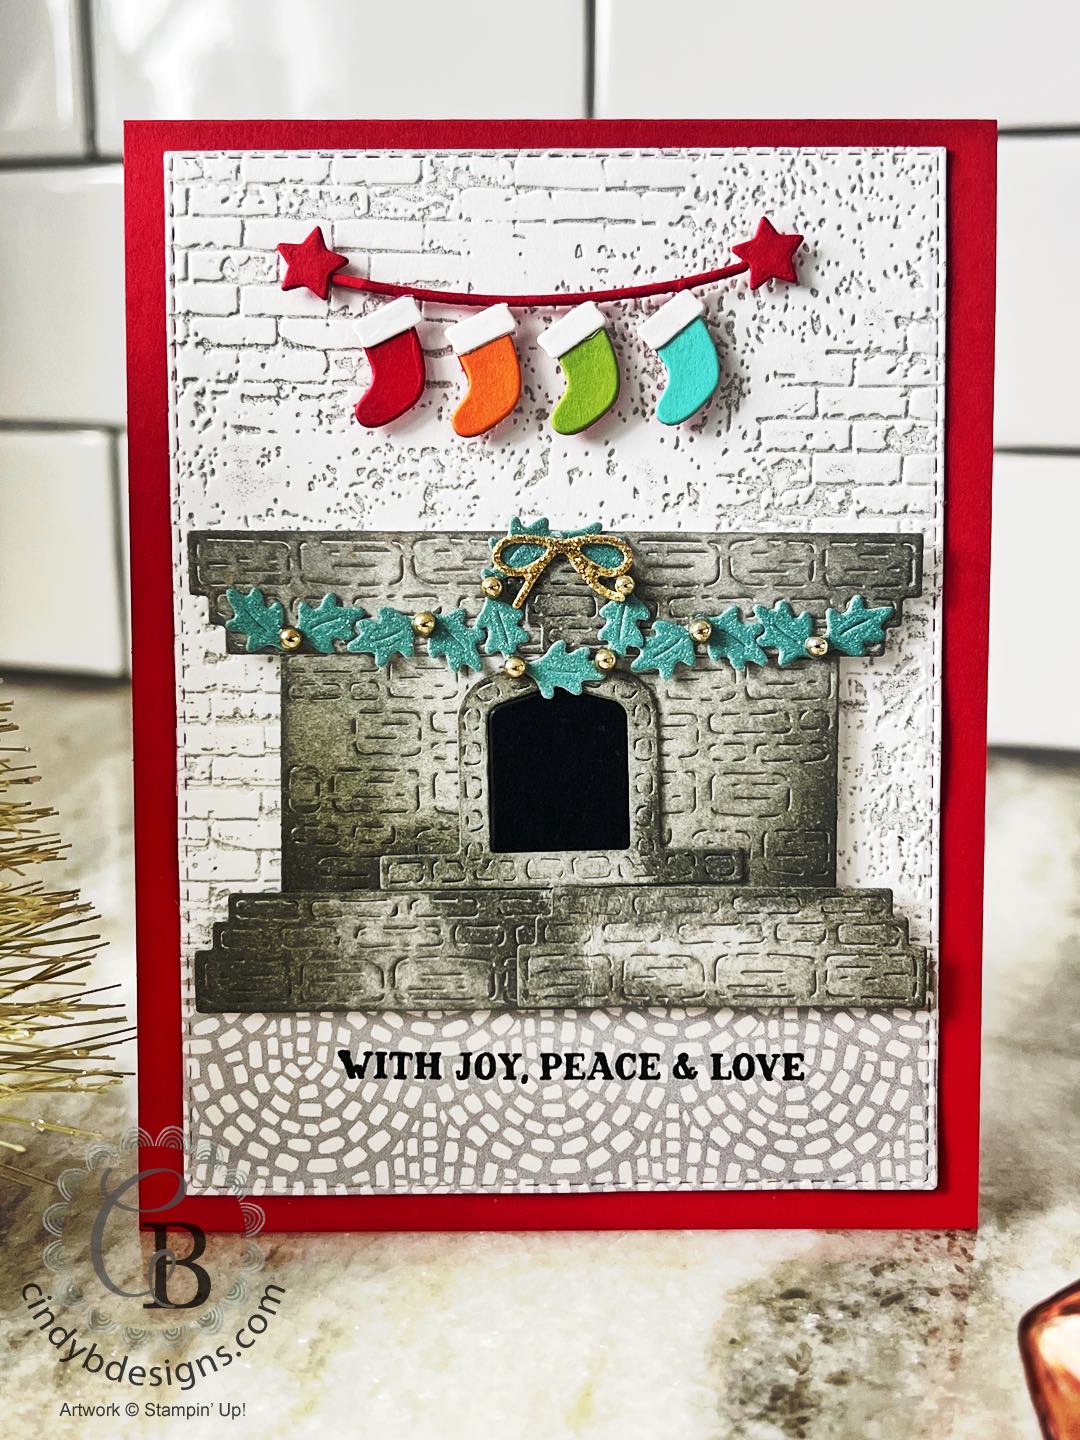
I started out with my A2 top-folding Real Red card base. I cut a piece of Basic White Regular CS out of the largest Stitched Rectangles Die. I inked up the back side of the Exposed Brick 3D EF with Smoky Slate ink and ran this through the Stampin’ Cut & Emboss Machine to imprint the ink into the grooves of the EF.
I then cut a piece of Les Shoppes Designer Series Paper for my sentiment that was stamped in Memento Tuxedo Black Ink from the Saint Nicholas stamp set. I cut DSP from the largest Stitched Rectangle Die and adhered this to the embossed CS with liquid adhesive that was then adhered to the Real Red card base with Seal Adhesive.
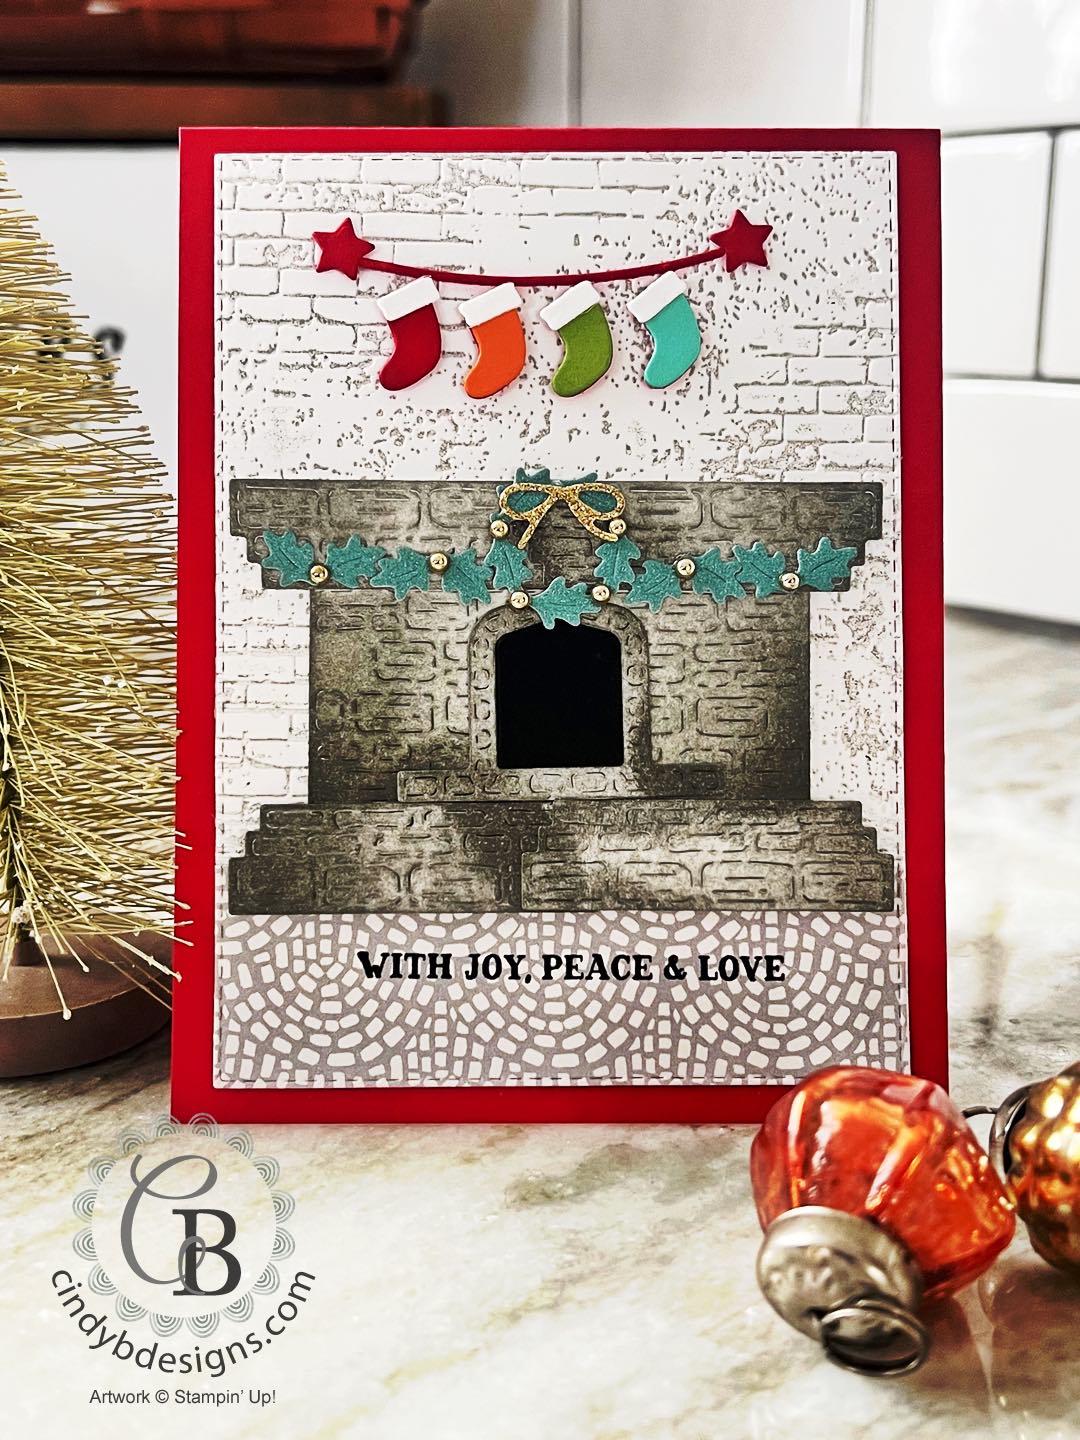
I then went about cutting my fireplace pieces from Basic White Regular CS. The mantel and the hearth were cut from the same die x4. The surround was also cut x2 from Basic White Regular CS. The firebox surround was cut from Basic White Regular CS with the firebox insert cut again from Basic Black CS to inlay.
I first ink blended all of these pieces with Smoky Slate ink using a Blending Brush. I then went back over the pieces with a little bit of Basic Gray ink.
I adhered the square surrounds together with Scotch Tape on the back and then adhered the mantel and hearth with liquid adhesive. The firebox surround and inlaid insert were adhered atop the hearth with liquid adhesive.
The fireplace was adhered to the card base with Stampin’ Dimensionals.
I cut my line of stockings from Real Red, Pumpkin Pie, Granny Apple Green, and Coastal Cabana CS with the tops from Basic White Regular CS. I trimmed the Pumpkin Pie, Granny Apple Green, and Coastal Cabana stockings and adhered them to the Real Red CS line of stockings with liquid adhesive. The tops of the stockings were adhered with liquid adhesive. The entire line of stockings was adhered above the mantel with Mini Stampin’ Dimensionals.
I die-cut the Cracker & Treat Box Dies stars out of Real Red CS and adhered them to each side of my stocking line with Mini Stampin’ Dimensionals.
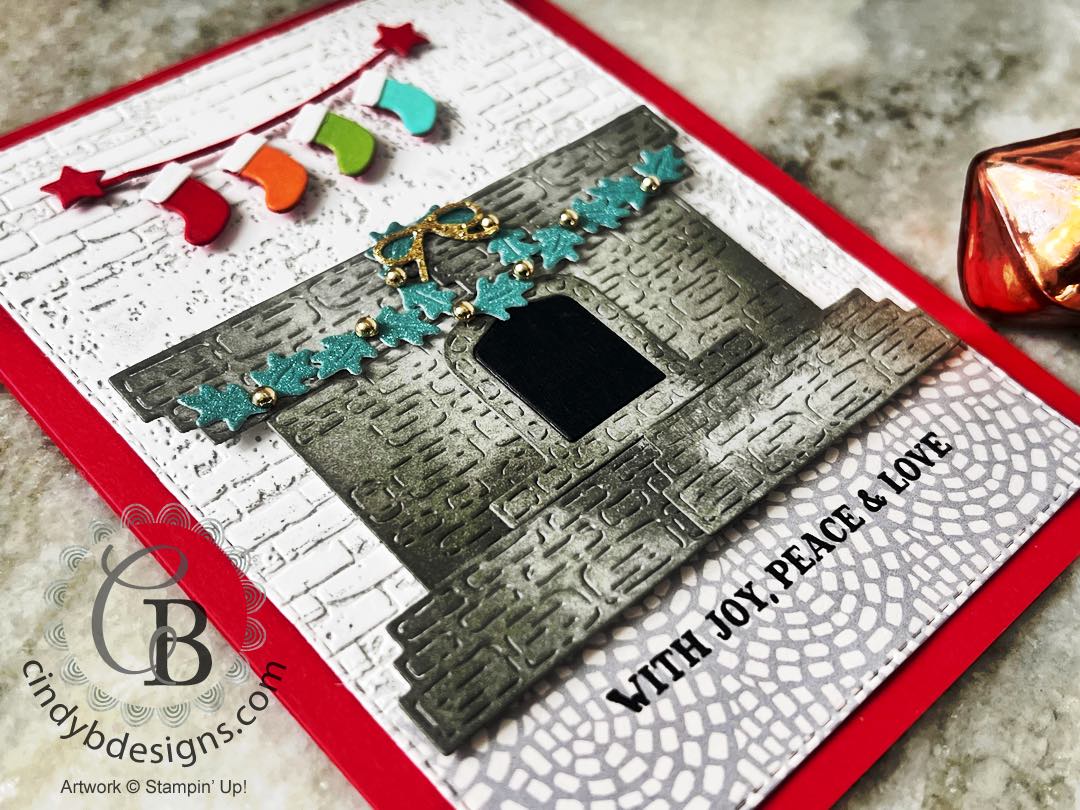
For final assembly and embellishment, I cut several of the standalone leaf clusters and wreath from Lost Lagoon Soft Shimmer Paper Combo Pack out of the Saint Nicholas Dies. The Online Exclusive Gold Adhesive-Backed bow was cut from Merriest Trees Dies. The wreath and the leaves were arranged and adhered to the mantel with Mini Glue Dots.
Gold Festive Pearls were used to embellish.
I hope you enjoyed today’s project and please let me know if you have any questions.
Thank you for stopping by for a visit and have a great day!


|
| ||
|
| ||
")


 Designer Series Paper")
 Adhesive Backed Glimmer Paper")
 Specialty Paper")
 Designer Series Paper")


|
| ||
|
| ||
|
|
|
|
|
|
| |
|
| ||
|
|
| |
| |||
|
|
| |


")