Hello there! Thank you for joining me today for a focus on an old school technique of tearing your card stock, which is so simple to do and adds a little something to any project.
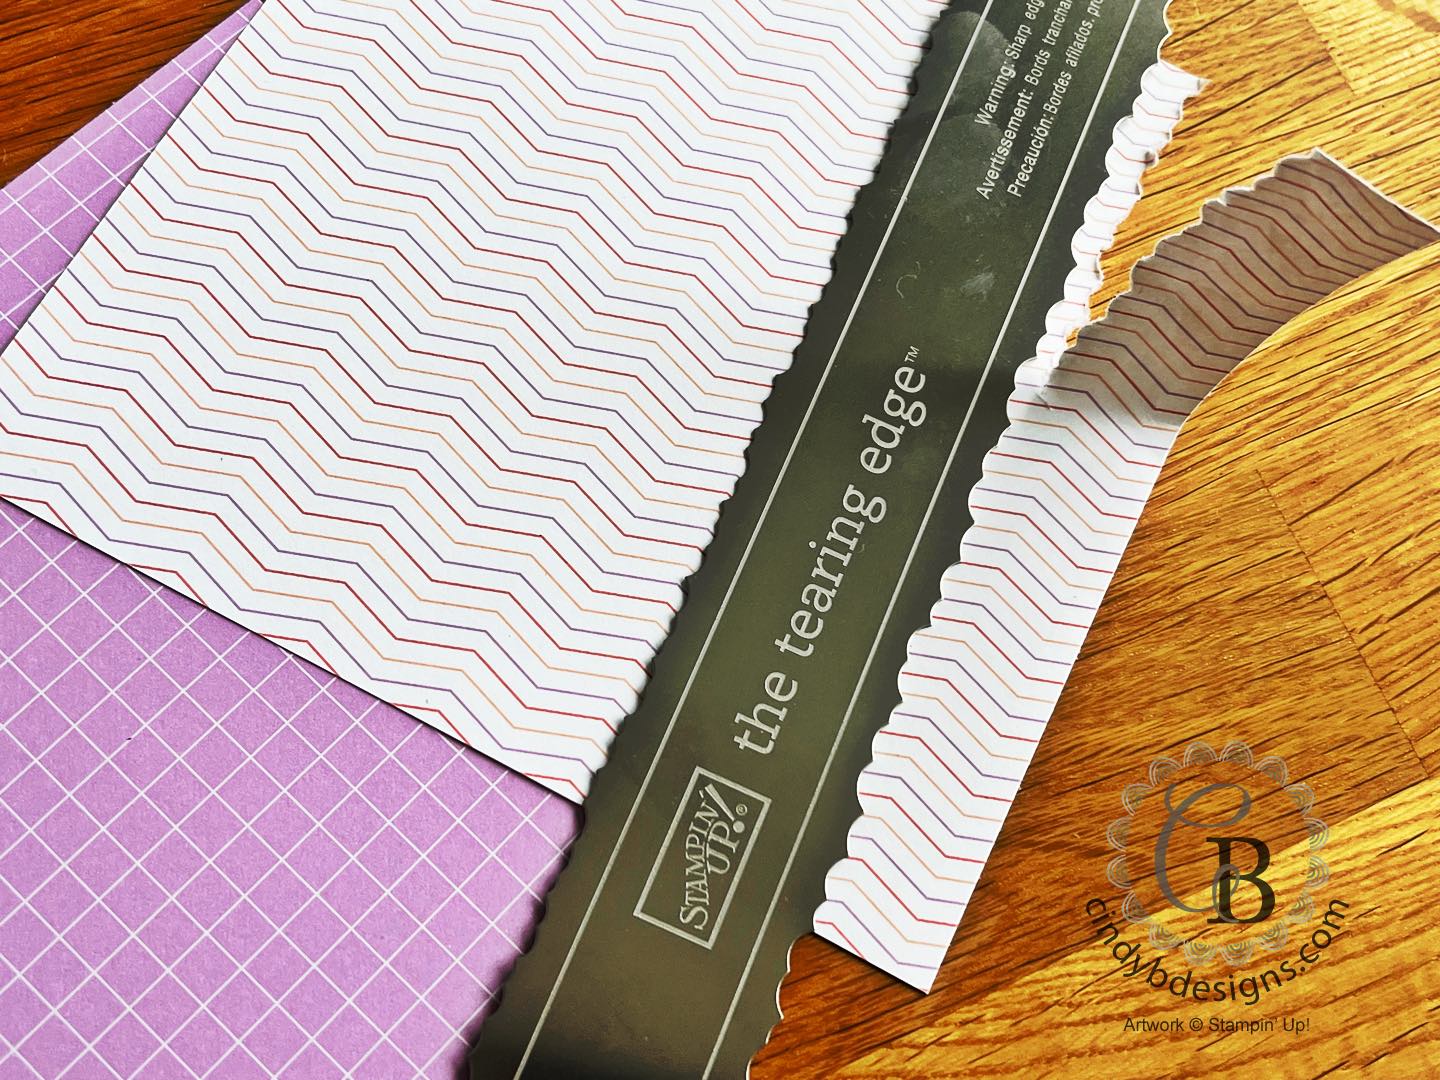
There are so many ways to tear your paper from using die-cuts, deckled tear ruler or other tearing tools, all of which are inexpensive OR the old fashioned way of using your fingers. Here, I used the The Tearing Edge by Stampin’ Up! that retired about a decade+ ago. I always keep these types of tools in my craft room that I consider staples, like our Envelope Punch Board, etc.
For today’s celebratory/birthday card project, I used the Share a Milkshake Bundle on pages 12-13 of the Spring Mini, Vellum Basics Specialty Designer Series Paper on page 46 of the Spring Mini, Fine Shimmer Paper Pack on page 15 of the Spring Mini, and Dandy Designs Designer Series Paper on page 14 of the Sale-A-Bration Brochure, along with some jewels, Baker’s Twine, and ribbon.
As always, your shopping Supplies and Instructions, including measurements, are below.
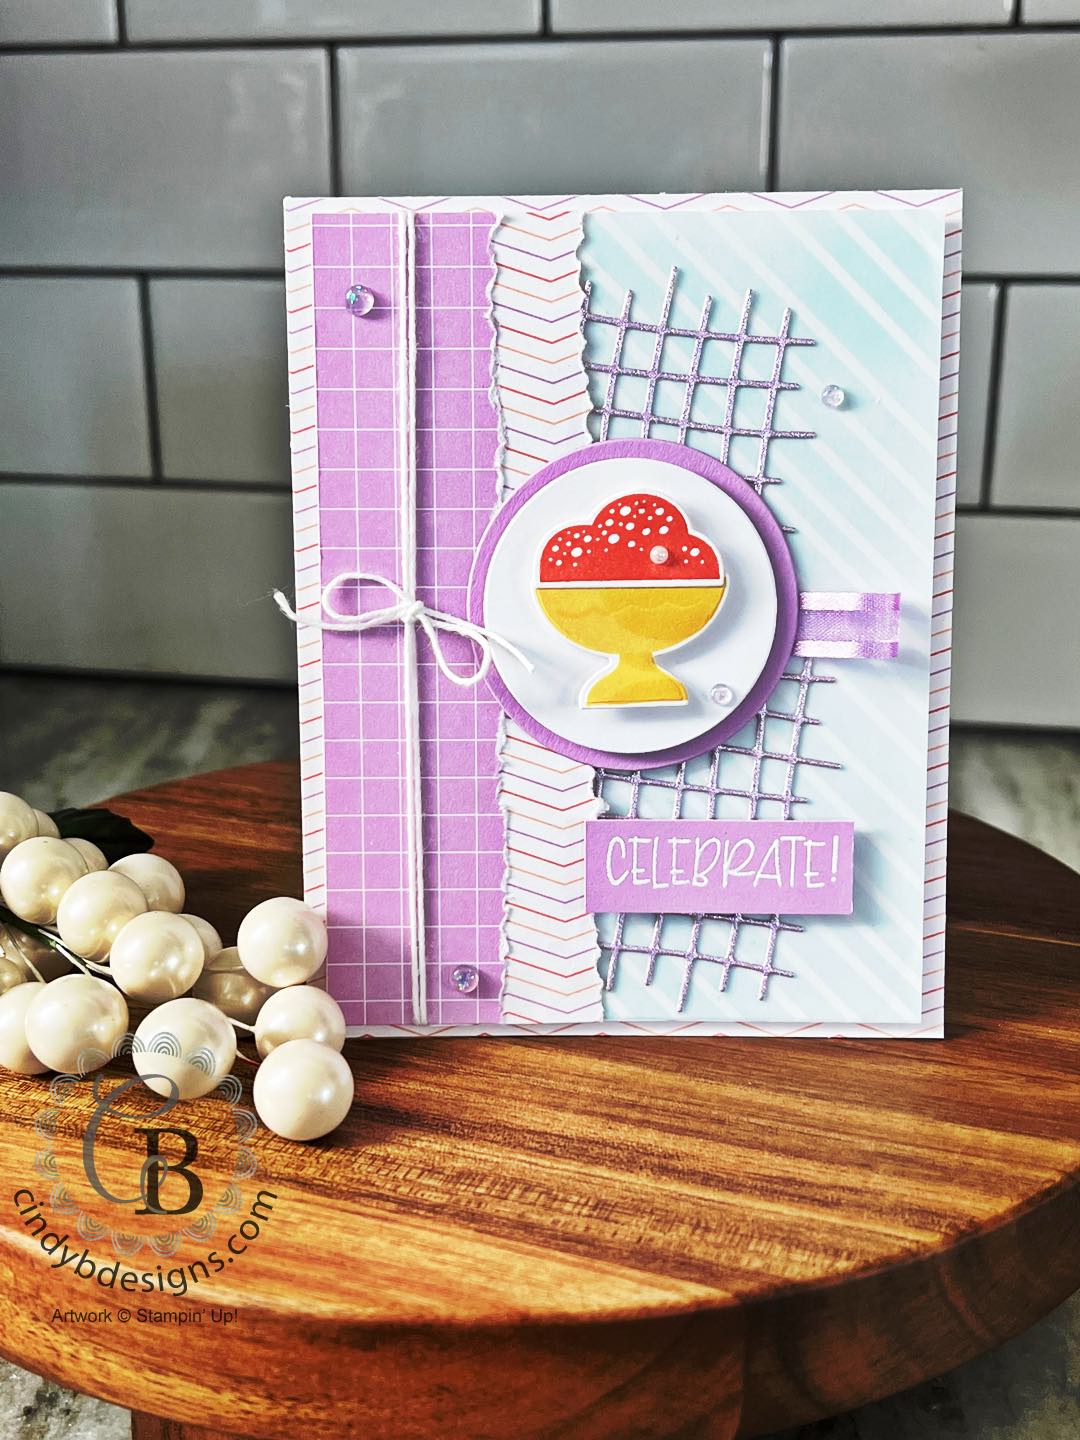
I started out with an A2 Basic White Thick CS base and layered on a piece of Dandy Designs DSP, which is an absolute favorite of mine and one that I wish would be current long past the end of this month, with liquid adhesive.
I cut a piece of Basic White Regular CS to size and used an Adhesive Sheet to adhere the Vellum Basics Paper to. I used a large Blending Brush inked up with Balmy Blue and added color to the vellum.
From the Share a Milkshake Dies, I cut two standalone grate-looking accents from Fresh Freesia Fine Shimmer Paper
I tore my DSP using The Tearing Edge.
I measured my DSP and die-cuts and adhered the dies with liquid adhesive as shown below.
I then adhered the lined DSP with liquid adhesive with the Fresh Freesia square DSP at the far left of the image panel with liquid adhesive.

I tied our White Baker’s Twine around the image panel at the left and into a bow.
I went about stamping and die-cutting my image mats, image, and sentiment.
The ice cream bowl was stamped in So Saffron and Daffodil Delight with the ice cream scoop in Calypso Coral.
The sentiment was stamped with Versamark ink onto Fresh Freesia CS and heat embossed with white powder. I used my Paper Trimmer to cut to size.
I cut my image panel mats to size from Layering Circles Dies from Fresh Freesia and Basic White Regular CS.

For final assembly, I looped a small piece of Fresh Freesia Open Weave Ribbon behind the largest image panel mat that was secured with Scotch Tape. This was adhered to the card base with Seal.
I added Stampin’ Dimensionals to the back of the Basic White image panel and adhered it to the larger circle.
The stamped image was also adhered with Stampin’ Dimensionals.
Four Fresh Freesia Opal Rounds were scattered about the card to embellish.
I hope you enjoyed today’s project and please let me know if you have any questions.
Thank you for stopping by for a visit and have a great day!


| |||
|
| ||
|
|
")

 Designer Series Paper")
 Paper Pack")
 Specialty Designer Series Paper")

 Open Weave Ribbon")


")

| |||
|
|
| |
|
|
| |
|
|
|
|
| |||
|
|
|


- Card base: A2 top-folding 4-1/4 x 5-1/2, Basic White Thick CS.
- Card base DSP: 4-1/4 x 5-1/2, Dandy Designs DSP.
- Image panel: 4 x 5-1/4, Basic White Regular CS.
- Left panel DSP: Before tearing 1-1/4 x 4, Dandy Designs DSP.
- Middle panel DSP: 1 x 4, Dandy Designs DSP.
- Left panel: 2-1/2 x 4, Vellum Basics DSP.
- Image mat: 2-3/8 Layering Circle Die at its widest point, Fresh Freesia CS.
- Image panel: 2-1/8 Layering Circle Die at its widest point, Basic White Regular CS.