Hello there! Thank you for joining me today for two projects featuring the Awash in Beauty and Hues of Happiness Suite Collections.
I brought in the new Holiday Catalog Black & White Designs and Rustic Harvest Designer Series Paper, all of which is available to you TODAY.
The Host Design a Daydream Designer Series Paper and 2021-2023 In Color Opal Rounds from the Annual Catalog were used to embellish both cards. All of our designer series paper has great lines and coordinates easily with our products.
There are no 2021-2023 In Colors used on this card, but I used the Opal Rounds in Pale Papaya, Soft Succulent, and Evening Evergreen to embellish, much like the In Color Rhinestones that I used on everything last year, which coordinated perfectly with everything.
As always, your shopping Supplies and Instructions, including measurements, are below.
For today’s cards, I will list the Instructions and measurements under each card.
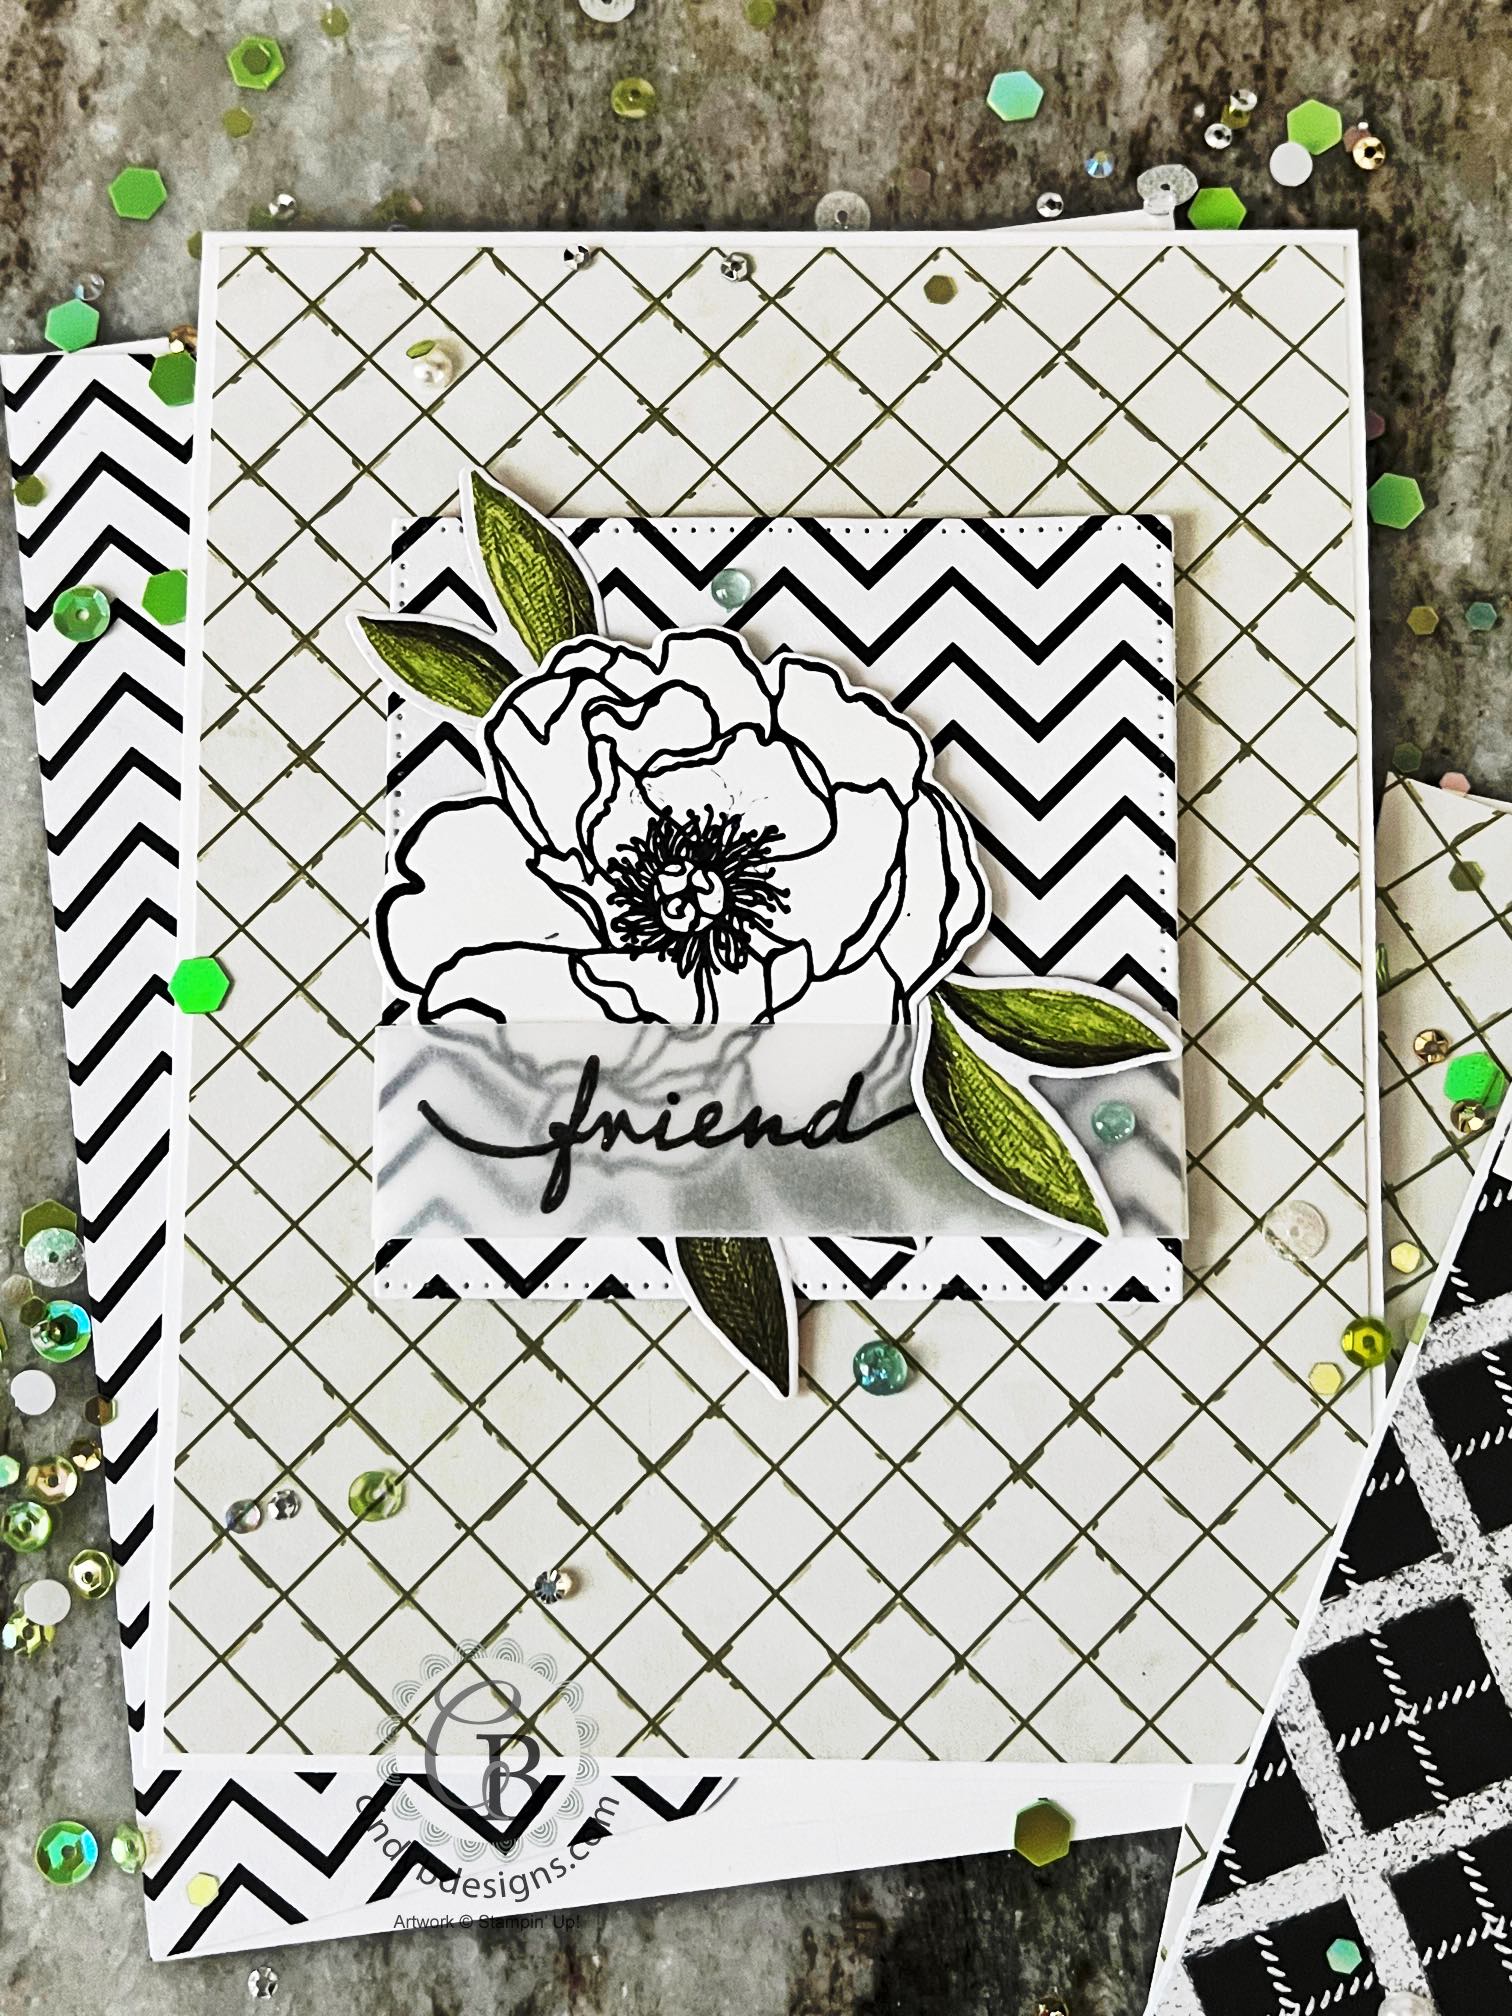
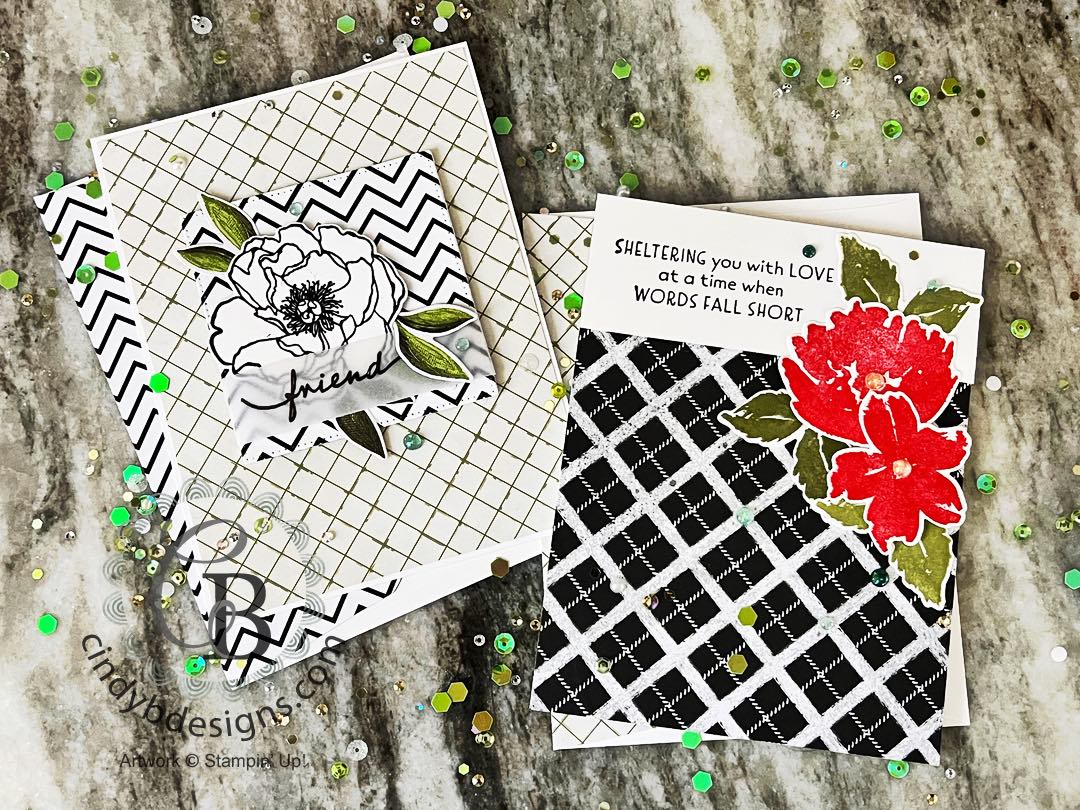
I used my faux black heat embossing technique on this card for the image and sentiment. Black powder for heat embossing is messy, especially onto surfaces that do not absorb leaving you with a wet image that will smear. To combat that, I stamp whatever I want to have the black heat emboss look with Memento Tuxedo Black. The key is to use clear embossing powder over the black ink and heat set. Super easy with the same results and definitely less mess and frustration.
You can definitely see the raised clear embossing on the image and sentiment. You can use clear embossing powder to spice up any of our ink colors.
The rose from Hues of Happiness was stamped onto Basic White Regular CS with Memento Tuxedo Black ink, clear embossed, then cut from its coordinating die.
I started out with an A2 card base and layered on a piece of Dream a Daydream DSP with Seal.
The leaves were cut from the Hues of Happiness DSP.
The image panel square was cut from Black & White Designs DSP.
For final assembly, I adhered the flower to the image panel square with Stampin’ Dimensionals. I wrapped the vellum sentiment around the image panel and secured the back to the image panel with Scotch Tape. I tucked the leaves in around the flower as shown.
The image panel was adhered to the center of the card base with Stampin’ Dimensionals and embellished with opal rounds in Soft Succulent.

- Card base: A2 top-folding 4-1/4 x 5-1/2, Basic White Thick CS.
- Card base mat: 4-1/8 x 5-3/8, Design a Daydream DSP.
- Image panel: Cut from the largest Stylish Shapes square, Black & White Designs DSP.
- Sentiment panel: 5 x 3/4″, Vellum CS.
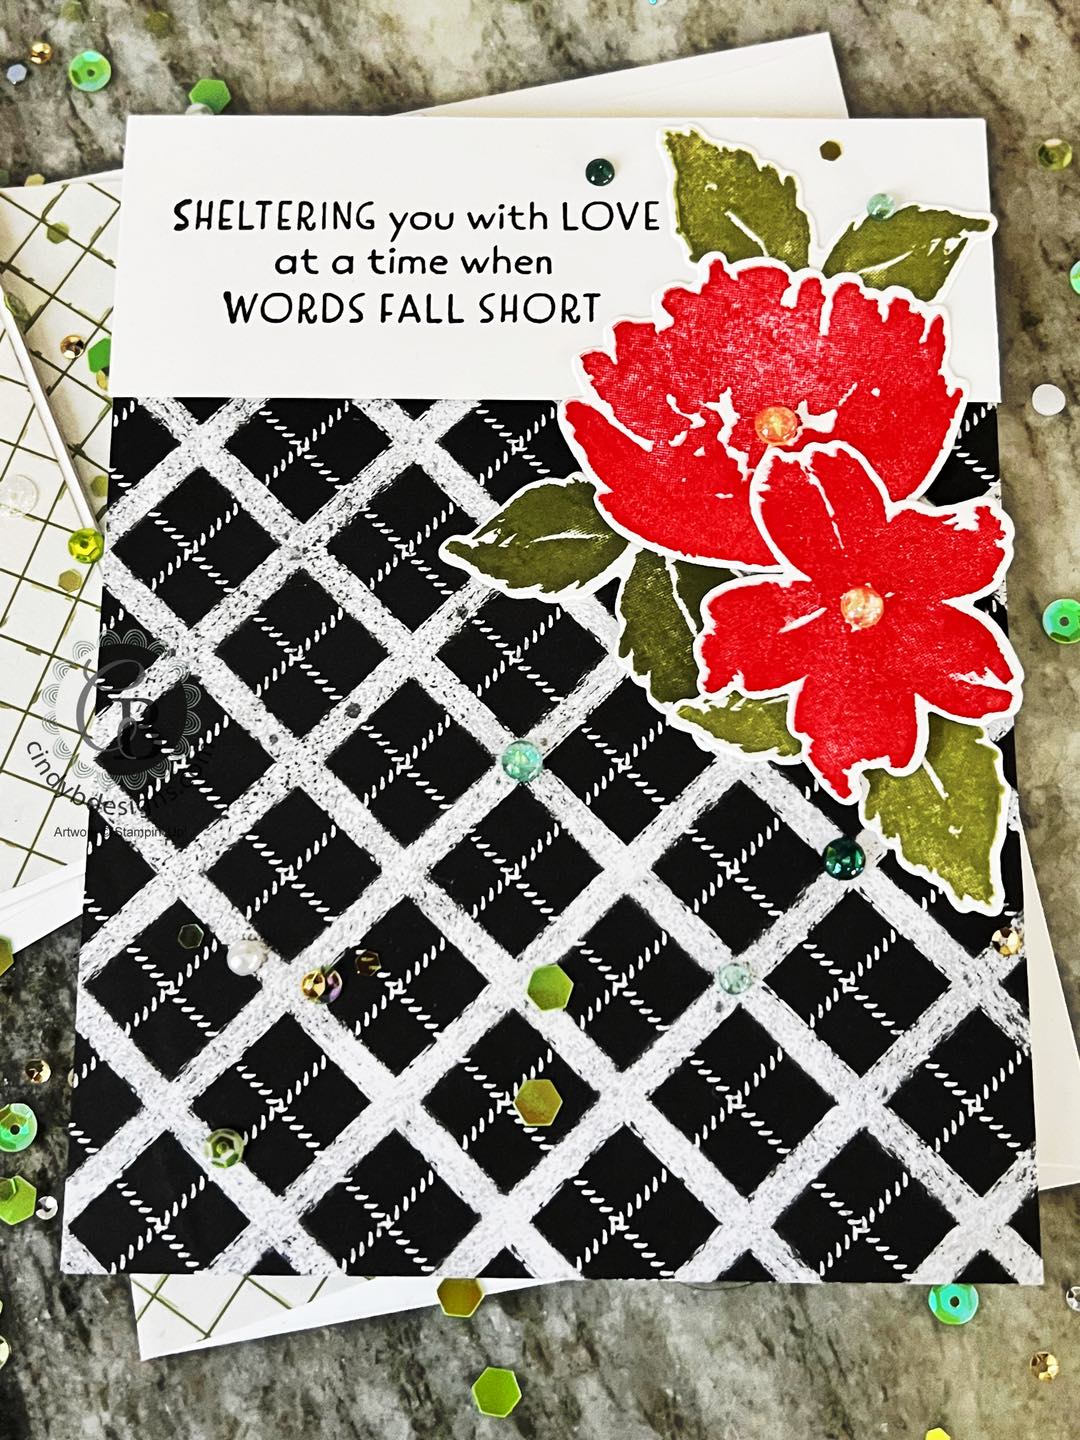
This card was very easy to put together. I started out with my card base and layered a piece of Rustic Harvest DSP on with Seal.
The sentiment was stamped from Inspired Thoughts in Memento Tuxedo Black at the left onto a piece of Basic White Regular CS and adhered to the card base with Stampin’ Dimensionals.
I stamped 2 flowers from True Beauty, which is the stamp set in the Awash With Beauty Suite Collection, onto Basic White Regular CS with Poppy Parade ink that were cut from their coordinating dies. I stamped 2 of the leaf images in Pear Pizzazz ink with the other in Old Olive, the cut from their coordinating dies.
For final assembly, the flowers were adhered to the card base with liquid adhesive and Stampin’ Dimensionals. The leaves were adhered with liquid adhesive.
Two large Pale Papaya Opal Rounds were used for the flower stamens with various shapes of Opal Rounds in Soft Succulent and Evening Evergreen to embellish.
- Card base: A2 top-folding 4-1/4 x 5-1/2, Basic White Thick CS.
- Card base mat: 4-1/4 x 5-1/2, Rustic Harvest DSP.
- Sentiment panel: 4-1/4 x 1-1/2, Basic White Regular CS.
I hope you enjoyed today’s project and please let me know if you have any questions.
Thank you for stopping by for a visit and have a great day!


|
|
|
||
|
|
|
||
|
|
|
|
|
|
|
|
|
|
|
|
|
|
|
|
|
|
|
|
|
|
|
|
|
|
|
|
|
|
|
|
|
")
")


 Host Designer Series Paper")


")


