Hello there! Thank you for joining me today for a project created with the Pretty Pumpkins Bundle and Heartfelt Wishes stamp set with a fantastic sketch + the amazing Peaceful Place Specialty Designer Series Paper.
I colored in the line art images with our Stampin’ Blends using an autumnal palette.
As always, your Supplies and Instructions are below.
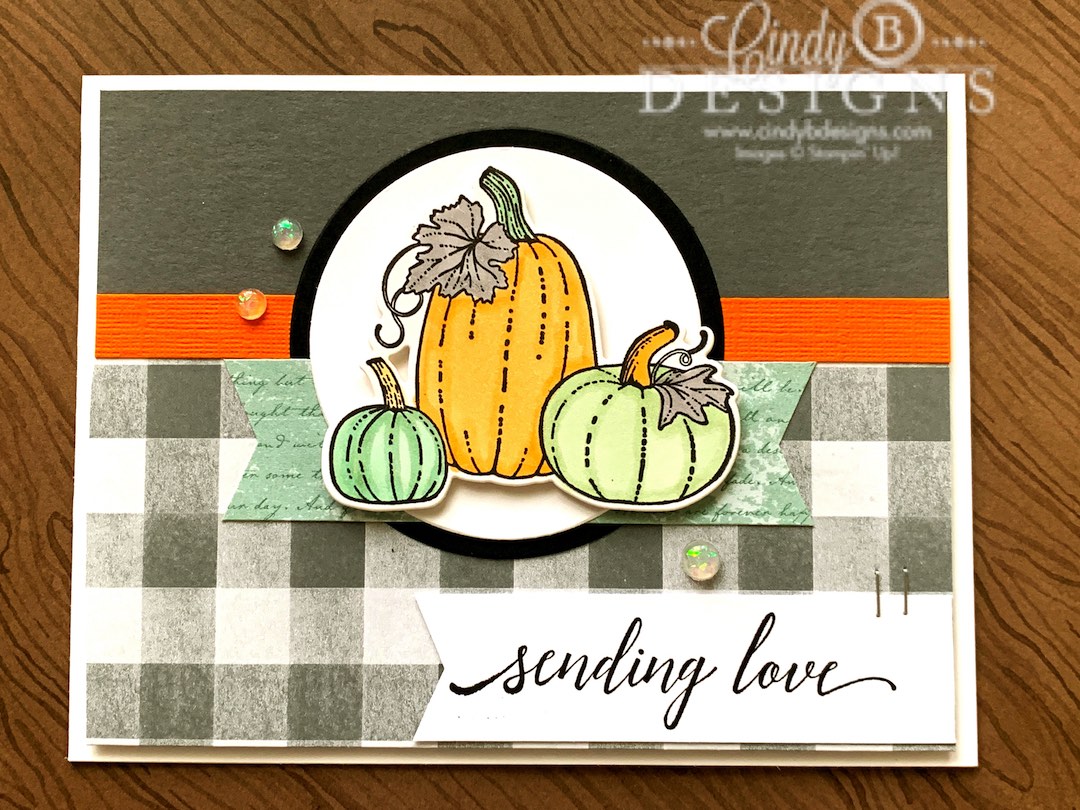
I started out with a landscape A2 Basic White Thick card base. I cut a piece Buffalo Plaid pattern from the Peaceful Place Specialty Designer Series Paper. Note below in the Instructions that this mat is not the usual size that I cut. I adhered Basic Gray CS to the top of the plaid mat and a textured piece of Pumpkin Pie CS below that.
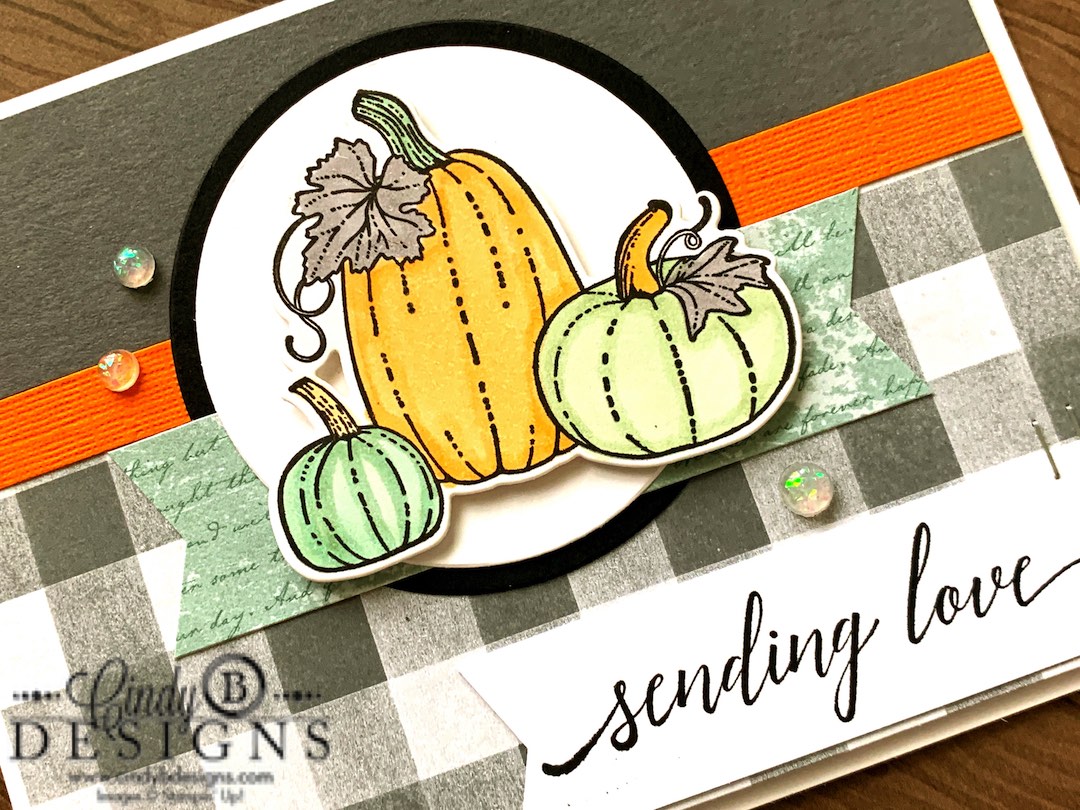
If you look at the above picture, you can see how I layered up this card from the base with the Layering Circles, banner, and image.
I cut a Basic Black Circle from Layering Circles and adhered that to the plaid mat. I cut a banner from Harvest Meadow DSP and adhered that across the Basic Black circle. I then cut another circle from Basic White CS that was adhered to the Basic Black circle mat.
I stamped the pumpkin line art image from the Pretty Pumpkins Bundle with Smoky Slate onto Basic White Thick CS. ALWAYS leave the image on the lid of your Stamparatus so you can go back and reapply Memento Tuxedo Black ink onto the image to impress AFTER you color with our Stampin’ Blends to crisp up the line art. Using this technique literally guarantees no smearing or harming the tips of your Blends when stamping in Archival ink. Our stamp pads are water-based, which is why I always use light colors to initially impress the image.
The pumpkins were colored with Pumpkin Pie, Soft Sea Foam, Mint Macaron, and Smoky Slate Stampin’ Blends and then cut from the coordinating die. I added Mini Stampin’ Dimensionals to the back of the image and adhered to the Layering Circles, as shown.
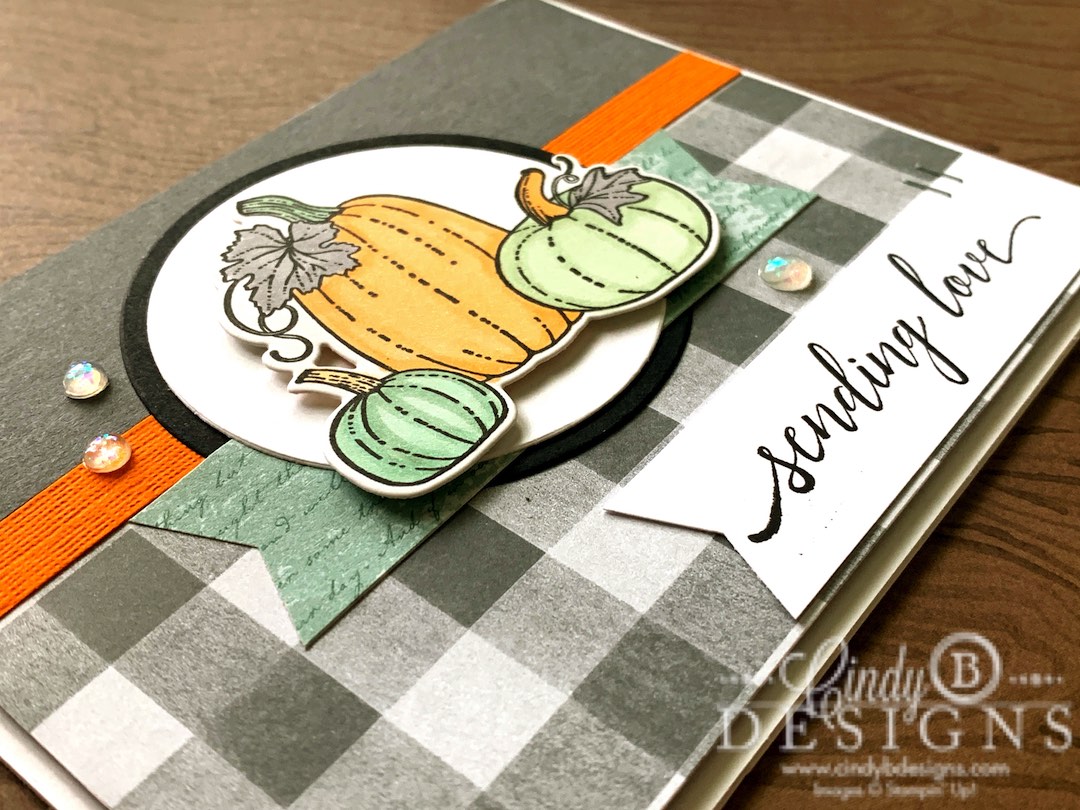
I stamped my sentiment from Heartfelt Wishes, which is the best variety of sentiments in our Holiday Catalog, onto a piece of Basic White CS. I bannered the left side of the sentiment and stapled down the right to the Buffalo Plaid mat.
I added Stampin’ Dimensionals to the back of the plaid mat and adhered this to the card base.
Three Opal Rounds were placed as an embellishment. What do you think? This is such a relaxing, yet attractive card to make for any recipient.
I’m currently designing my Christmas cards from this sketch. Send me a message if you would like one.
I hope you enjoyed today’s project. Thank you for stopping by for a visit and have a great day!


|
|
|||
|
|
|
|
|
|
|
|||
|
|
|
|
|
|
|
|
|
|
|
|
|
|
|
|
|
|
|

")
 Designer Series Paper")
 Specialty Designer Series Paper")


- Card base: A2 landscape 5-1/2 x 4-1/4, Basic White Thick CS.
- Plaid mat: 5-1/4 x 4, Peaceful Place DSP.
- Top plaid mat: 5-1/4 x 1-1/4, Basic Gray CS.
- Textured stripe: 5-1/4 x 1/2″, Pumpkin Pie CS.
- Image circle mat: 2-5/8″ at widest point Layering Circle, Basic Black CS.
- Image circle panel: 2-3/8″ at widest point Layering Circle, Basic White Regular CS.
- Banner mat: 3-5/8 x 1, script print, Harvest Meadow DSP.
- Sentiment banner: 3-1/4 x 7/8″, Basic White Regular CS.